Table of Contents
INTRODUCTION
If you have been using the MICROSOFT EXCEL software for some time, you must have heard or read about the word POWER QUERY.
POWER QUERY IS A DATA SHAPING TOOL WHERE WE CAN BRING THE DATA THROUGH A CONNECTION FROM VARIOUS SOURCES, DO SOME SHAPING SUCH AS REMOVING ROWS, COLUMNS, CHANGING DATA TYPES, TRIMMING THE DATA ETC. AND GET IT FINALLY FOR THE ANALYSIS IN OUR MAIN SOFTWARE SUCH AS MICROSOFT EXCEL OR MICROSOFT POWER BI .
FOR THE INTRODUCTION OF POWER QUERY, CLICK HERE.
Power Query tool, in fact, has immense powers to shape up the data in the way we want.
We’ll cover a lot of practical problems to sort them with the help of the POWER QUERY.
In this article, we would learn how to convert the columns to row and rows to columns in Power Query
GETTING THE EXAMPLE READY
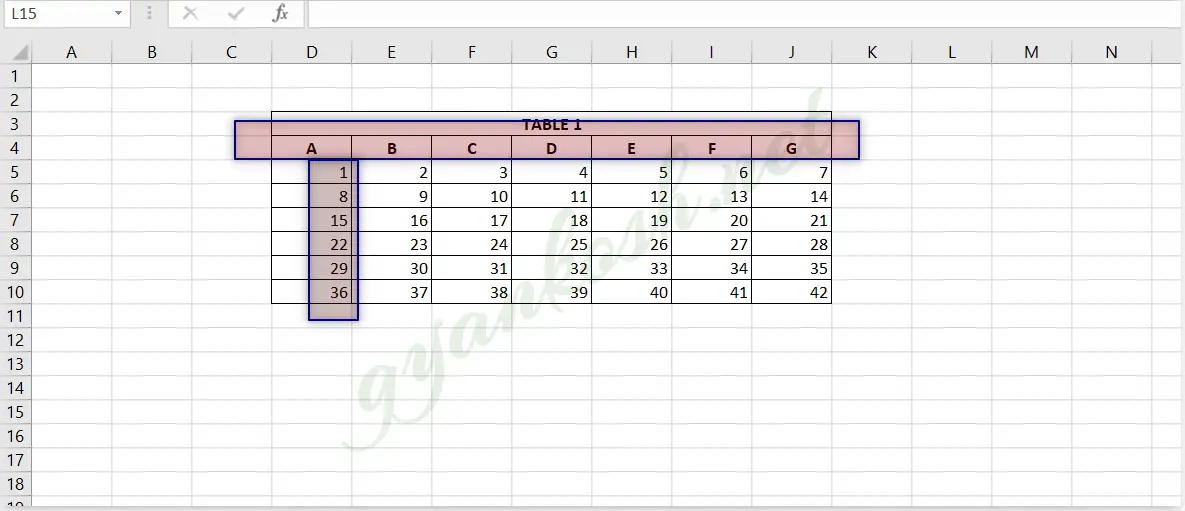
For the example, we are going to take an Excel Sheet containing fictitious table just to understand how we can understand the process.
But before we learn how to convert columns to rows or rows to column, the table needs to be shaped up for the same.
The following picture shows the table.
FOLLOW THE STEPS TO CLEAN AND SHAPE THE DATA:Before we try to convert the columns into rows, we need to do the following operations.
IMPORT THE DATA INTO POWER QUERY.
- Launch the POWER QUERY EDITOR.
- Choose , import from EXCEL.
- Select the EXCEL file.
- Choose the table from the navigator and click TRANSFORM DATA.
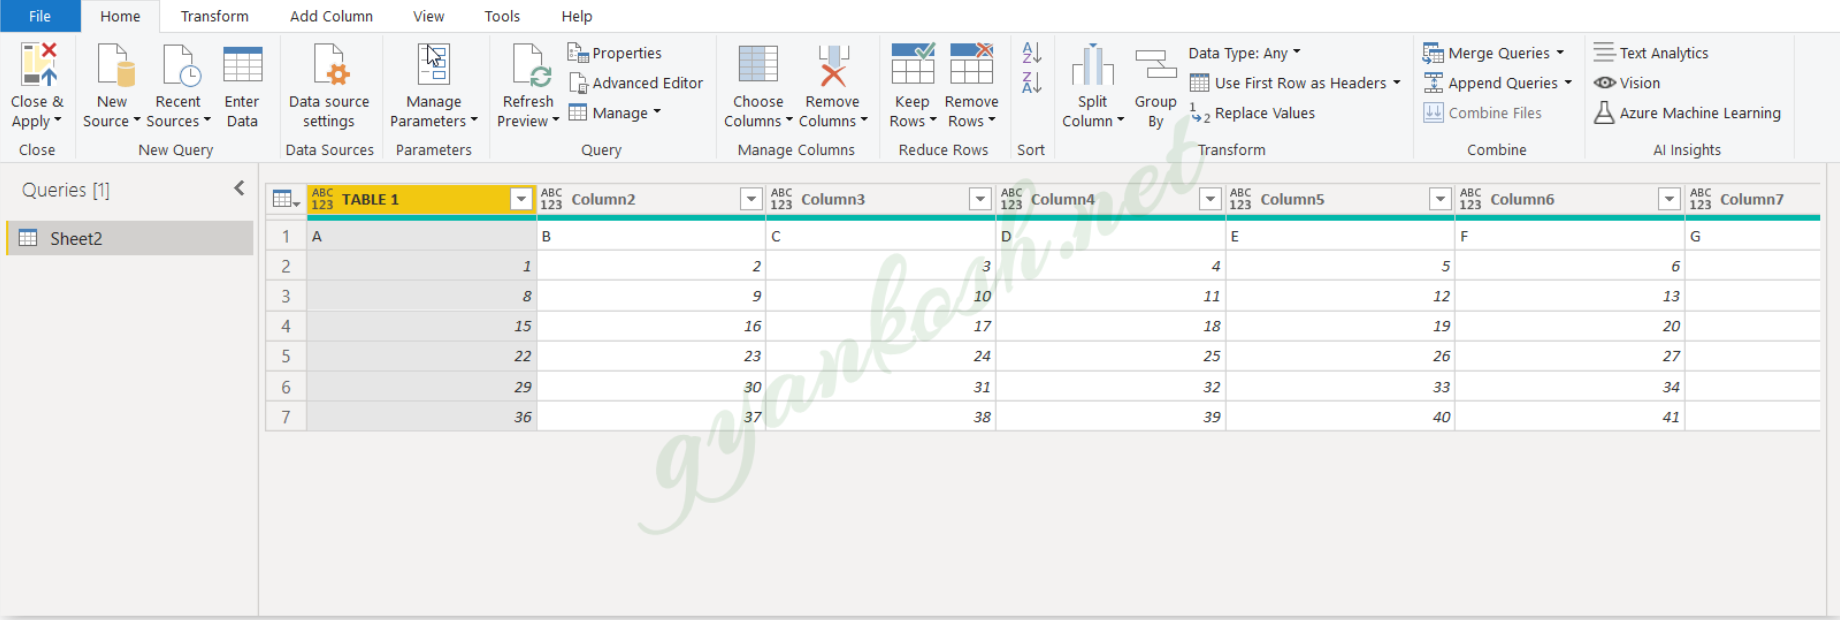
The following picture shows the data as it enters the POWER QUERY EDITOR
FIX THE HEADER OF THE TABLE:
We can see that the header is not the one we need.
So follow the steps to change the header and make the first row as header [Which is our header in actual].
- Click on the left upper corner of the table.
- Choose the option USE FIRST ROW AS HEADERS.

- It’ll directly replace the COLUMN HEADERS WITH THE FIRST ROW.
THE COMPLETE PROCESS IS SHOWN IN THE PICTURE BELOW.
Now, our data is ready for the main operation.
CONVERTING COLUMN TO ROWS IN POWER QUERY
STEPS TO TRANSPOSE A TABLE IN POWER QUERY EDITOR:
- After the table is cleaned and shaped up, go to TRANSFORM TAB.
- Choose TRANSPOSE. [TRANSPOSE IS THE WORD WHICH MEANS THE CONVERSION OF ROWS TO COLUMNS OR COLUMNS TO ROWS]
- The table will be converted and the columns will become rows and rows will become columns.
So, we have successfully converted the columns into rows and rows into columns. [Rows to column or column to rows, both means the same].
You must have notices that only the rows were transposed and not the headings. So how to get the headings also be transposed during the process.
There are a few hacks for that.
1. We already had our headings as a top row which we changed into the HEADERS. If we had kept it the same, the first row would have become the row headers.
2.Transpose the data if we need to have ROW HEADERS instead of COLUMN HEADERS. Now close and apply the power query editing and add the row headers in the main application.
POWER QUERY EDITOR IS DESIGNED WORK ON THE COLUMNS AS WE CAN SEE MAXIMUM OPTIONS ARE APPLICABLE ON THE COLUMNS. SO IT IS NECESSARY TO MAKE YOUR DATA AS PER COLUMNS, EDIT THEM AND TRANSPOSE THEM BACK IF NEEDED. HEADERS CAN BE GIVEN AGAIN TO THE COLUMNS.