Table of Contents
- Introduction
- What is a border in Excel ?
- What are the steps to create a border in Excel?
- How to remove border in Excel?
- FAQs
- What are the different types of borders available in Excel?
- How to add Double line border in Excel ?
- How to add thick box border in Excel?
- How to add Top and Bottom border in Excel?
- How to add Bottom Double border in Excel ?
- What is the keyboard shortcut to apply border in Excel?
Introduction
In this article, we’ll learn about how to create a border in excel, various ways to apply or remove borders, difference between merging and borders and more.
Borders are the dark lines which divide the various areas within a table or any defined figure.
We deal with a lot of data in Excel and standard cells are having light colored lines which divide our workspace into cells. What if we want to club two or more columns or rows together without merging. [ Merging merges the cells but borders doesn’t merge the cells ]
We can do so using the borders.
What is a border in Excel ?
Simply stating, border is an outer edge or the outer limit of any area.
In our context, a border refers to the lines that you can apply around cells or ranges of cells to visually define their boundaries. Border is the outer limits or the boundaries of various smaller or whole area in the given sheet.
These are the dark lines which will be printed darker in comparison with the cell grid.
What are the steps to create a border in Excel?
Follow the steps to create a border for the given data.
- Select the complete data where you want to apply the border.
- Go to TOOLBAR and click BORDERS as shown in the picture below.
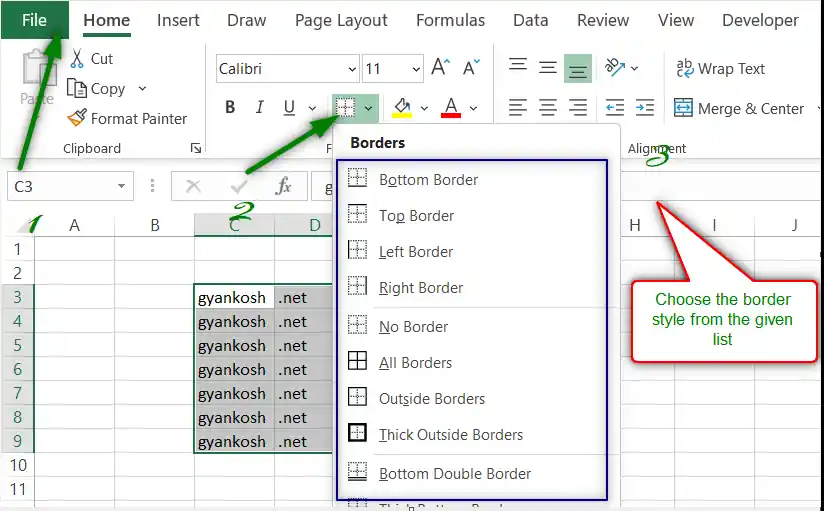
- Choose the border of your choice and click it.
- The border will be applied.
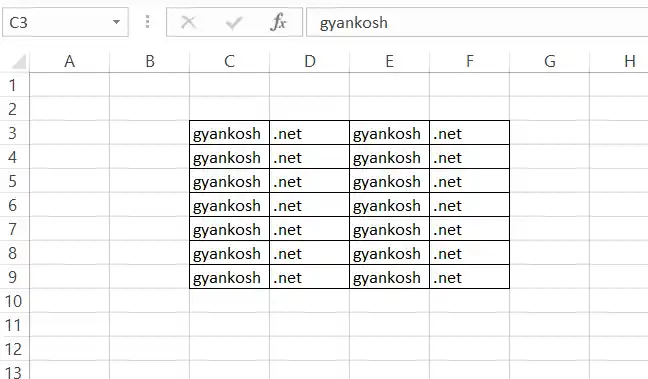
In this way we can add border in excel to any table or data in Excel.
How to remove border in Excel?
It is very easy to remove the borders.
Follow the steps to remove the borders in Excel.
- Select all the data from where you want to remove the borders.
- Go to TOOLBAR>BORDERS>CLEAR BORDERS as shown in the picture below.
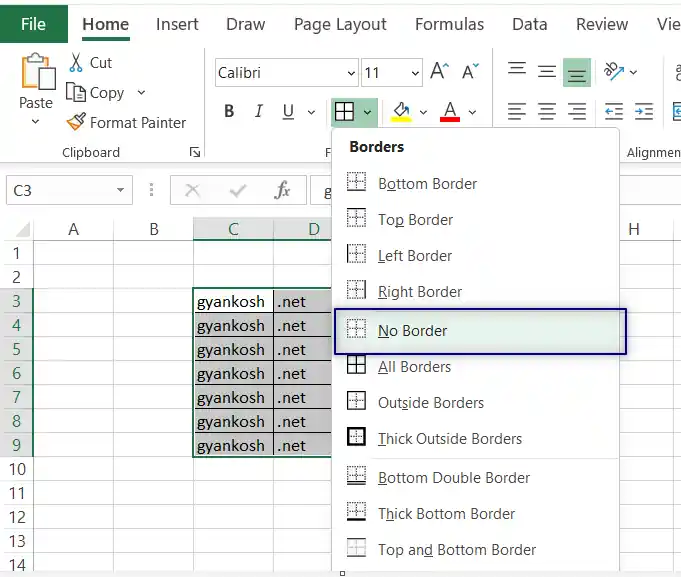
- The borders will be removed.
FAQs
What are the different types of borders available in Excel?
Excel offers a variety of border types that you can apply to cells or ranges of cells. Here are the most common types of borders in Excel:
1. Outline Borders
- Applies borders to the outer edges of the selected range (top, bottom, left, and right).
2. Inside Borders
- Adds borders between the cells within the selected range (i.e., inside vertical and inside horizontal lines).
3. Top Border
- Adds a border only at the top of the selected cell(s).
4. Bottom Border
- Adds a border only at the bottom of the selected cell(s).
5. Left Border
- Adds a border only to the left side of the selected cell(s).
6. Right Border
- Adds a border only to the right side of the selected cell(s).
7. No Border
- Removes all borders from the selected cell(s).
8. All Borders
- Applies borders to every cell in the selected range (i.e., creates grid lines).
9. Thick Box Border
- Adds a thicker border to the outside of the selected range, useful for emphasizing a block of data.
10. Double Border
- Adds a double line as a border (typically used for totals or other important information).
11. Diagonal Borders
- Adds a diagonal line from one corner of the cell to the opposite corner. This can be either from top-left to bottom-right or from top-right to bottom-left.
12. Custom Borders
- In the Format Cells dialog (under the Border tab), you can customize borders further by selecting specific combinations of lines, styles, thickness, and colors. You can apply any combination of top, bottom, left, right, and diagonal borders with specific styles and colors.
These options allow for considerable flexibility in formatting your Excel worksheets.
How to add Double line border in Excel ?
Double line border is the border where the Tabular lines are made up with two parallel lines.
You just have to follow the standard procedure of border-applying as discussed above.
- Go to the Border Selection menu and choose LINE STYLE.
- Choose DOUBLE LINE from the list.
- Now, choose ALL BORDERS.
- The double line border will be applied.
How to add thick box border in Excel?
Thick border is made up of a thick solid line which shows the boundary of the border.
You just have to follow the standard procedure of border-applying as discussed above.
- Select the Border format as THICK OUTSIDE BORDERS.
- The box border will be applied.
- It is the box border so only the outer line will have a thick line.
How to add Top and Bottom border in Excel?
Top and Bottom border is represented by a line at the top of the table or data and a line at the bottom of the table or data.
You just have to follow the standard procedure of border-applying as discussed above.
- Select the Border format as shown in the picture below.
- Go to BORDER STYLE and choose TOP AND BOTTOM BORDER.
- The top and bottom border will be applied.
How to add Bottom Double border in Excel ?
Bottom double border is the type of border where a double line is put at the bottom of the data or table.
You just have to follow the standard procedure of border-applying as discussed above.
- Select the Border format as shown in the picture below.
- Go to BORDER STYLE and choose BOTTOM DOUBLE BORDER.
- The bottom double line border will be applied.
What is the keyboard shortcut to apply border in Excel?
We can use a simple shortcut to open the menu of the borders and select the borders by Up or Down key.
Follow the steps to apply border using shortcut in excel.
- Select the cells where you want to apply the borders.
- Press ALT+H+B.
- The border menu will open showing the key letter for choosing any specific border.
- Choose the relevant border by pressing the key and the border will be applied. For example, A for all borders, O for bottom border, L for left border and more.