Table of Contents
- INTRODUCTION
- WHAT IS A BORDER?
- HOW TO APPLY BORDER TO A TABLE IN GOOGLE SHEETS?
- HOW TO REMOVE BORDER IN GOOGLE SHEETS?
- FAQs
- HOW TO APPLY DOUBLE LINE BORDER TO THE DATA IN GOOGLE SHEETS?
INTRODUCTION
Borders are the dark lines which divide the various areas within a table or any defined figure.
We deal with a lot of data in Google Sheets and standard cells are having light colored lines which divide our workspace into cells. What if we want to club two or more columns or rows together without merging. [ Merging merges the cells but borders doesn’t merge the cells ]
We can do so using the borders.
In this article, we’ll learn the various ways to apply or remove borders, difference between merging and borders and more.
WHAT IS A BORDER?
Simply stating, border is an outer edge or the outer limit of any area.
In our context, border is the outer limits or the boundaries of various smaller or whole area.
These are the dark lines which will be printed darker in comparison with the criss cross cell lines.
HOW TO APPLY BORDER TO A TABLE IN GOOGLE SHEETS?
Follow the steps to apply a border in Google Sheets
- Select the complete data where you want to apply the border.
- Go to TOOLBAR and click BORDERS as shown in picture below.
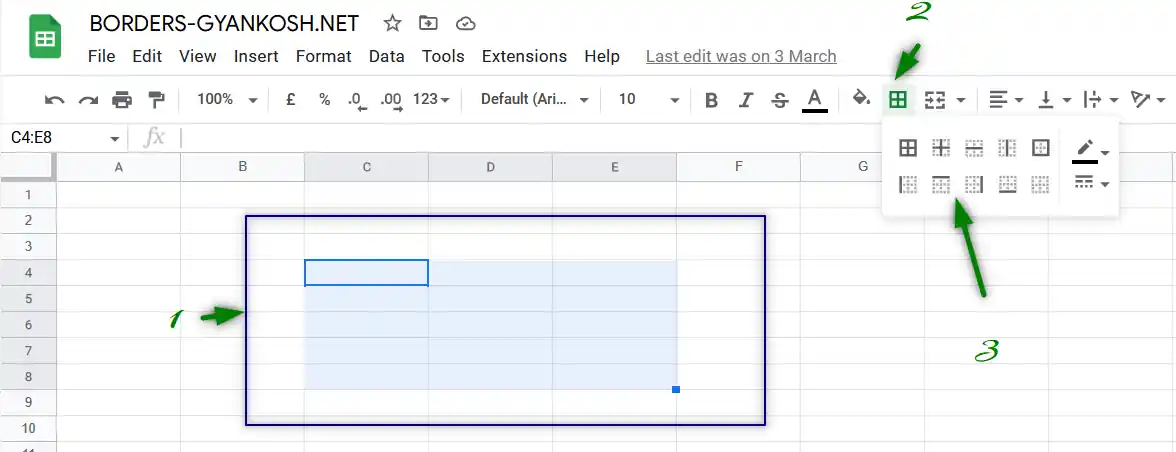
- Choose the border of your choice and click it.
- The border will be applied.
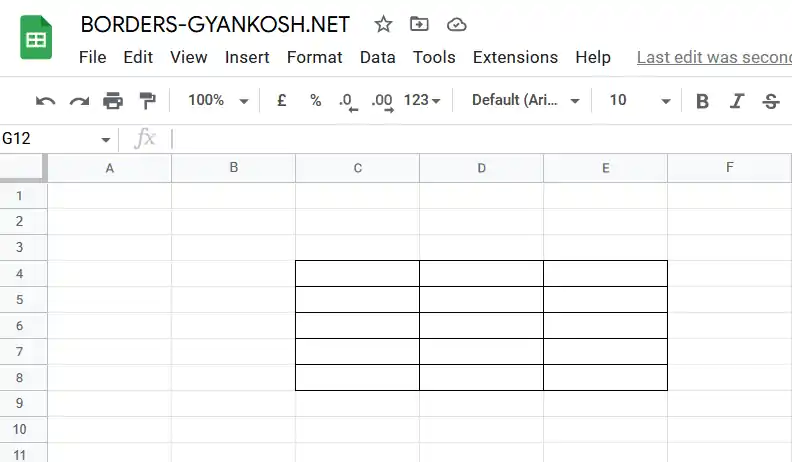
In this way we can apply borders to any table or data in Google Sheets.
HOW TO REMOVE BORDER IN GOOGLE SHEETS?
It is very easy to remove the borders.
Follow the steps to remove the borders in Google Sheets.
- Select all the data from where you want to remove the borders.
- Go to TOOLBAR>BORDERS>CLEAR BORDERS as shown in the picture below.
- The borders will be removed.
FAQs
HOW TO APPLY DOUBLE LINE BORDER TO THE DATA IN GOOGLE SHEETS?
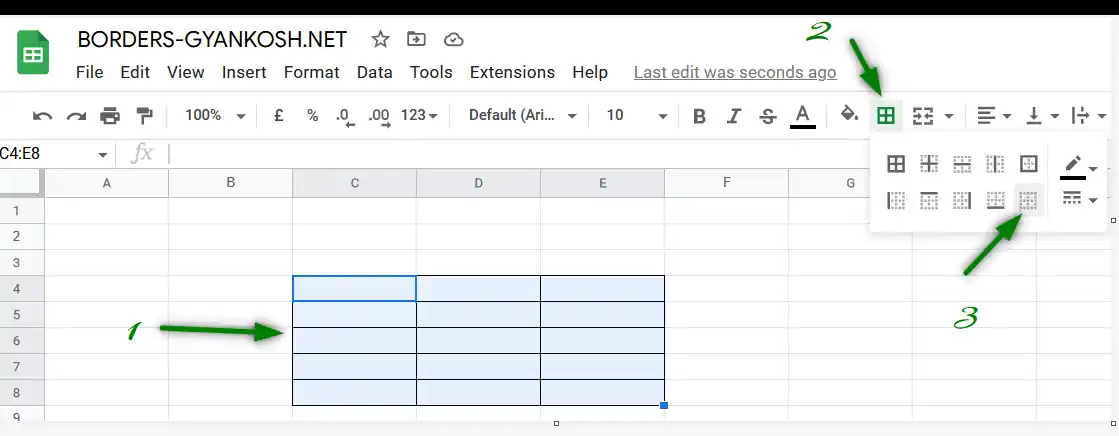
You just have to follow the standard procedure of border-applying as discussed above.
- Select the Border format as shown in the picture below.
- Go to BORDER STYLE and choose double line.
- The double line border will be applied.