Table of Contents
- INTRODUCTION
- MACRO-BRIEF DETAILS
- RECORDING A MACRO
- RUNNING A MACRO
- HOW TO DISPLAY DEVELOPER TAB IN EXCEL?
- STEPS TO SHOW DEVELOPER TAB
- OPENING VBA WINDOW
- KNOW THE VBA WINDOWS
- SAVING THE FILE WITH MACRO(VBA CODE)
INTRODUCTION
VBA sits at the back end of Excel. But its always there.
VBA sits in the background and in the front we have MACRO in Excel. It would be advisable that you just spend five minutes here to learn about the MACRO.
In this article we’ll go through MACRO, how to open VBA, what can we do in VBA and how would we start the program.
MACRO-BRIEF DETAILS
MACRO is a system of recording the steps which you have performed. Many times we perform large operations on a value to achieve the result. If we have to do repetitive operations, we can create a MACROS and use it. Kindly refer HERE to read about MACRO.
RECORDING A MACRO
MACROS CREATION is quite simple. Here are the steps for creating and Macros.
- Press the LOWER MACRO BUTTON
.
- Press RECORD MACRO.
- The Macro will start recording your steps. Before this Click USE RELATIVE REFERENCES.(It’ll make MACRO more useful as the Addresses will be relative rather than ABSOLUTE. ABSOLUTE address means that if we are working on cell A9, the macro would work on A9 only and not on other cells.
- After the process is complete, press STOP RECORDING under the MACRO LOWER BUTTON.
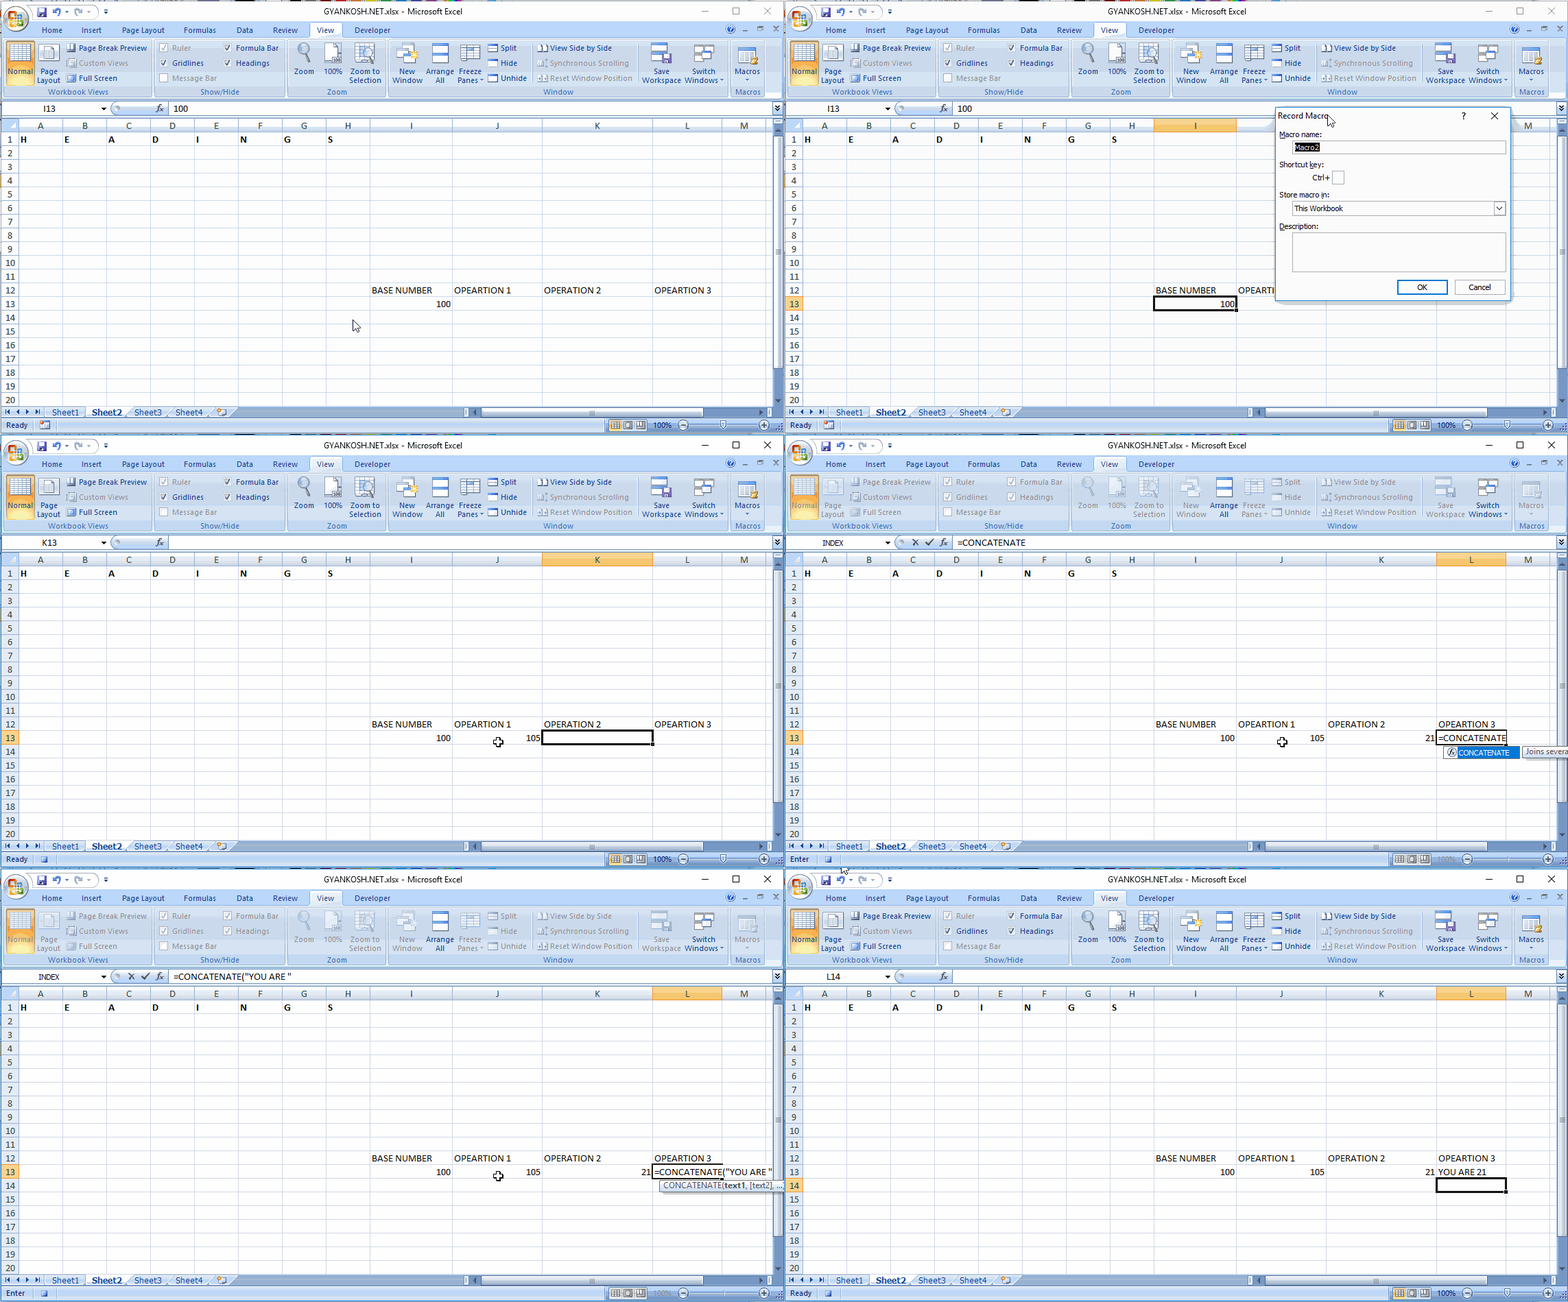
DESCRIPTION OF ANIMATED SCENARIO:
The example shows a series of operations where the BASE NUMBER is first added 5.
After this, the number is divided by 5
The end result is joined with the text “You are ” and the result is achieved.
The process is the same as discussed before the picture.
RUNNING A MACRO
STEPS:
- After a macro has been created it is stored for future use.
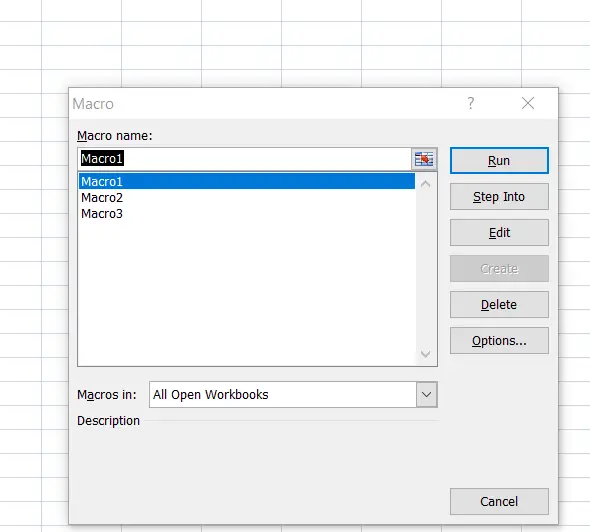
- CLICK MACRO button.
- Following Dialog BOX will open.
- Click on the RUN BUTTON and the MACRO would run and perform the job.
HOW TO DISPLAY DEVELOPER TAB IN EXCEL?
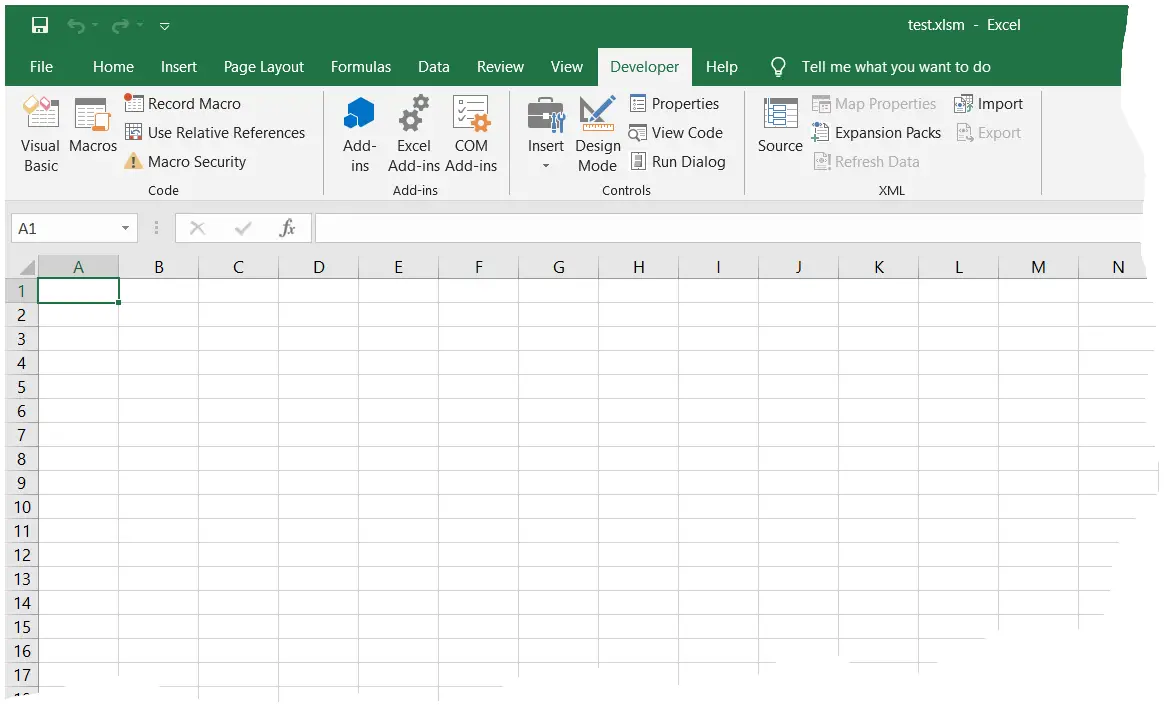
The tab shown in the picture below is the DEVELOPER TAB.
It is one of the many tabs present in the Ribbon area. But by default Developer tab is not present. But as we are going to use VBA and MACRO, we need this tab. So let us see how we can show/hide this tab.
STEPS TO SHOW DEVELOPER TAB
IF DEVELOPER TAB IS NOT VISIBLE TO YOU, HERE ARE THE STEPS TO BE FOLLOWED
- Right-click anywhere on the Ribbon and choose Customize the Ribbon.
Excel displays the Customize Ribbon tab of the Excel Options dialog box. - In the list box on the right, place a check mark next to Developer.
- Click OK.
ANOTHER WAY TO MAKE THE DEVELOPER TAB VISIBLE IS THROUGH THE OPTIONS. HERE ARE THE STEPS
- Go to File and then Options.
- In the options choose CUSTOMIZE RIBBON and we reach the same place.
- Choose DEVELOPER TAB.
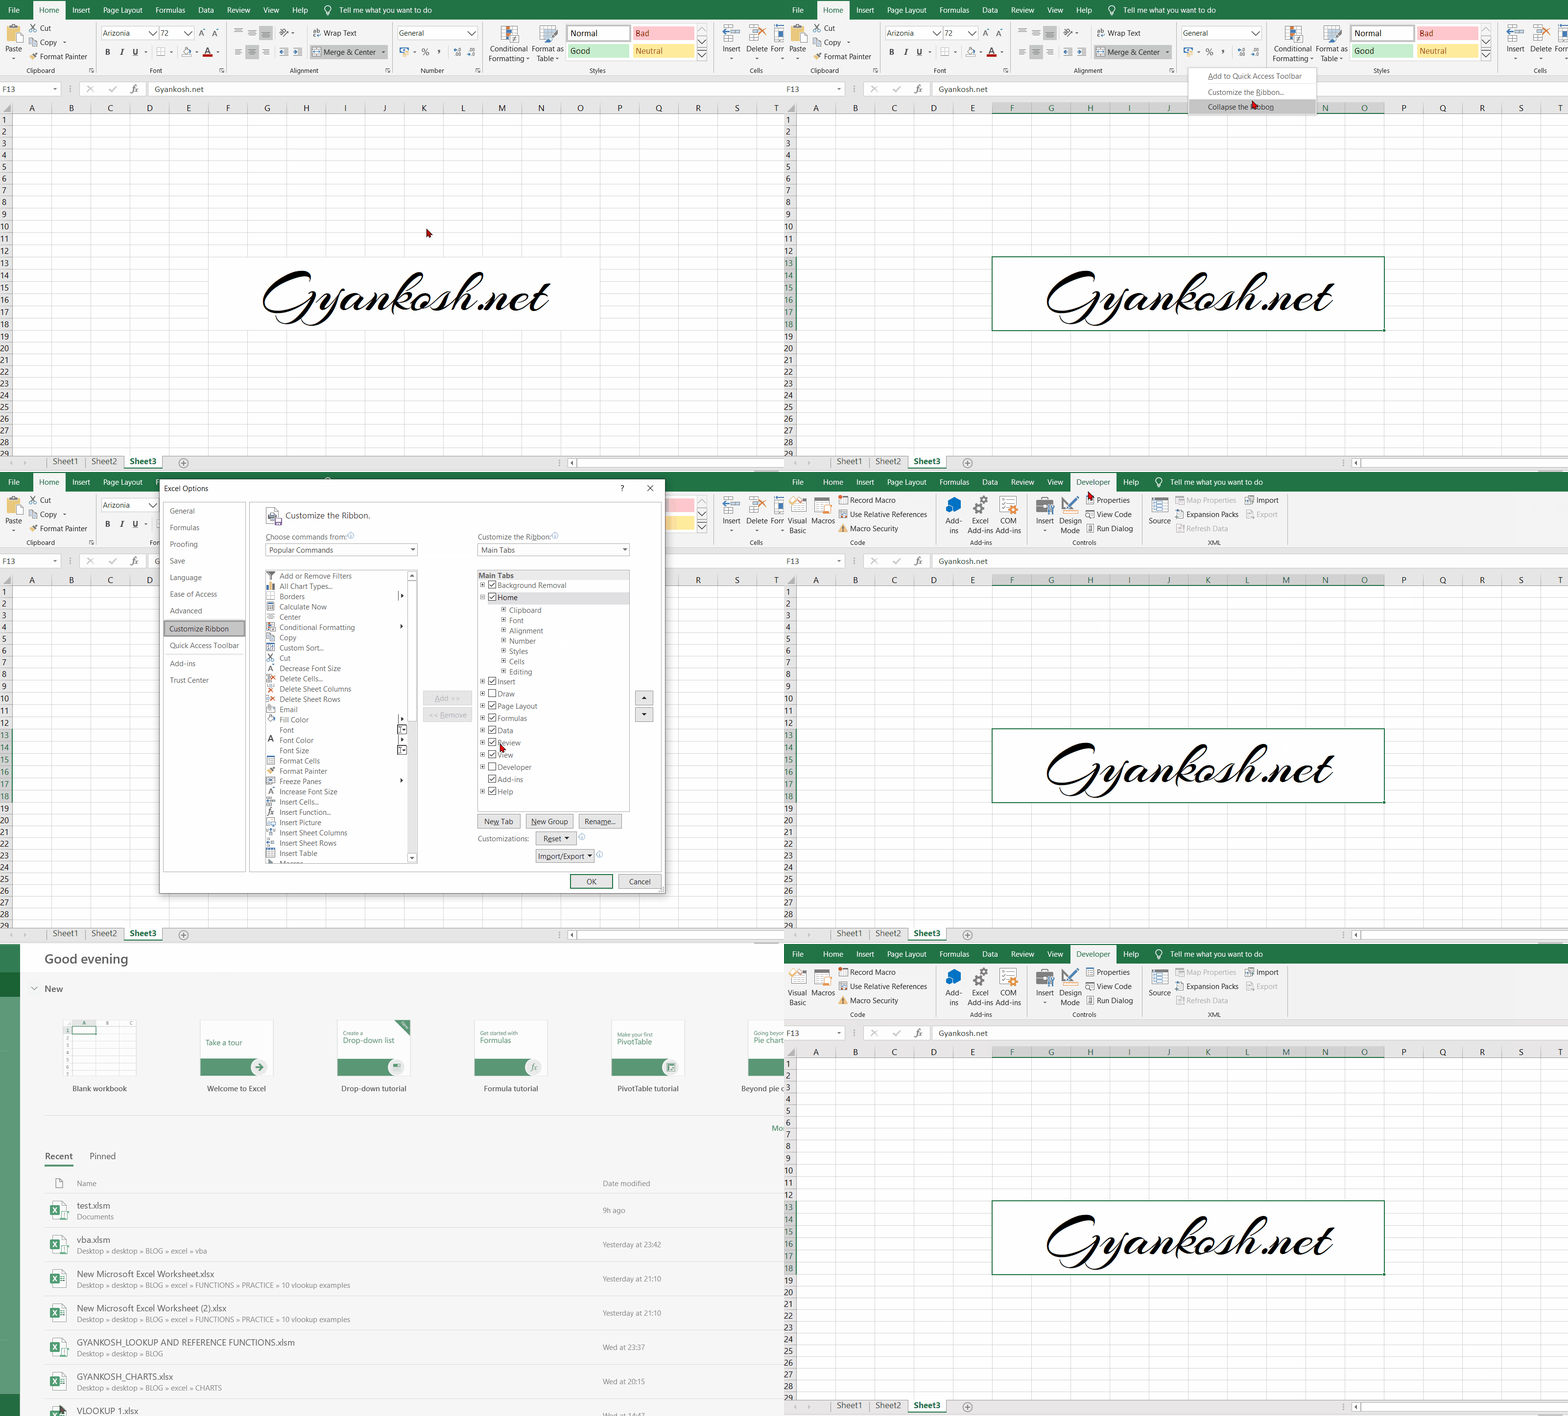
The following animation shows the whole process so that you are not confused.
The picture shows both ways of showing the DEVELOPER TAB.
“MACRO ARE THE AUTOMATED FUNCTIONS WHICH ARE PROGRAMMED IN VISUAL BASIC FOR APPLICATIONS.”
OPENING VBA WINDOW
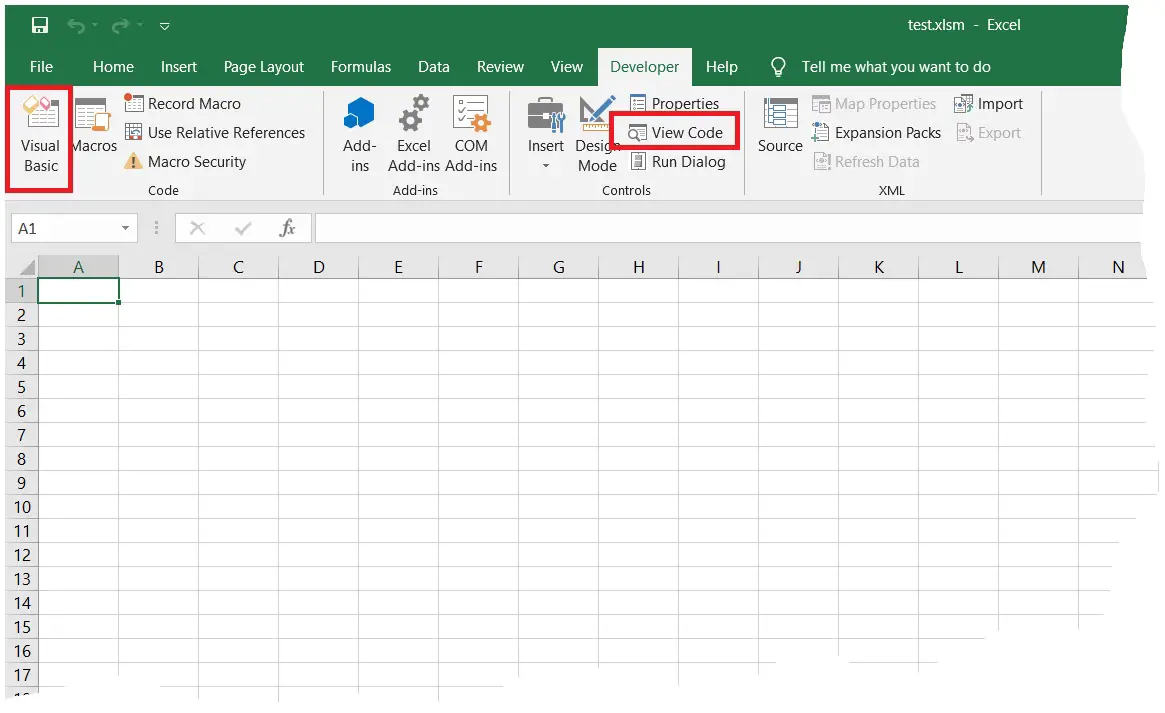
After we have got the DEVELOPER TAB appeared, now is the turn for the VBA Window, where we‘ll start writing code for our applications.
KEYBOARD: Press ALT+F11.
MOUSE: Press the buttons shown in the picture below. They’ll take us to the Visual Basic for Applications window.
KNOW THE VBA WINDOWS
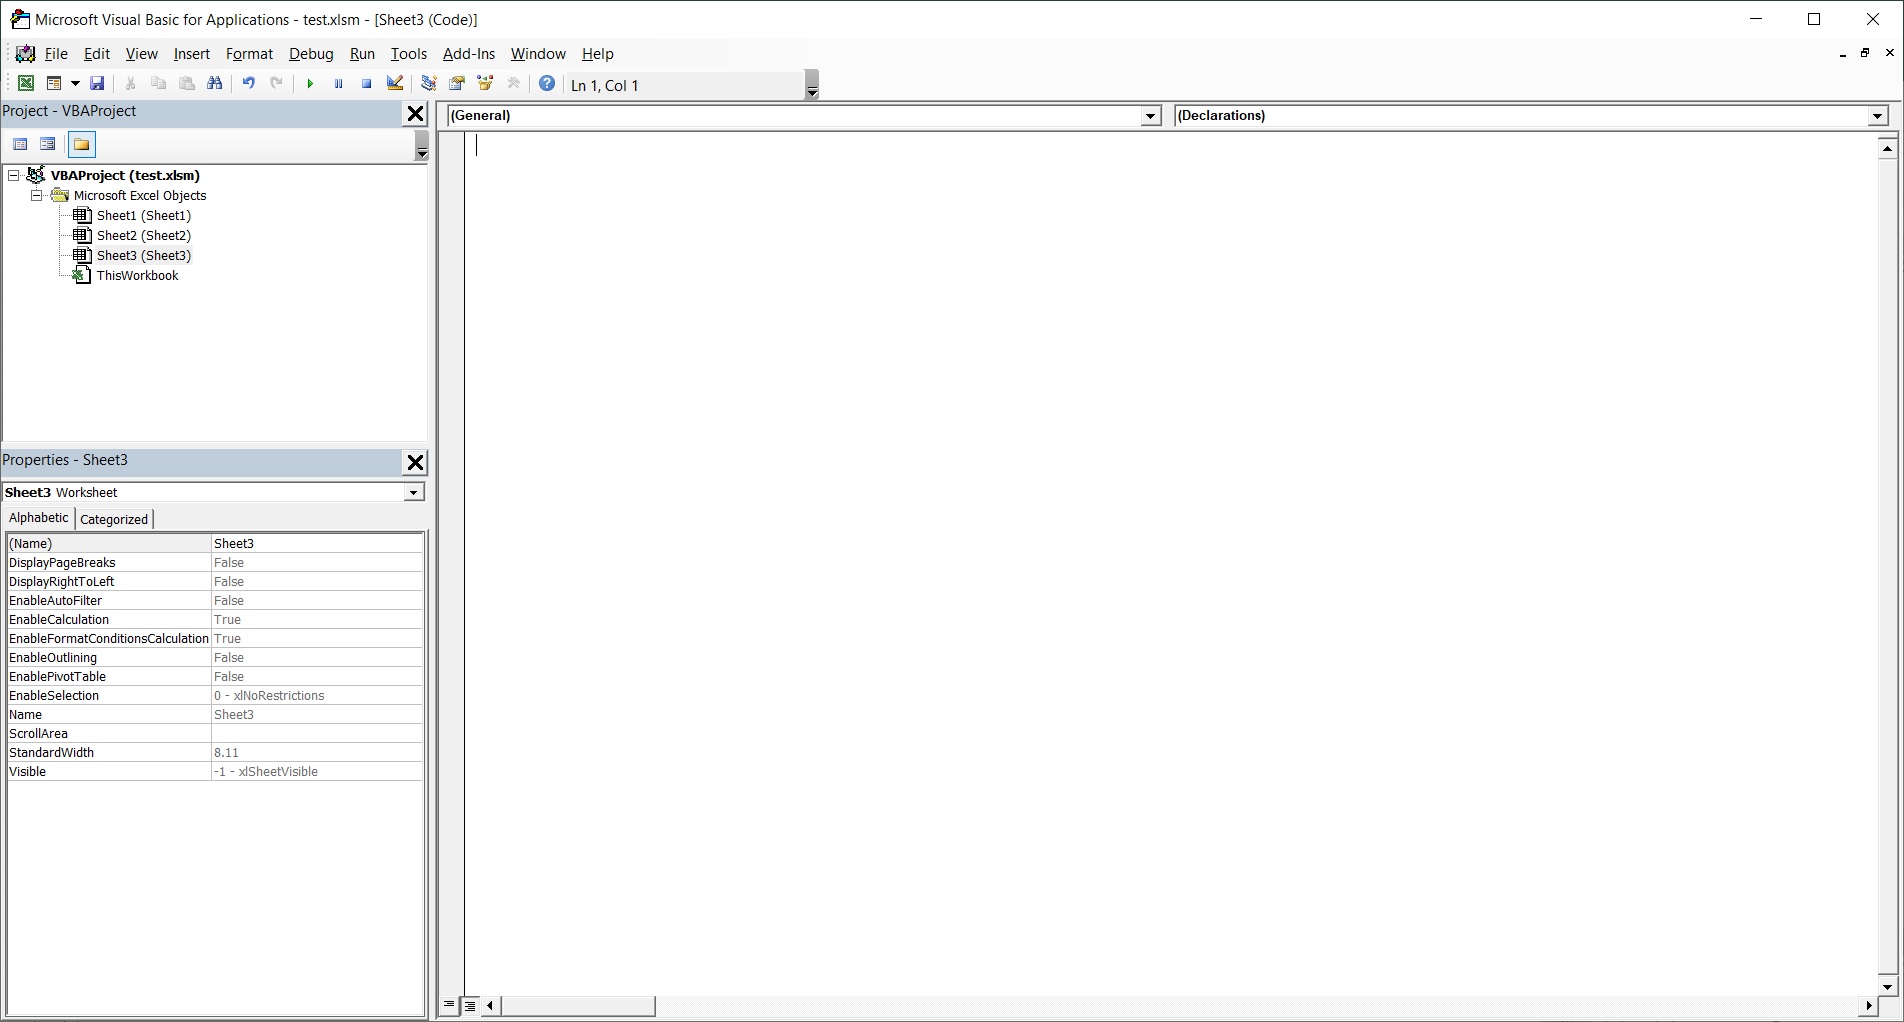
There are many components of the VISUAL BASIC ENVIRONMENT (VBE) and let us understand the environment first.
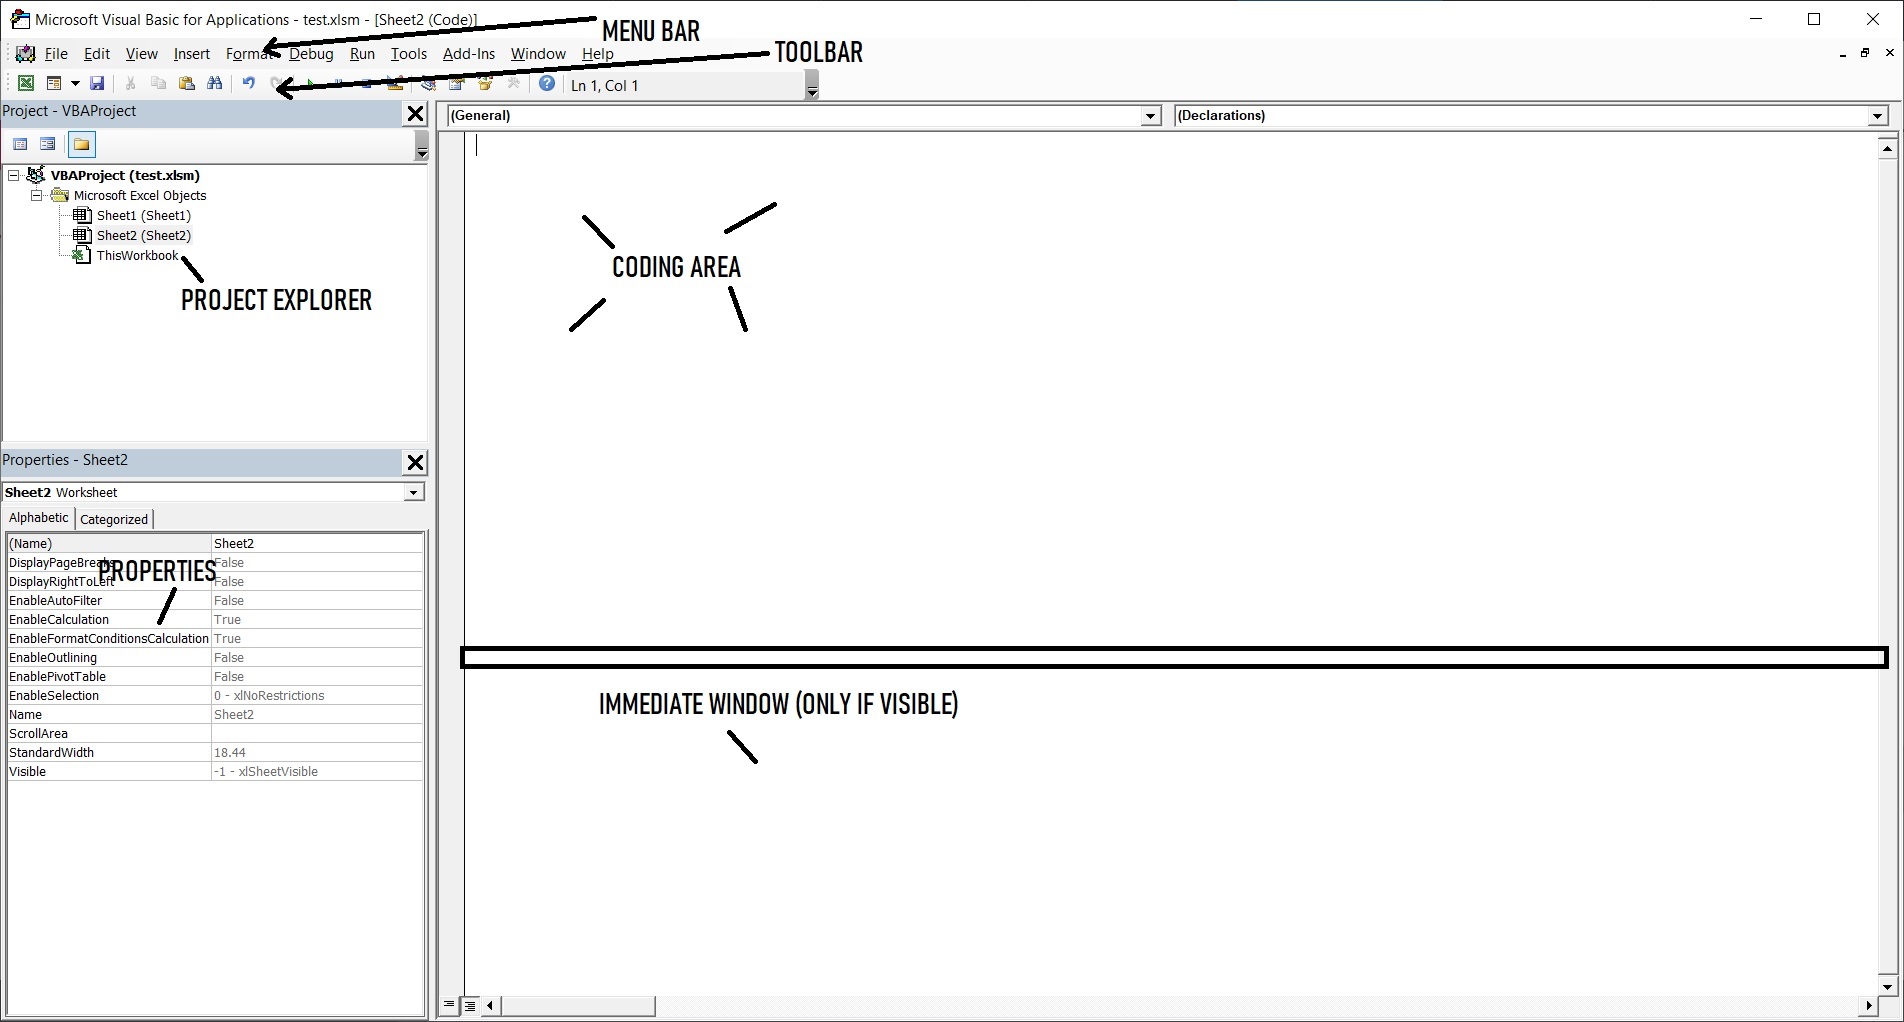
The picture below shows the different components in the VBE.
There are many components of the VISUAL BASIC ENVIRONMENT (VBE) and let us understand the environment first.
The picture below shows the different components in the VBE.
MENU BAR:
Standard menu bar which is available in all the windows applications. It contains different VBA commands to execute.
TOOLBAR:
This is the standard toolbar that is present under the menu bar and contains different functions such as save, find, etc.
We can customize toolbars and choose other toolbars also through the menu. (VIEW>TOOLBARS)
PROJECT EXPLORER:
The project explorer shows a TREE DIAGRAM of all the details of the opened projects. It contains projects, worksheets, modules, etc. whatever is present in the project. We can directly double-click the file to reach there in VBA.
CODING AREA:
The area, where we put all the code for the VBA.
PROPERTIES:
Properties of the selected sheet, workbook or module.
IMMEDIATE WINDOW:
The immediate window is shown by pressing (CTRL+G) or by going to the VIEW menu. It is very important while debugging the formula. (debugging is removing the error) because it gives the option of executing the program line by line. This window is maybe hidden also. You can always make it visible.
NEVER CONFUSE BETWEEN MACRO AND VBA
MACRO IS THE NAME OF THE FUNCTION OF AUTOMATED STEPS
VBA IS THE CODE THAT IS BEHIND THE MACRO
SAVING THE FILE WITH MACRO(VBA CODE)
As we know that after MS OFFICE 2007 the standard format of the EXCEL FILE is .xlsx
which means that normal excel files are saved as “Excelfile.xlsx”. but MACRO ENABLED sheets are saved as “Filename.xlsm”. So it means that we’ll save all our files as .xlsm extension. Few more extensions are discussed below.
| EXTENSION | USED FOR |
| .xlsm | MACRO ENABLED WORKBOOK |
| .xlsx | STANDARD WORKBOOK |
| .xls | 1997-2003 OLD VERSION WORKBOOK |
| .xltx | EXCEL TEMPLATE WORKBOOK |
| .xlam | EXCEL ADDIN WORKBOOK |
WE WILL SAVE OUR FILES AS . XLSM EXTENSION ONLY FOR VBA
