INTRODUCTION
Windows 11 is the latest OPERATING SYSTEM and will be launched soon.
But Microsoft has already started rolling out the Beta Versions of Windows 11.
All of us are very curious to try out the latest versions of the Operating Systems but with the Beta versions [ The versions with some glitches ] , we are always in doubt whether to install them or not.
Many of us are so excited about trying the latest versions that we install them and sometimes get in the trouble by losing some important data.
But , we have a great solution for this problem.
The VIRTUAL MACHINE!
The virtual machine is an application which creates a complete PC ENVIRONMENT inside our computer and lets us load a complete operating system without risking our data or any other risk.
In this article, we’d learn to GET A COPY OF WINDOWS 11 and install it on a VIRTUAL MACHINE SUCCESSFULLY.
GET WINDOWS 11 FOR FREE
WHAT IS A VIRTUAL MACHINE ?
A Virtual Machine [ VM ] is a computer within a computer.
It imitates a real computer.
We define RAM, Hard disk, Processor and all the other components. You can use internet also. The only difference is that VIRTUAL MACHINE is software defined within the real computer.
Although we can’t compare the performance of a real computer to the virtual machine but using the virtual machines are very helpful in many scenarios.
ADVANTAGES OF USING VIRTUAL MACHINES
There are many advantages of using virtual machines.
Few are as follows:
- It is completely safe. You can try any new Operating Systems, or try anything which might cause a data loss or system crash if tried directly on the real computer.
- Physical infrastructure is reduced as you can run multiple virtual environments from one physical infrastructure.
- They are portable. Simply copy the setup file and put it on other PC and it’ll be ready to do the job again.
- We can run the risky apps on the Virtual Machine and save the real PC from getting infected or any crash. So, virtual machines are used to study the computer virus , isolating them kind of jobs.
These are some of the important features. There are many more technical benefits of Virtual machines.
DOWNLOAD WINDOWS 11 IMAGE [ . ISO ]
For downloading the windows 11 , the first step is to become a WINDOWS INSIDER.
CLICK ANYWHERE TO LEARN THE PROCESS OF BECOMING A WINDOWS INSIDER
or
LEARN TO DOWNLOAD THE WINDOWS 11 ISO DIRECTLY
Follow the options and you can download the latest ISO of the Windows 11 build.
WHERE TO GET THE VIRTUAL MACHINE FOR WINDOWS 11 INSTALLATION
There are many reliable virtual machines.
For example
All these virtual machines are good for installing Virtual Operating Systems on your pc.
In this article, we’ll demonstrate the process with VMWARE VM.
STEPS TO INSTALL WINDOWS 11 ON VIRTUAL MACHINE
We choose VMWARE to demonstrate the process.
Let us start the process.
STEP 1: DOWNLOAD THE WINDOWS 11 ISO. [ RIGHT NOW WE HAVE BETA BUILDS. BUT AFTER WE GET THE ORIGINAL OS, THE PROCESS IS SAME ]
We can learn the downloading procedure here.
There is a great source. LEARN TO DOWNLOAD THE WINDOWS 11 ISO DIRECTLY
Follow the options and you can download the latest ISO of the Windows 11 build.
Simply download the WINDOWS 11 ISO and save it somewhere in your pc.
You can create a folder named WINDOWS 11 and keep the file there.
STEP 2: DOWNLOAD THE VMWARE VIRTUAL MACHINE LATEST VERSION.
If you are already a user of VMWARE WORKSTATION VIRTUAL MACHINE or any other VM and you have already tried installing the Latest WINDOWS 11 but failed, then you need not to worry about this.
If this is the case, the main issue is about the version.
GET THE LATEST VERSION OF THE VMWARE WORKSTATION.
CLICK HERE TO GET THE LATEST VMWARE
The above link will get you the VMWARE 16.0 FREE FOR THE PERSONAL USE.
The link will directly fire the download and you’ll need to save the Executable Installer on your PC.
Alternatively , if you can go to VMWARE.COM , if you want to have a look at other options too.
You can simply spot the product of your choice and download it.
STEP 3: INSTALL THE VIRTUAL MACHINE VMWARE WORKSTATION.
After, we have downloaded the product,
Double Click the Installer to start the installation.
The process is simple and will guide you through the Installation.
A brief of the installation process is shown below in the animation.
The VMWARE VM has been installed successfully.
STEP 4: CREATE A VIRTUAL MACHINE AND GET WINDOWS 11 IMAGE READY TO LOAD
After we have the WINDOWS ISO [IMAGE] and VMWARE VIRTUAL MACHINE has been installed, we are ready to install WINDOWS 11 on our VIRTUAL MACHINE.
FOLLOW THE STEPS TO CREATE AN OPERATING SYSTEM INSIDE THE VMWARE VIRTUAL MACHINE.
- Double Click the VMWARE icon to start the application.
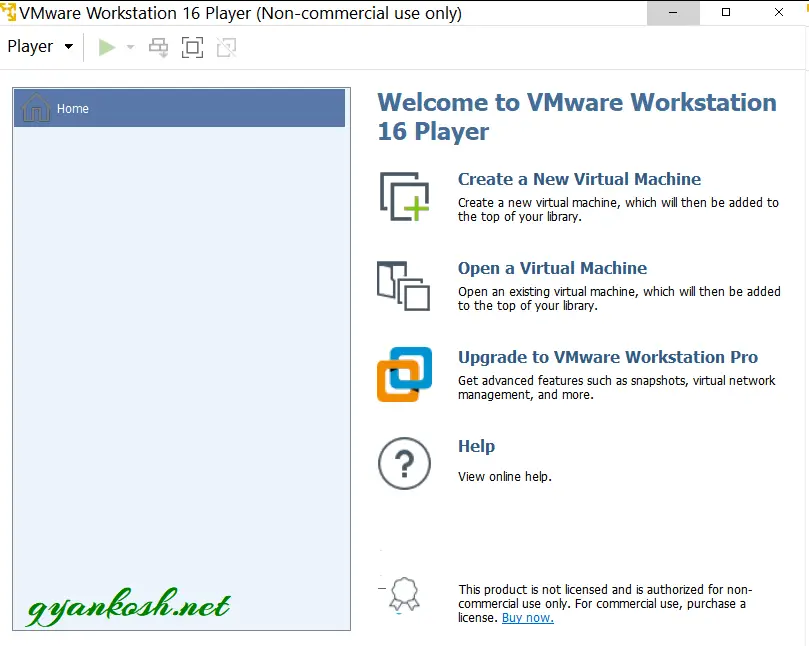
- Click CREATE NEW VIRTUAL MACHINE.
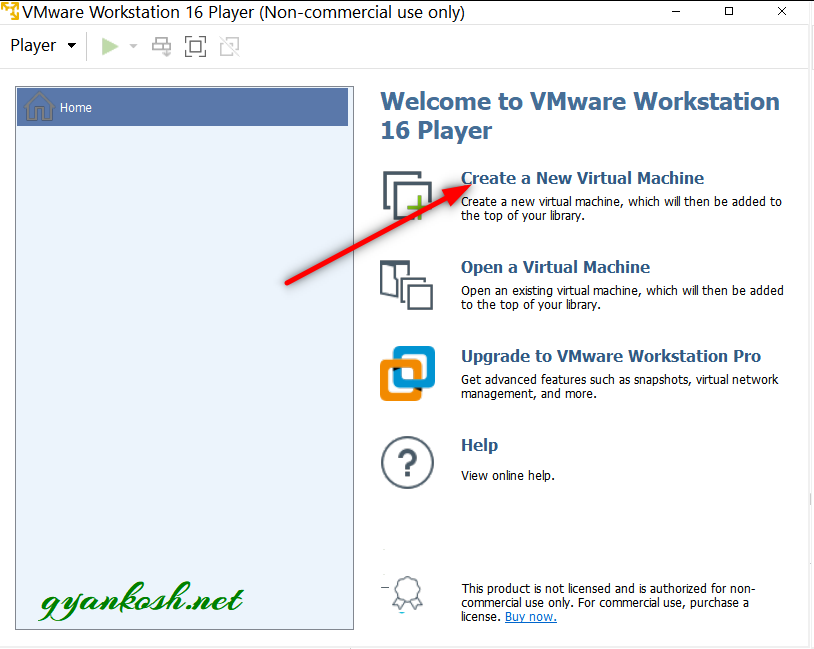
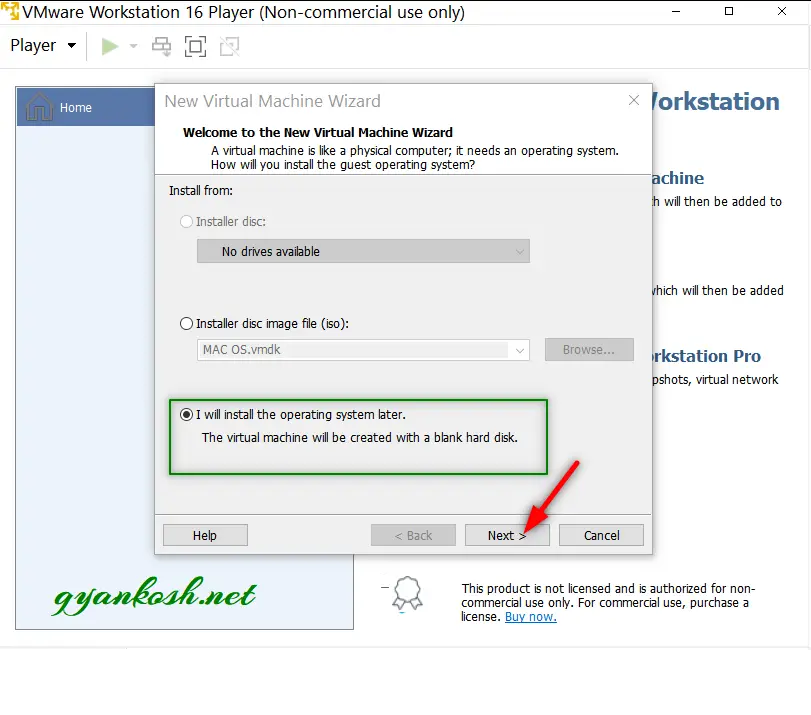
- As we click CREATE NEW VIRTUAL MACHINE, the following status will follow.
- For INSTALL FROM: , select I WILL INSTALL THE OPERATING SYSTEM LATER which is the third option.
- Click NEXT.
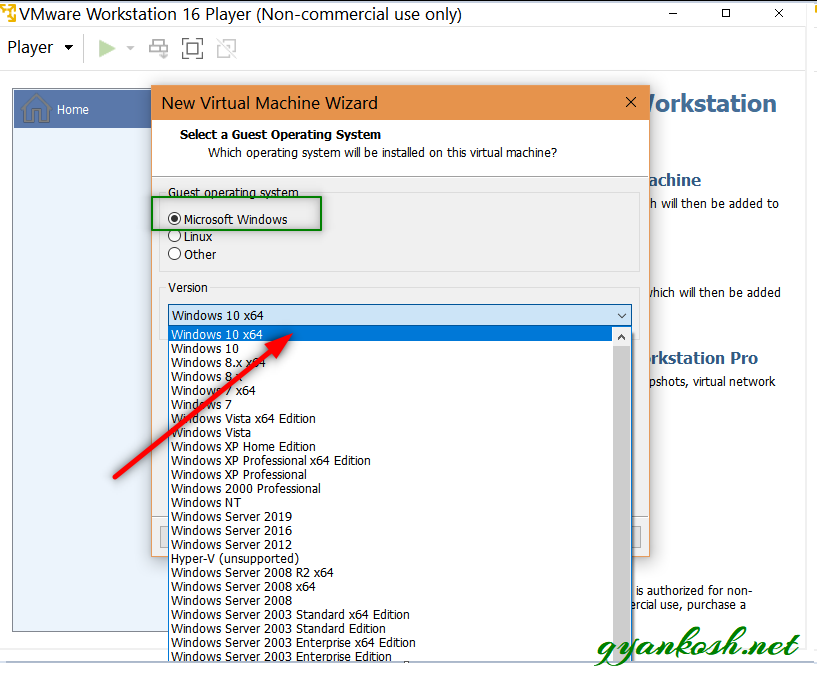
- After selecting the INSTALL FROM:, choose the GUEST OPERATING SYSTEM as MICROSOFT WINDOWS and choose the version as WINDOWS 10 X64 from the drop down list.
- Choose NEXT.
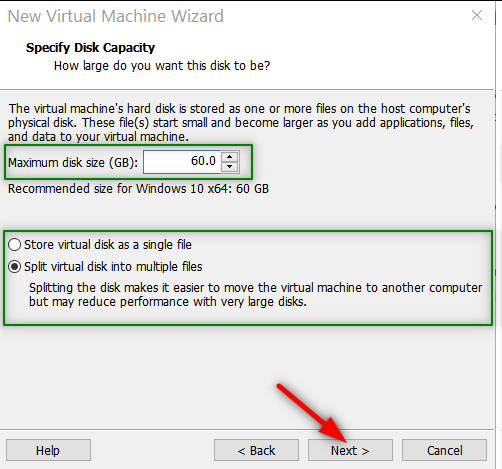
- Choose the DISK SIZE.
- You can choose 60 GB or lesser if you just want to look at the features.
60 GB doesn't mean that it'll occupy 60 GB at once. It is a limit just like a hard disk on our physical PC.
- Choose STORE VIRTUAL DISK AS A SINGLE FILE if you want a single file or
- SPLIT VIRTUAL DISK INTO MULTIPLE FILES if you want them to be split so that you can move the disk easily to other computer.
- There is a bit of the performance degradation due to SPLITTING FILE.
- Click NEXT.
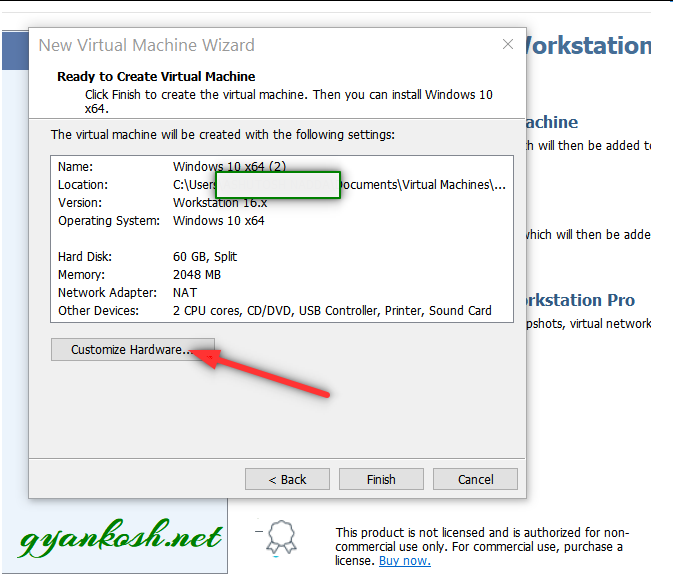
- After NEXT, the Virtual Machine will show the final settings. You can also customize the settings.
- Let us have a final look at the specifications of the Virtual Machine we are creating.
- Click CUSTOMIZE HARDWARE.
- Under the CUSTOMIZE HARDWARE, we’ll find all the different hardware settings. [The settings for our Virtual Machine ].
- Choose the memory to be 4GB.
- Processors are 2, which are just fine.
- Go to NEW CD/DVD (SATA).
- Choose SECOND OPTIN USE ISO IMAGE FILE.
- Click BROWSE.
- Reach the folder where we downloaded the WINDOWS 11 ISO IMAGE.
- Rest of the settings are not needed for the basic working.
- YOU CAN ALWAYS TRY THEM LATER ON.
- Click CLOSE.
- We are done.
- Our VIRTUAL MACHINE has been created and MICROSOFT WINDOWS 11 ISO IMAGE has been loaded to this.
- It is just like the COMPUTER IS READY TO BE INSTALLED WITH A WINDOWS 11.
STEP 5: INSTALL WINDOWS 11 IN THE NEWLY CREATED VIRTUAL MACHINE
Now, as our machine is ready and we have already loaded the WINDOWS 11 IMAGE, let us load the WINDOWS 11 and see how it looks.
NOTE: THIS IS ALSO THE PROCEDURE OF THE ACTUAL INSTALLATION OF WINDOWS 11 [ BETA OR FINAL RELEASE ] IF YOU HAVE A BOOTABLE DVD OR BOOTABLE USB THROUGH WHICH YOU ARE INSTALLING THE WINDOWS 11 ON YOUR PC.
FOLLOW THE STEPS TO INSTALL WINDOWS 11 IN THE VIRTUAL MACHINE.
- Open the VMWARE VIRTUAL MACHINE by simply clicking it fromt he menu or desktop.
- The following window will open.
- Select the Machine Created as shown in the picture below.
- Click the RUN BUTTON.
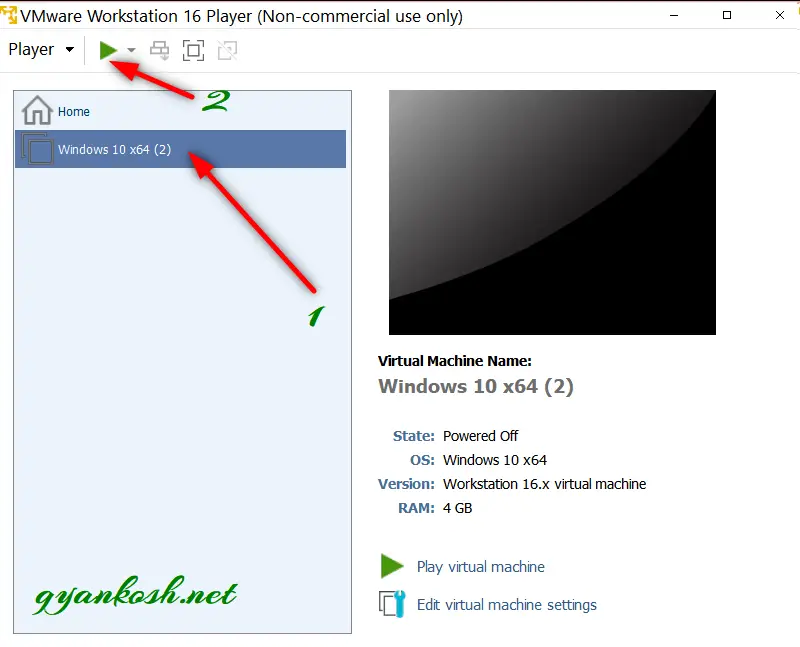
- As we click the RUN button which is a green PLAY BUTTON at the top, the system will start.

REMINDS YOU OF SOMETHING ??
IF YOU HAVE INSTALLED ANY PREVIOUS WINDOWS OS THROUGH THE CD OR DVD , IT WAS THE FIRST SCREEN ASKING IF YOU WANT TO BOOT FROM THE CD.
- Press any key on the keyboard and the installation will start.
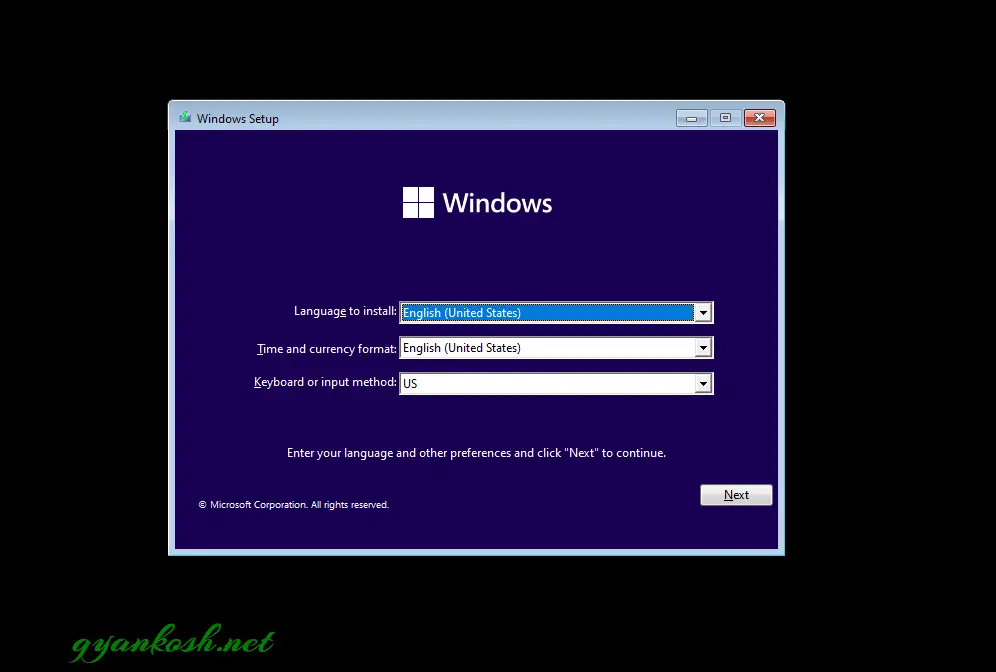
- After few seconds the following screen will appear.
- Select the Language and click Next.

- After selecting the language for the Installation process, choose the Language to install, Time and currency and keyboard input method.
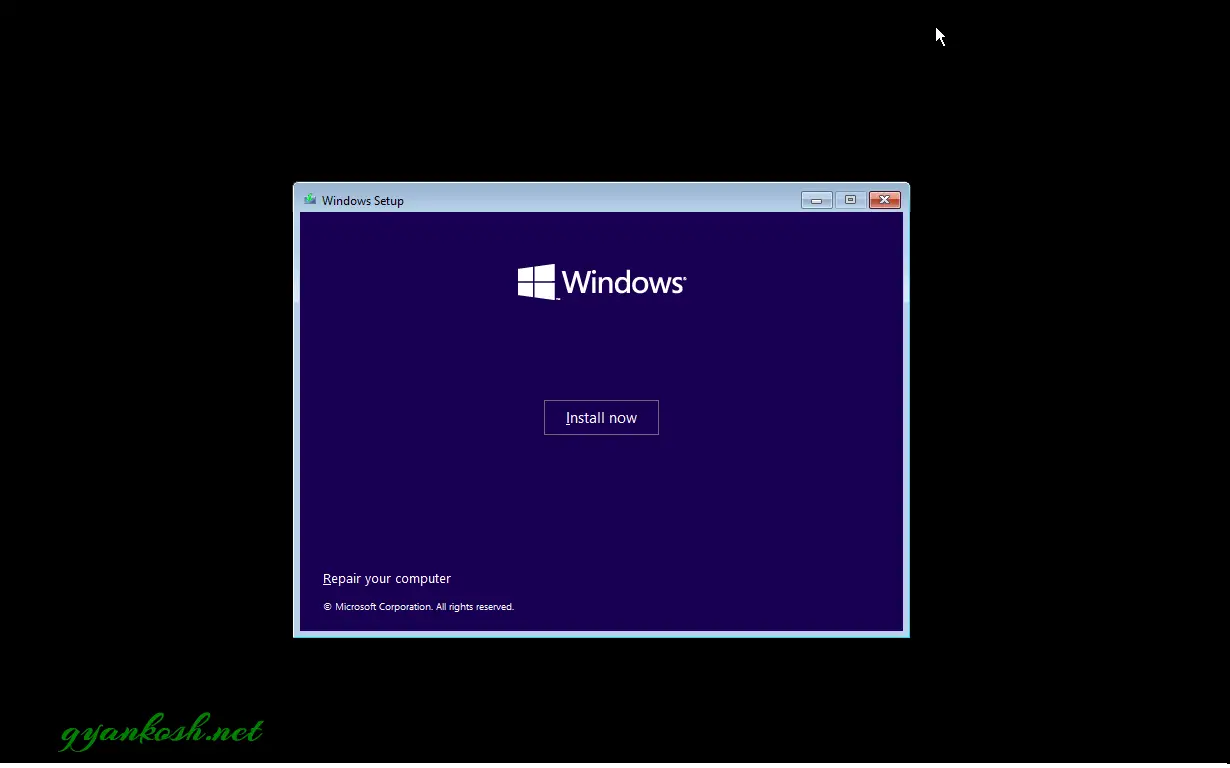
- Click INSTALL NOW.
- After clicking INSTALL NOW, an agreement will be shown.
- Read the agreement and click NEXT if you agree.
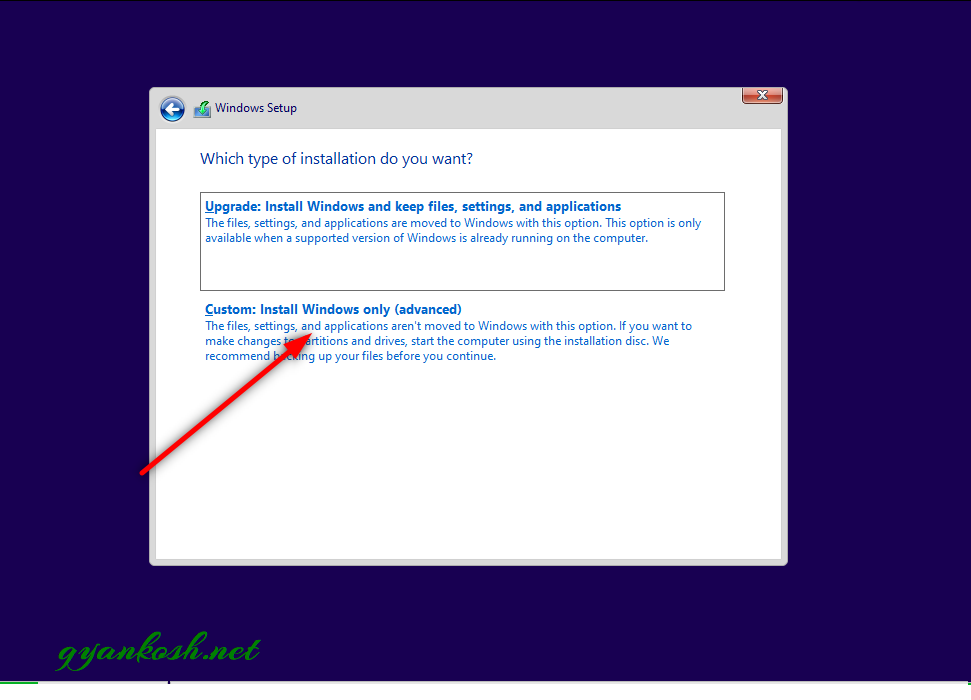
- The screen asking you to choose the INSTALLATION TYPE will appear.
- Choose CUSTOM: INSTALL WINDOWS ONLY [ADVANCED].
- Select the created HardDisk for the installation and click NEXT.
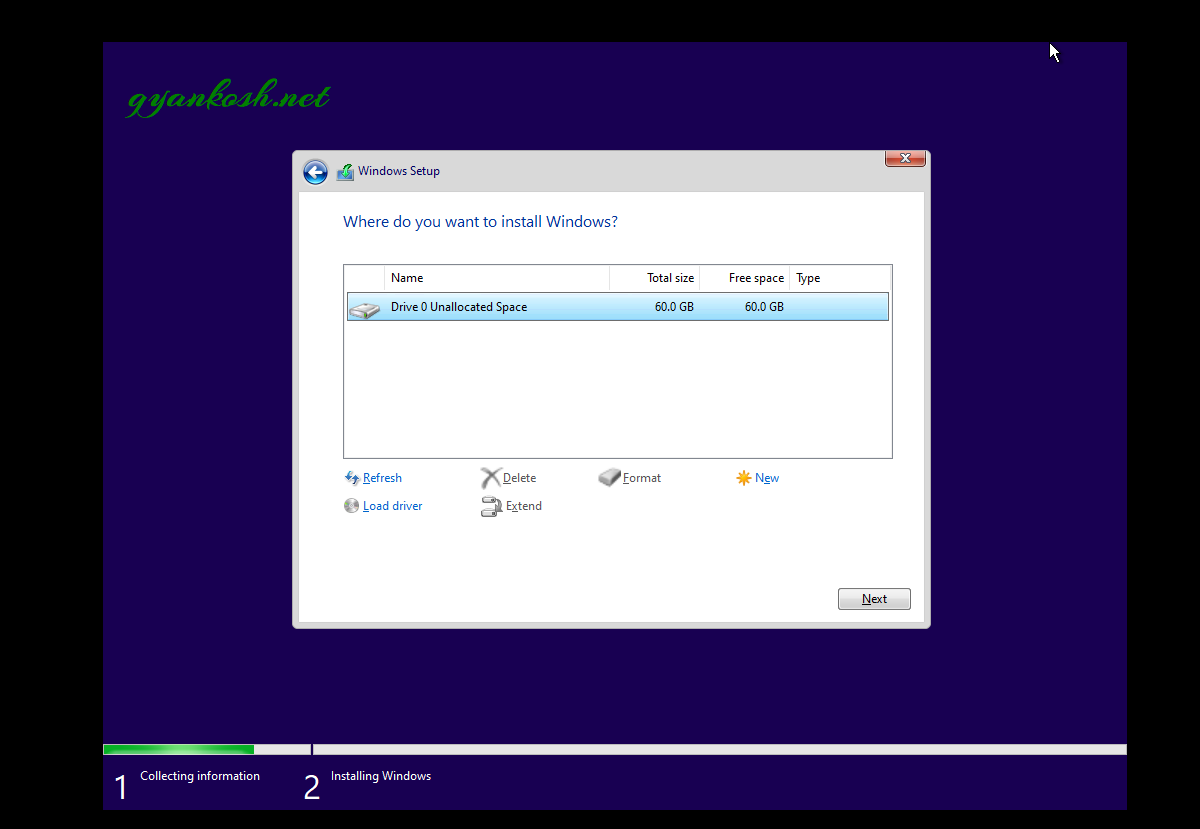
- The installation will start.
- Let it go on its pace.
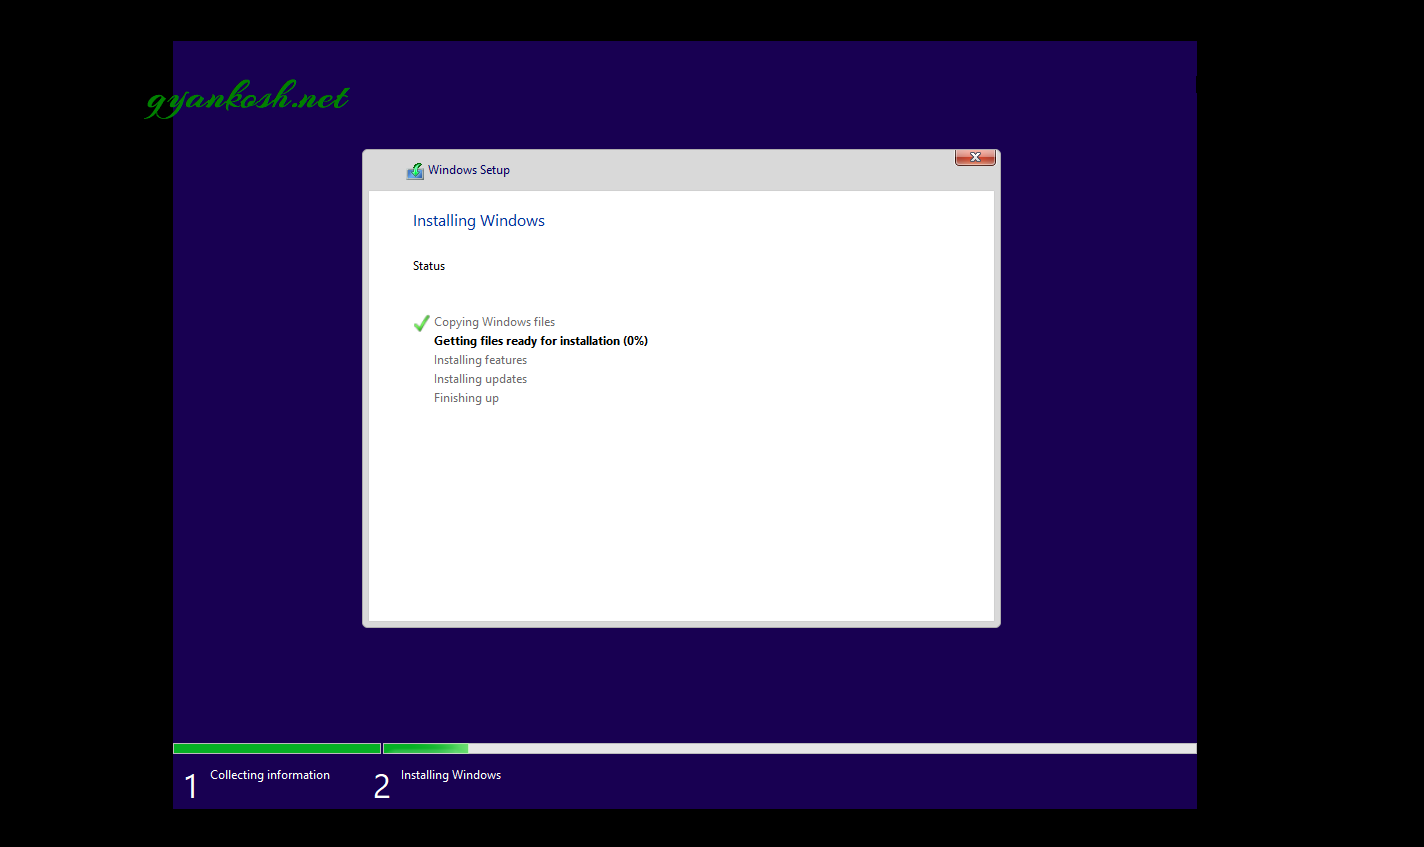
- After the installation , following window will appear.
- After this, CHOOSE THE COUNTRY and click NEXT.
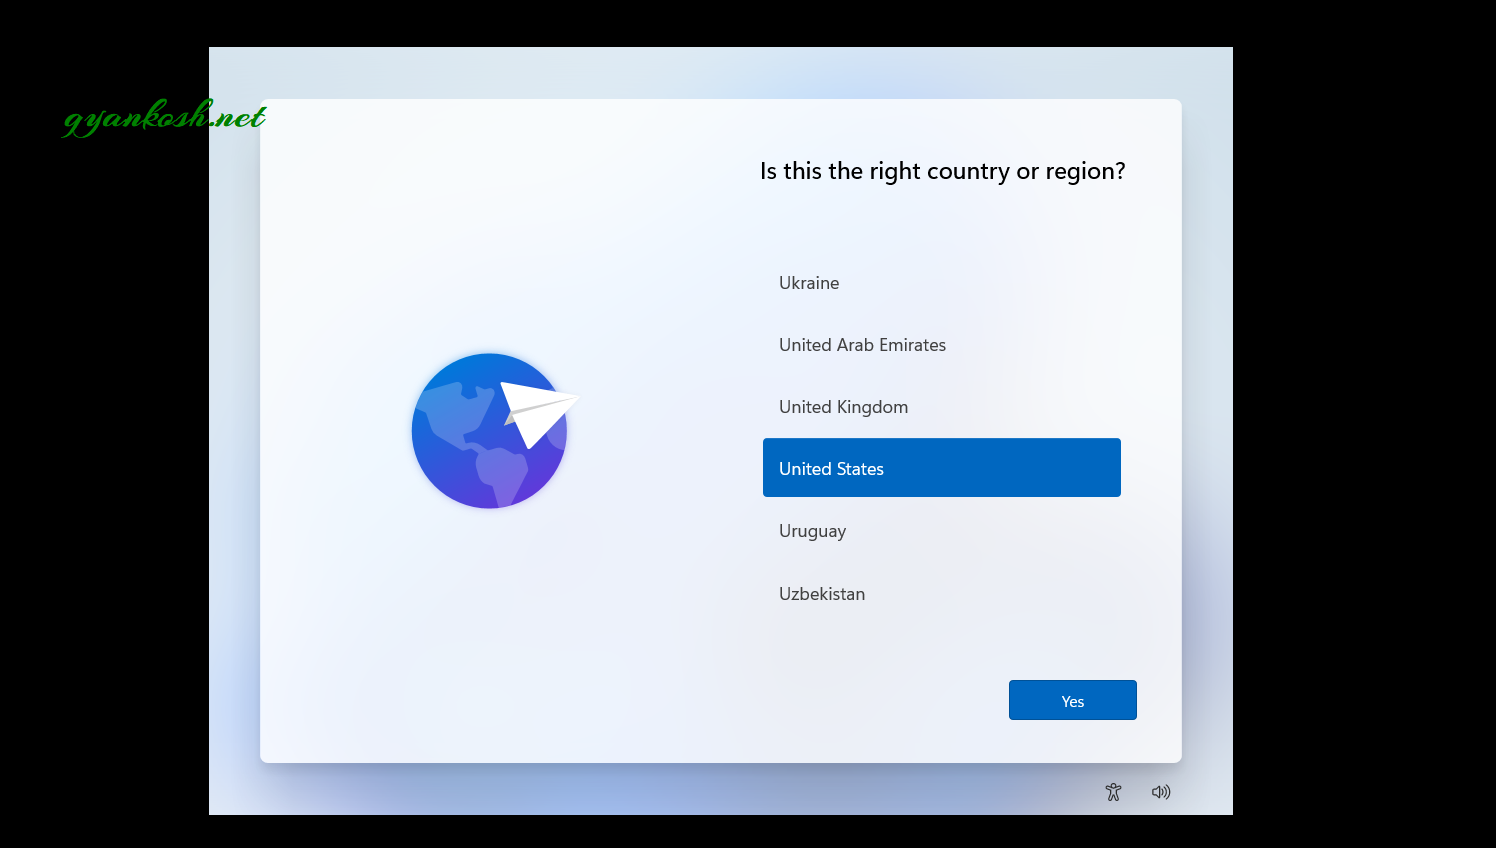
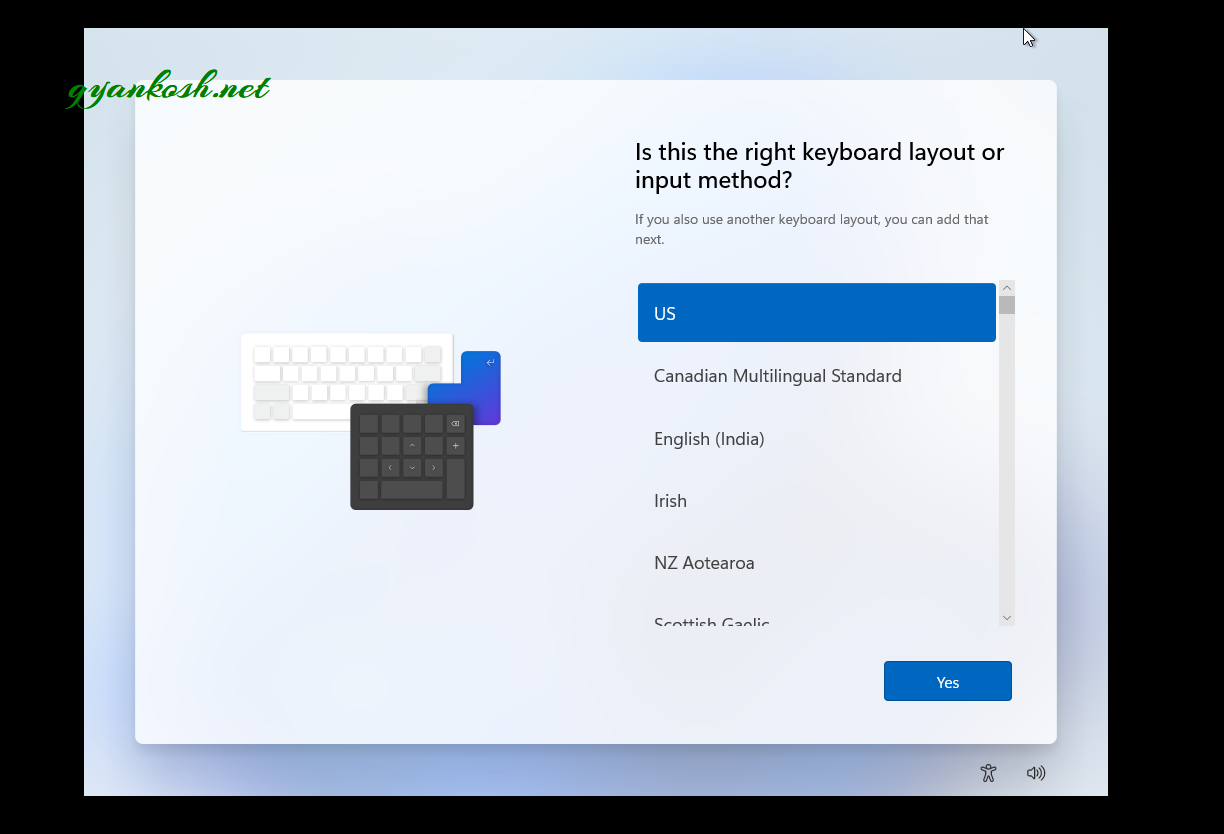
- After choosing the COUNTRY choose the LAYOUT for the KEYBOARD and click YES.
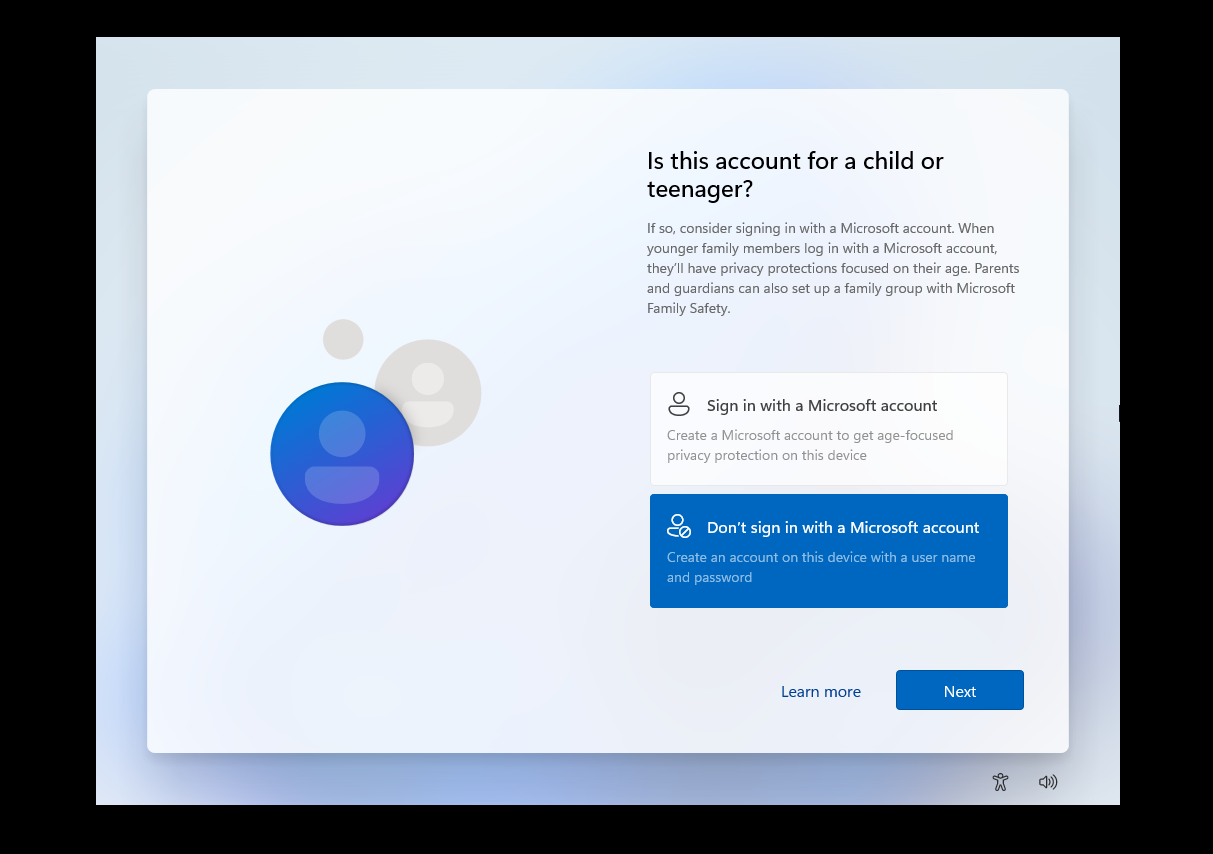
- If the account is for the teenager, you can sign in the MICROSOFT ACCOUNT and the privacy protections will update as per the age.
- For now, we are skipping this.
- Click NEXT.
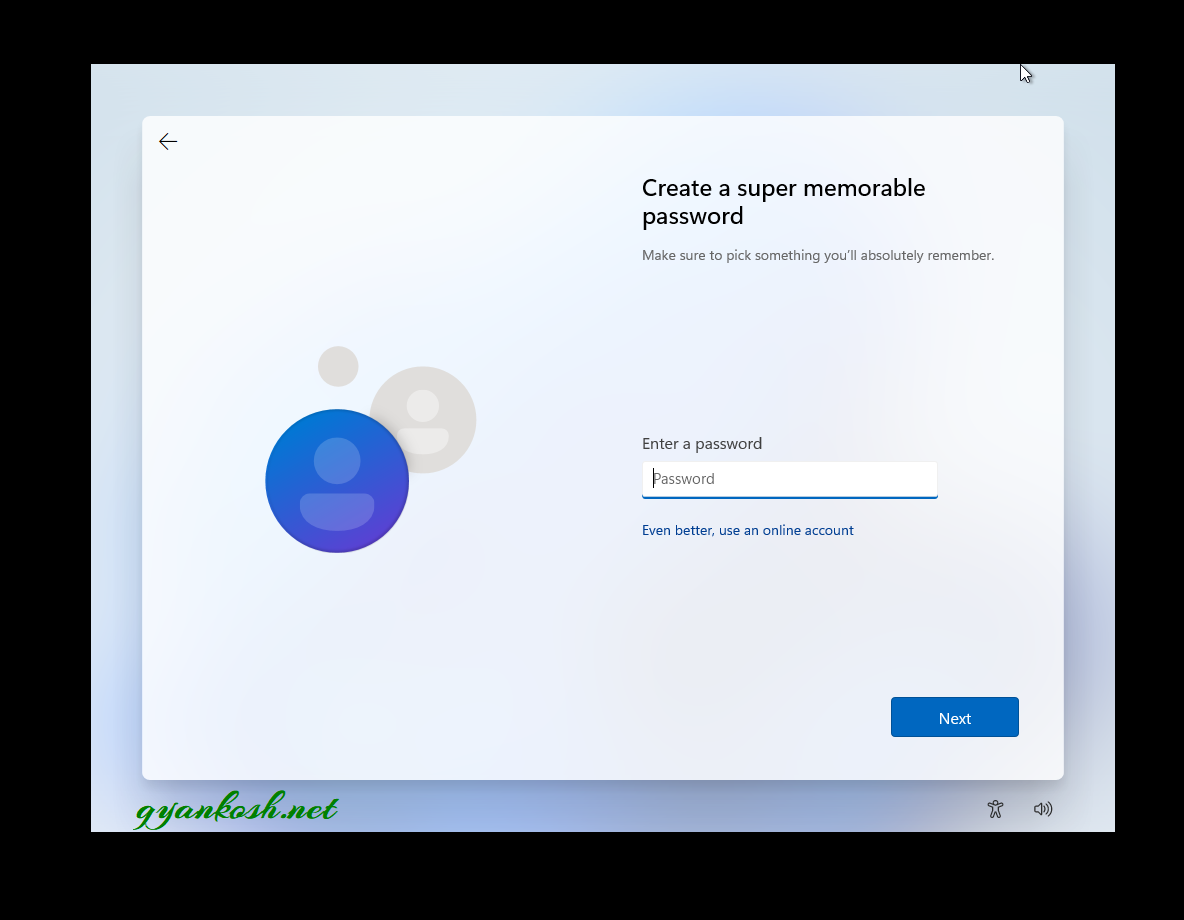
- ENTER YOUR NAME and click NEXT.

Put the PASSWORD or simply click NEXT to keep the password empty.
- After this, choose the privacy settings as your wish and click NEXT.
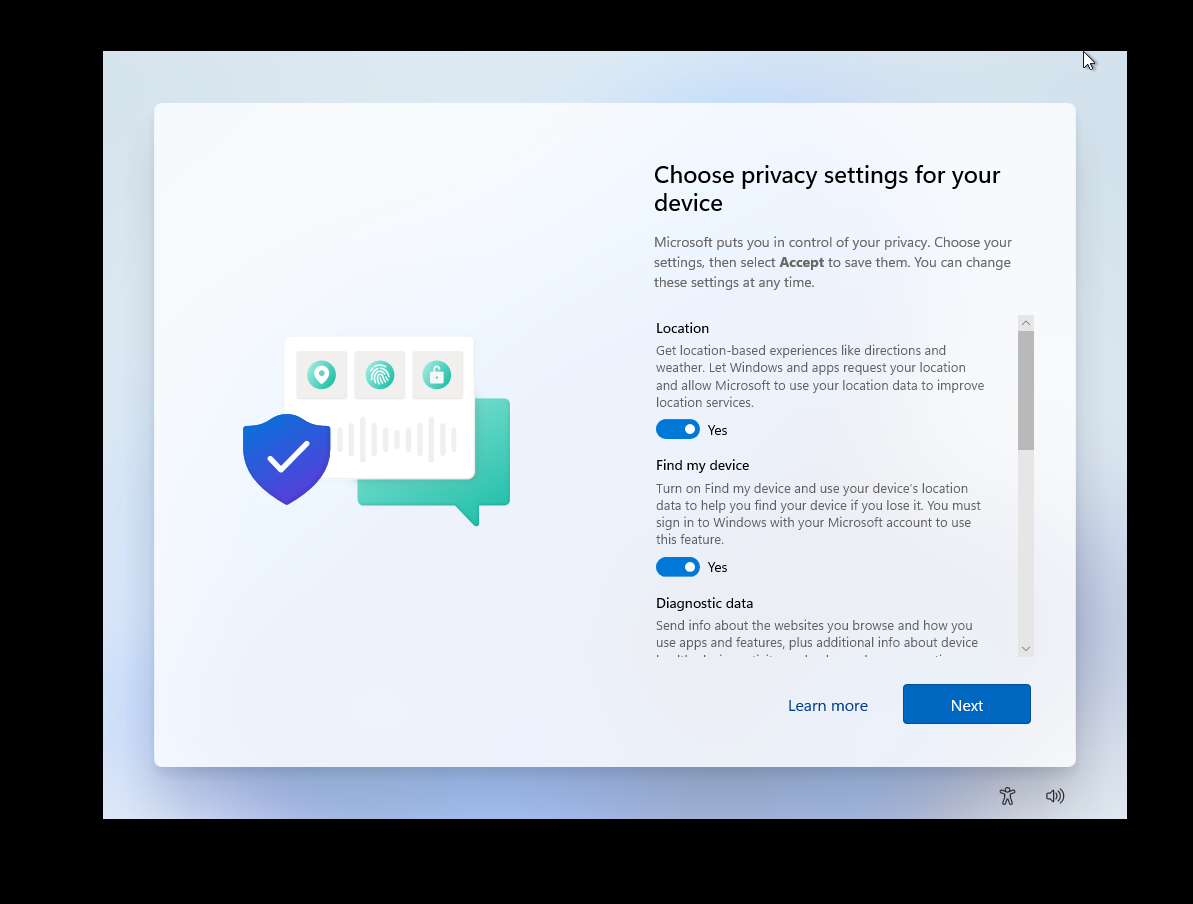
- We are done.
- The WINDOWS 11 is installed.
- After this, you’ll reach the home screen of WINDOWS 11.
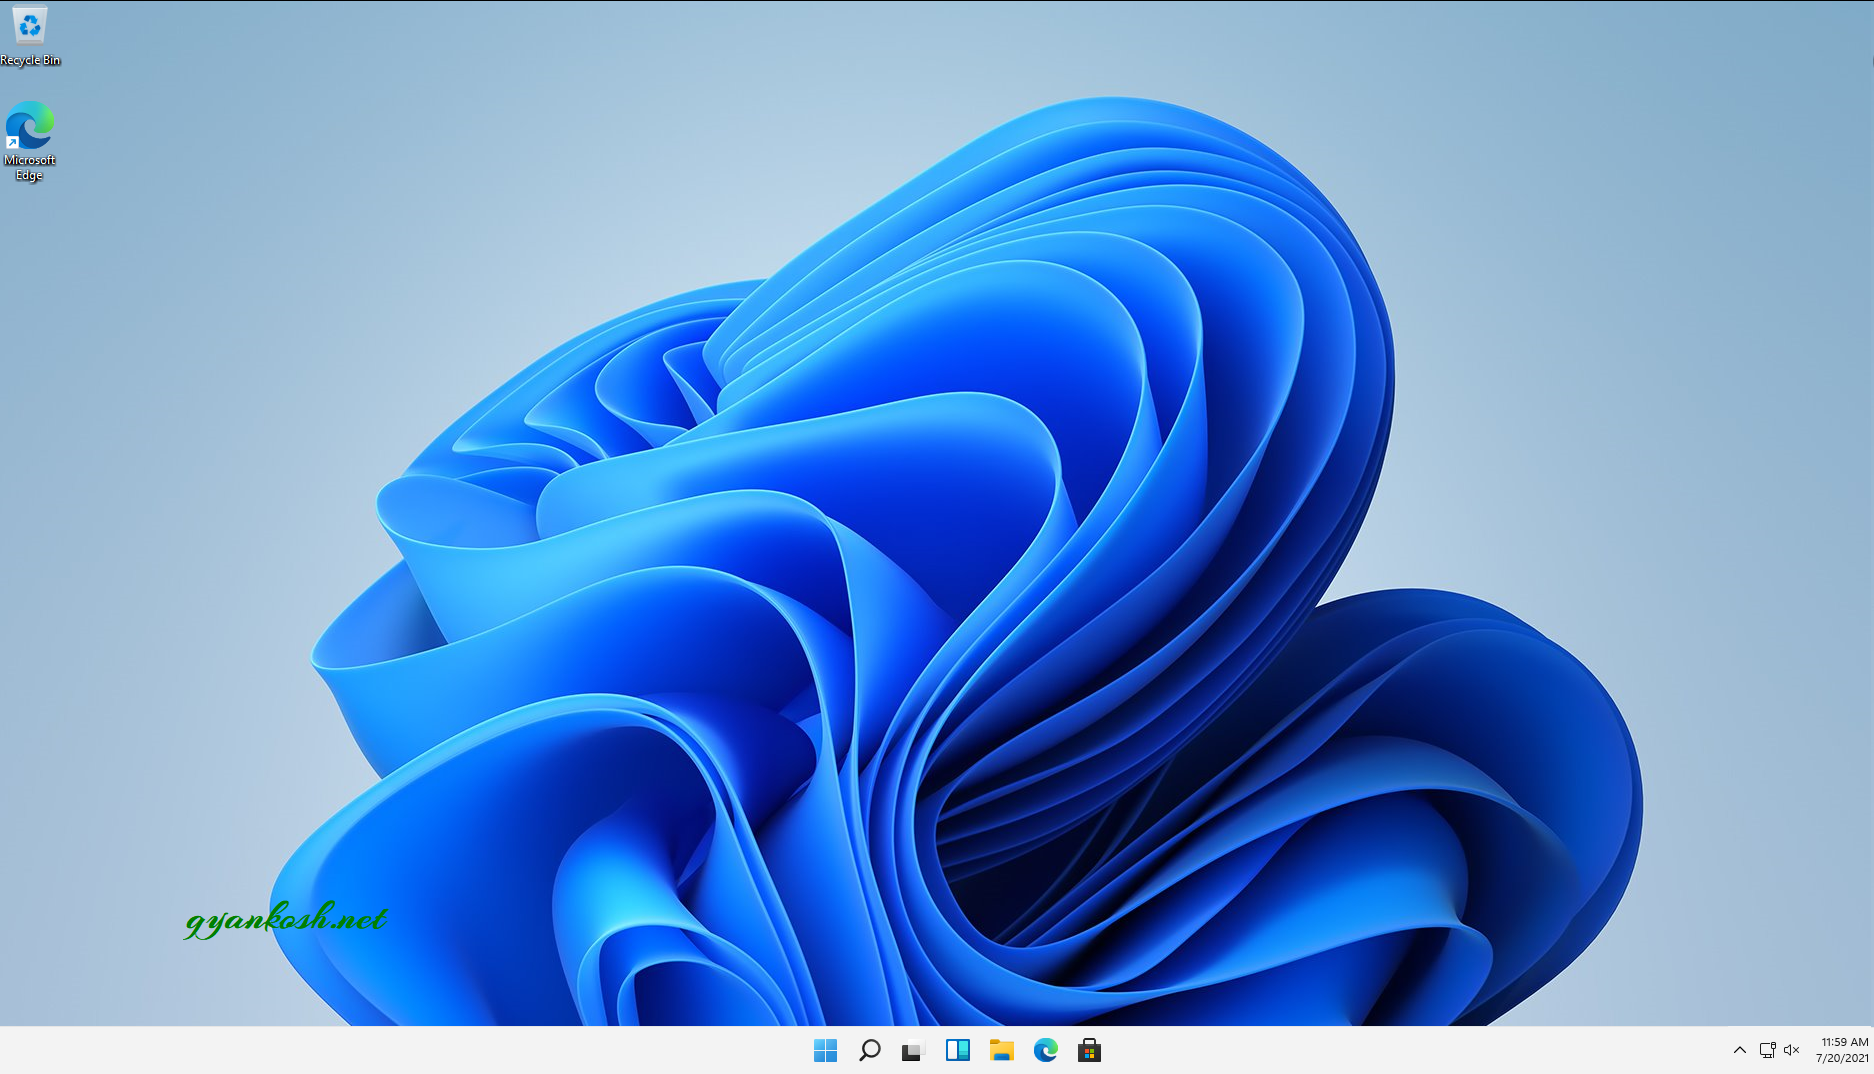
CONGRATULATIONS!!!
YOU HAVE SUCCESSFULLY INSTALLED WINDOWS 11 ON YOUR VIRTUAL MACHINE.