Table of Contents
- INTRODUCTION
- WHAT DO WE MEAN BY PRINTING TITLES IN EXCEL?
- WHERE IS BUTTON LOCATION FOR PRINTING TITLES IN EXCEL ?
- STEPS TO PRINT TITLES IN EXCEL
- EXAMPLE 1: PRINT ALL THE HEADINGS ON EVERY PAGE OF THE REPORT
INTRODUCTION
We all are stuck in this particular situation whenever dealing with a very lengthy report.
The situation is regarding the HEADING or TITLES of the columns of the report. We need to scroll up and down again and again to have a look at it. So we freeze the panes to get rid of this problem.
But, what about the prints of the report. Freezing panes is not the solution for a printed report. So to print the headings or any specific line on every printed page we have got this option known as PRINTING TITLES in EXCEL.
THE PRINTING TITLE OPTION GIVES THE OPTION OF REPEATING ANY ROW OR COLUMN ON EVERY PRINTED PAGE.
IT IS HELPFUL IN THE SITUATION WHEN THE REPORT IS VERY LARGE AND WE NEED TO REPEAT THE HEADING ON EVERY PAGE.
In this article, we’ll learn about the procedure of printing the titles in Excel.
WHAT DO WE MEAN BY PRINTING TITLES IN EXCEL?
PRINTING TITLES means printing any specific row or column on all the printed pages of the sheet.
We also use the HEADERS and FOOTERS option for the same task but it might become a headache if we want to repeat the rows or columns on every printing page.
This option can be used very effectively to print the headings of any report on every page. We need to manually insert the headings if we don’t use this option.
Similarly, if we have any column which contains a heading and needs to be repeated on every page, the same option can be used.
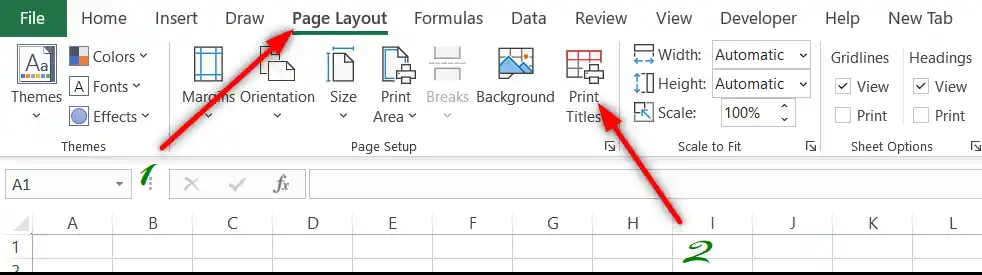
WHERE IS BUTTON LOCATION FOR PRINTING TITLES IN EXCEL ?
The button for printing titles is located under the
PAGE LAYOUT TAB> PAGE SETUP SECTION
The location is shown below.
STEPS TO PRINT TITLES IN EXCEL
The following steps are to be followed to print titles in EXCEL.
REFER PICTURE: BELOW
STEPS TO PRINT TITLES IN EXCEL:
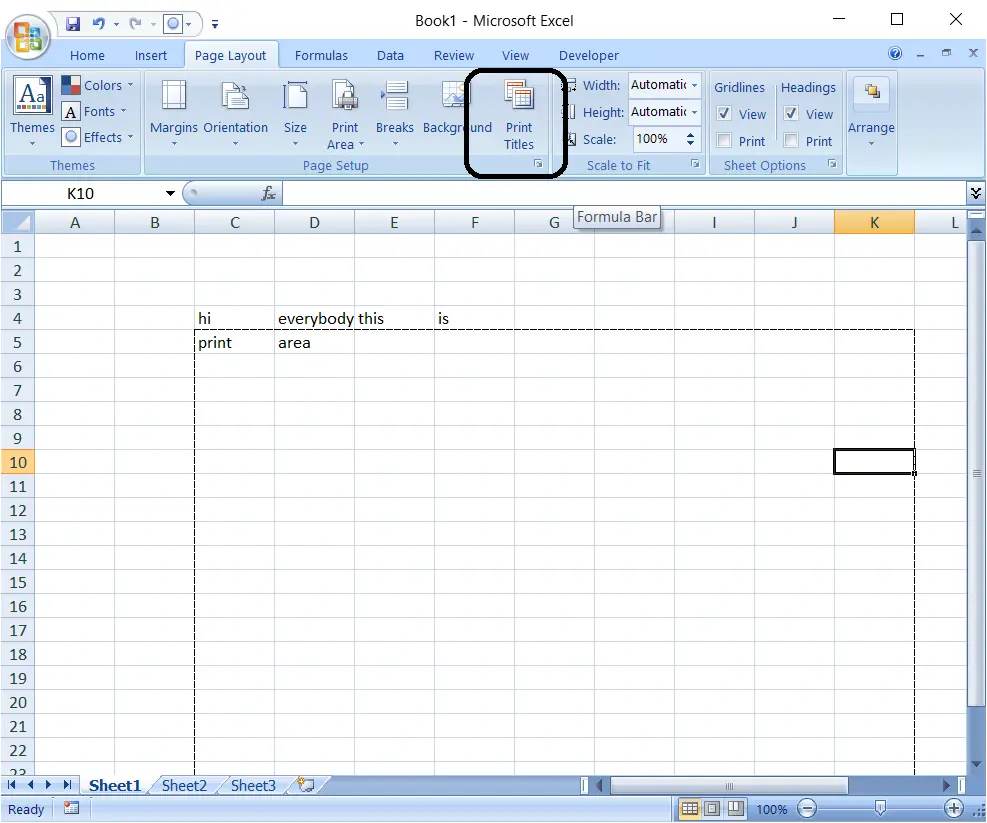
- Click PRINT TITLES.
- Look at the picture below and study it. A lot of information has been given in the picture itself.
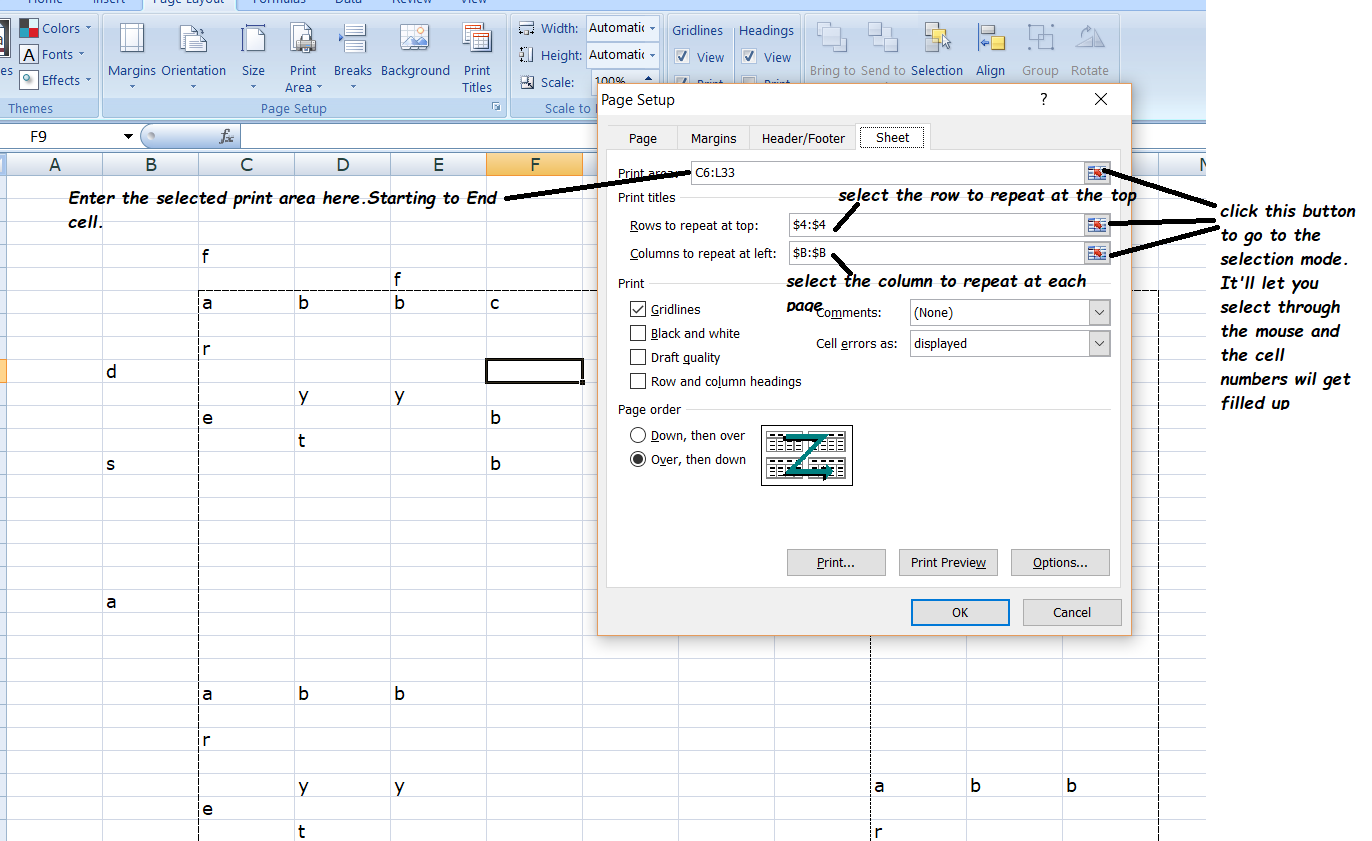
- Enter the print area. It can be selected by clicking the right icon as shown and then selecting the complete printing area.
- Select the row to be repeated in the mentioned field. It can also be selected by mouse or directly entering the address of the row. $4:$4 means the complete row 4.
- Select the column to be repeated if needed. It can be selected by mouse or directly by entering the address of the coulmn. $b:$b means the complete B column.
- There are a few more options which are self explanatory. e.g. If you want to print GRIDLINES or not, BLACK and WHITE or colored, HEADING to be printed or not etc.
- Click PRINT.
EXAMPLE 1: PRINT ALL THE HEADINGS ON EVERY PAGE OF THE REPORT
This is a very frequent requirement while printing long reports.
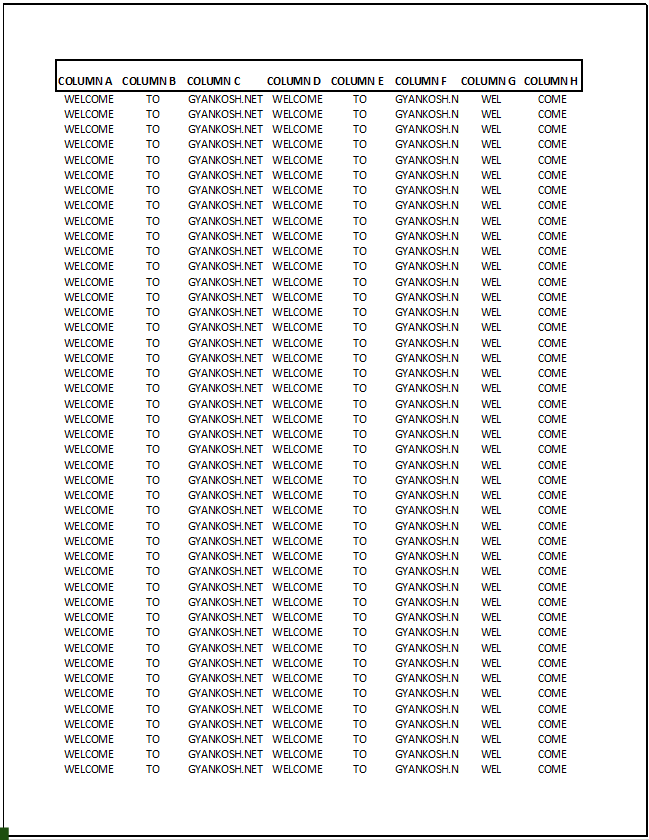
For Example, we’ll take sample data with HEADINGS on the top and data needs to be printed on all the paper.
The following pictures show a portion of the complete data.
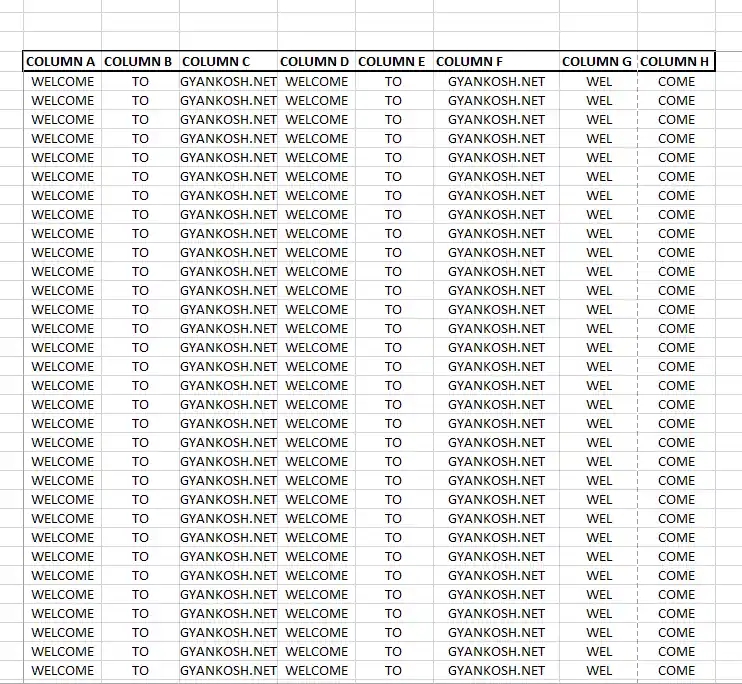
We have the top row showing the headings followed by the data which spreads over two pages.
It is visible that we have the top row which is showing the columns on the first page only.
We can check the print preview which will show the top row only on the first page.
The following animation shows the print preview prior to the PRINT TITLE settings.
But we want that row to get printed over every page.
FOLLOW THE STEPS TO PRINT THE HEADINGS ON ALL THE PAGES IN EXCEL:
- Simply go to the PAGE LAYOUT TAB.
- Click PRINT TITLES option.
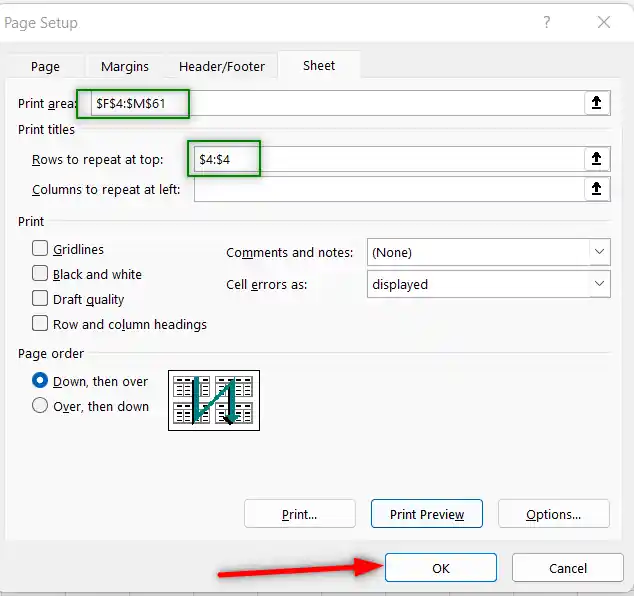
- The following dialog box will open.
- Choose PRINT AREA. [ Include all the rows including the headings. ]
- Choose ROWS TO REPEAT AT TOP. [ It’ll help you select the complete row. ]
- Click OK. [ Rest of the options are not needed in this example. ]
In the picture below we have chosen the Print Area and Row to repeat which contains the row of the headings.
- After the settings, nothing visible will happen.
- Now, go to the PRINT PREVIEW.
- You can see that the selected row will appear on the top of every printable page.
- The PRINT PREVIEW of this example is showed below.

You can check that in the picture above, every page is showing the top row.