INTRODUCTION
We already learnt few things about the TEXT BOX here.
But it is not enough to simply insert the text box but text box needs to be edited as per requirement.
Let us revise what a text box is.
“TEXTBOX” is drawn at any portion where we need to put the text. It can be drawn anywhere in the sheet. Although text can be put in the cells also but putting the text in box gives us the privilege of making the text having more styles and options
In this article we’ll focus specifically on the procedure of rotating the TEXT BOX in google sheets.
NOTE: BEFORE CONTINUING FURTHER, IT IS BELIEVED THAT YOU KNOW HOW TO INSERT A TEXT BOX IN GOOGLE SHEETS. IF NOT CLICK HERE TO LEARN HOW TO INSERT A TEXT BOX IN GOOGLE SHEETS.
WHY WE NEED TO ROTATE THE TEXT BOX IN GOOGLE SHEETS
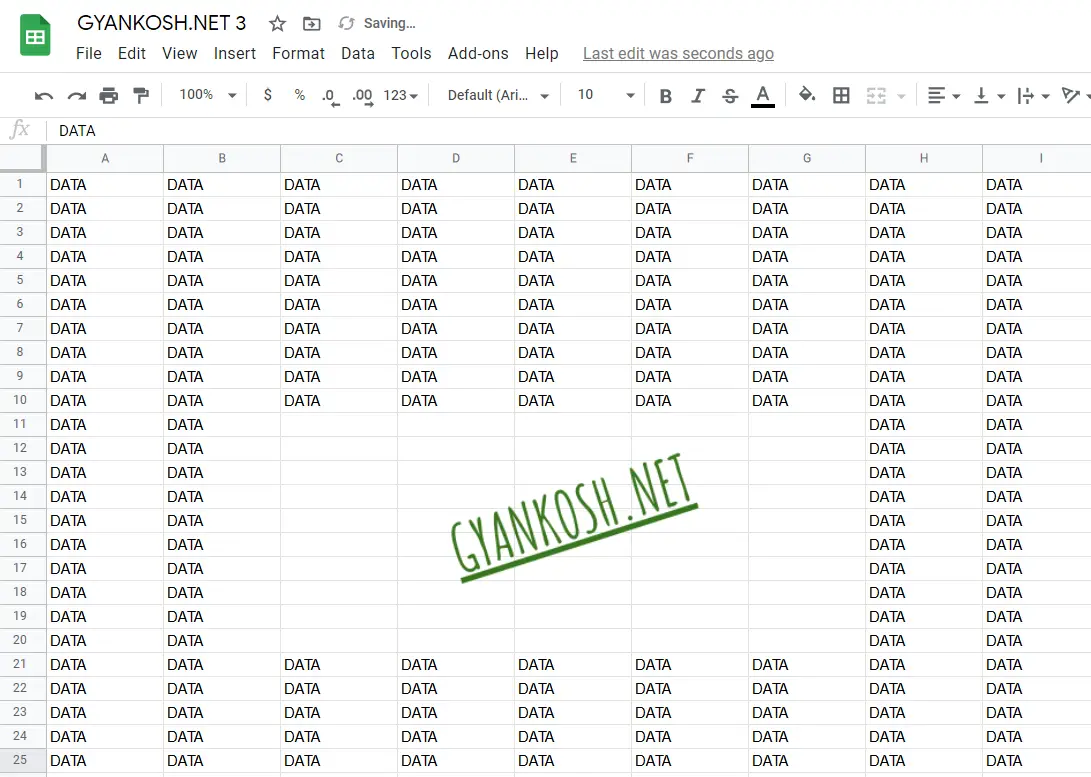
It is totally a requirement based choice. We need to rotate the text to enhance the look and feel of our reports. We can use the text box to create a stamp or it can be used as a watermark too.
TEXTBOX NEEDS TO BE ROTATED TO COMPLEMENT THE LOOK AND FEEL OF OUR REPORT AND SOLELY DEPENDS UPON THE REQUIREMENT OF THE USER
WAYS TO ROTATE TEXTBOX IN GOOGLE SHEETS
We can rotate textbox in mainly two ways.
- Using the ROTATION CONTROLLING CIRCLE.
- Using the MENU option or RIGHT CLICK option
ROTATION OF THE TEXTBOX WILL TAKE PLACE IN THE DRAWING BOX ONLY.
FOLLOW THE STEPS TO PREPARE TEXTBOX FOR ROTATION.
- Go to INSERT MENU > DRAWING OPTION.
- It’ll take us to drawing box.
- Click on the TEXT BOX option and type the text you want in the text. [ THE DETAILED INFORMATION OF INSERTING A TEXT BOX IS HERE ]
It is believed that you have your textbox ready.

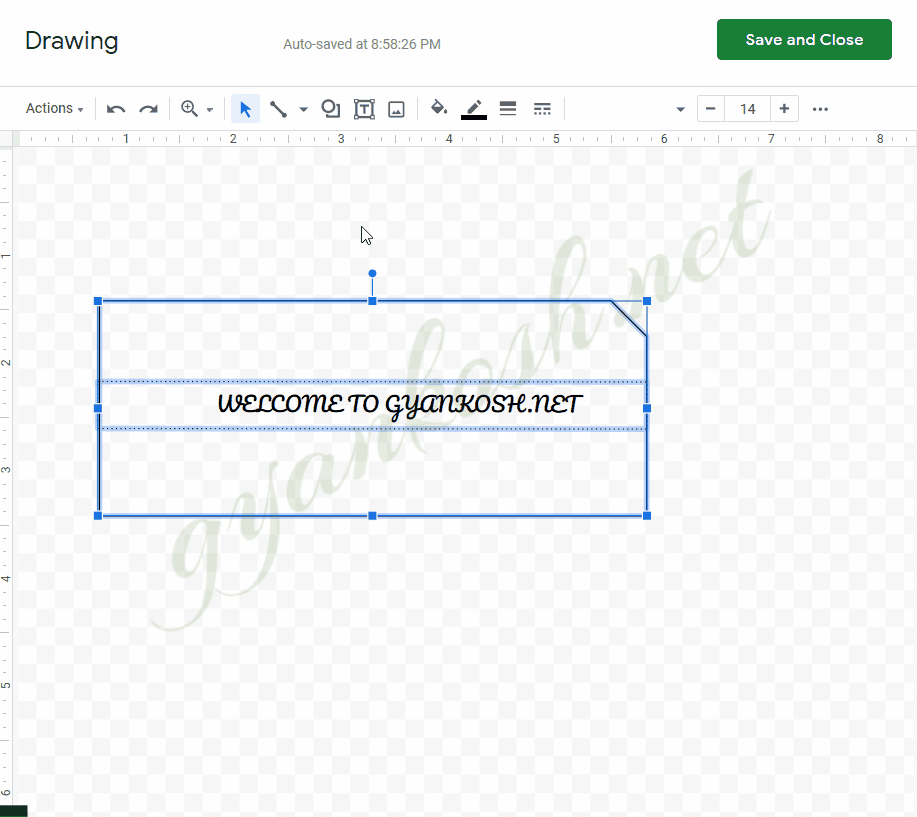
ROTATING TEXT BOX USING CONTROLLING CIRCLE
When we select the TEXTBOX , it shows different small squares and a small disc or circle at the top.
Look at the picture below.
There is a small disc or circle at the top of the selected TEXT BOX. We can control the rotation using this circle.
Look at the picture below.

FOLLOW THE STEPS TO ROTATE THE TEXT BOX
- Select the text box by a single click.
- Hold the circle [ Left click and keep it pressed ] , and rotate towards left or right.
- A small information label will be showing the rotation in degrees.
- Rotate the text as per requirement.
The procedure is shown below in the animation.
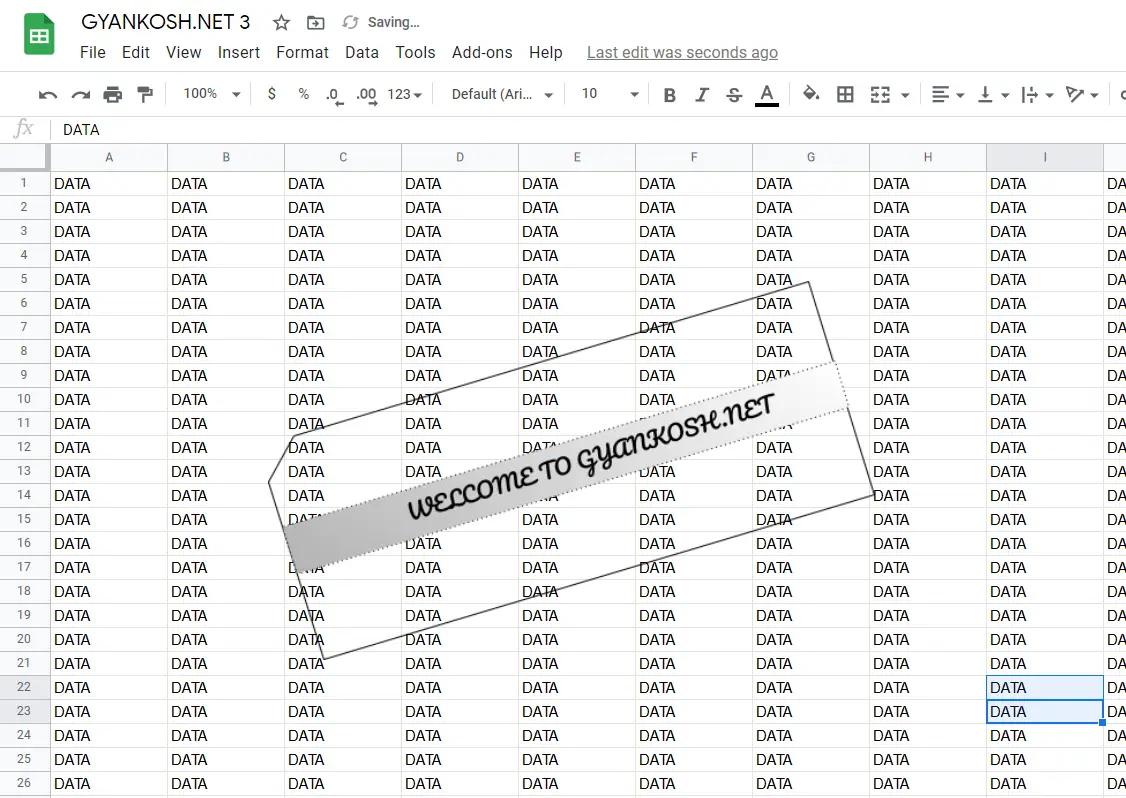
After we have set the rotation as per requirement , release the left mouse button.
Click SAVE AND CLOSE at the right upper corner.
The text box will be inserted as shown in the picture below.
ROTATING TEXT BOX USING MENU OPTION
We can rotate the textbox with the help of menu options also but if we want to rotate the textbox precisely, we need to go for the first option only.
THE MENU OPTION PROVIDES FIXED ROTATION OPTIONS LIKE 90 DEGREES CLOCKWISE OR COUNTER-CLOCKWISE, FLIP HORIZONTALLY OR VERTICALLY.
But these options are handy and fast when we need to rotate the textbox vertically in simple clicks.
FOLLOW THE STEPS TO ROTATE TEXT BOX USING MENU OPTIONS.
- Select the TEXT BOX.
- Click ACTIONS MENU, go to ROTATE. THE SAME MENU OPENS UP BY SELECTING THE TEXT BOX AND CLICKING RIGHT.
- Choose ROTATE CLOCKWISE 90 DEGREES [ RIGHT SIDE] , OR COUNTER CLOCK WISE 90 DEGREES [ LEFT SIDE ], FLIP HORIZONTALLY [ ROTATE THE TEXTBOX AROUND THE HORIZONTAL AXIS ] OR FLIP VERTICALLY [ ROTATING THE TEXTBOX AROUND THE VERTICAL AXIS ]

- For our example, we are rotating the textbox to counterclockwise twice to make it vertical.

- Click SAVE AND CLOSE.
- The TEXT BOX will be inserted in the sheet.
- Look at the picture below.

In this article we learnt the ways to rotate the TEXT BOX in GOOGLE SHEETS.