Table of Contents
- INTRODUCTION
- WHAT IS A VOLUNTEER SHEET?
- LINK FOR THE VOLUNTEER REGISTRATION FREE TEMPLATE
- VOLUNTEER SHEET
- HOW TO USE VOLUNTEERING SHEET?
INTRODUCTION
Google Sheets is a good spreadsheet application when it comes to the sharing capabilities.
Sharing of the sheets online gives us a lot of opportunities to make our work simpler with the security promise of Google. These days, most of the persons are having at least one google account. Even if you don’t have you can get one very easily here. [ https://accounts.google.com] [ YOU MUST HAVE A GOOGLE ACCOUNT FOR USING GOOGLE SHEETS TO GET THE TEMPLATE ]
Previously , when the sharing of the sheets was not that easy, we used to send the sheet to somebody through any other medium say email, they filled up the required data and then they send it back to us.
The process till here is not cumbersome but then we needed to compile the data received from the various users which was a real problematic part. [ Suppose if we have even a small number like 500, it is going to take hours ].
But thanks to the betterment and ease in the sharing capabilities of the Spreadsheet apps.
We need not to share any sheet today and can just share the link to update their details in the main sheet itself , which is going to be the key factor here in this article.
In this article we are going to create and use one VOLUNTEER SHEET for any reason and provide you a simple template which you can use to get the details from the users.
WHAT IS A VOLUNTEER SHEET?
We might need to call for the volunteers for any cause, it can be social, academic etc.
VOLUNTEERING MEANS TO UNDERTAKE OR SHOW WILLINGNESS TO UNDERTAKE ANY RESPONSIBILITY.
We’ll create a sheet where we can create the columns with the desired information which needs to be sought from the users who want to volunteer in our cause.
The link will be shared with the users and asked them to open the google sheet and fill in the details.
We’re done.
The list can be checked any time and the list will contain the details of all the volunteers which want to participate.
LINK FOR THE VOLUNTEER REGISTRATION FREE TEMPLATE
Click the following link and click MAKE A COPY BUTTON. It’ll create a copy for you .[ MIND IT , YOU SHOULD BE LOGGED IN WITH YOUR GOOGLE ACCOUNT . IF YOU DON’T HAVE ONE, KINDLY CREATE ONE BY GOING TO https://accounts.google.com.
CLICK BELOW TO CREATE A COPY OF THE SHEET FOR YOURSELF
VOLUNTEER SHEET
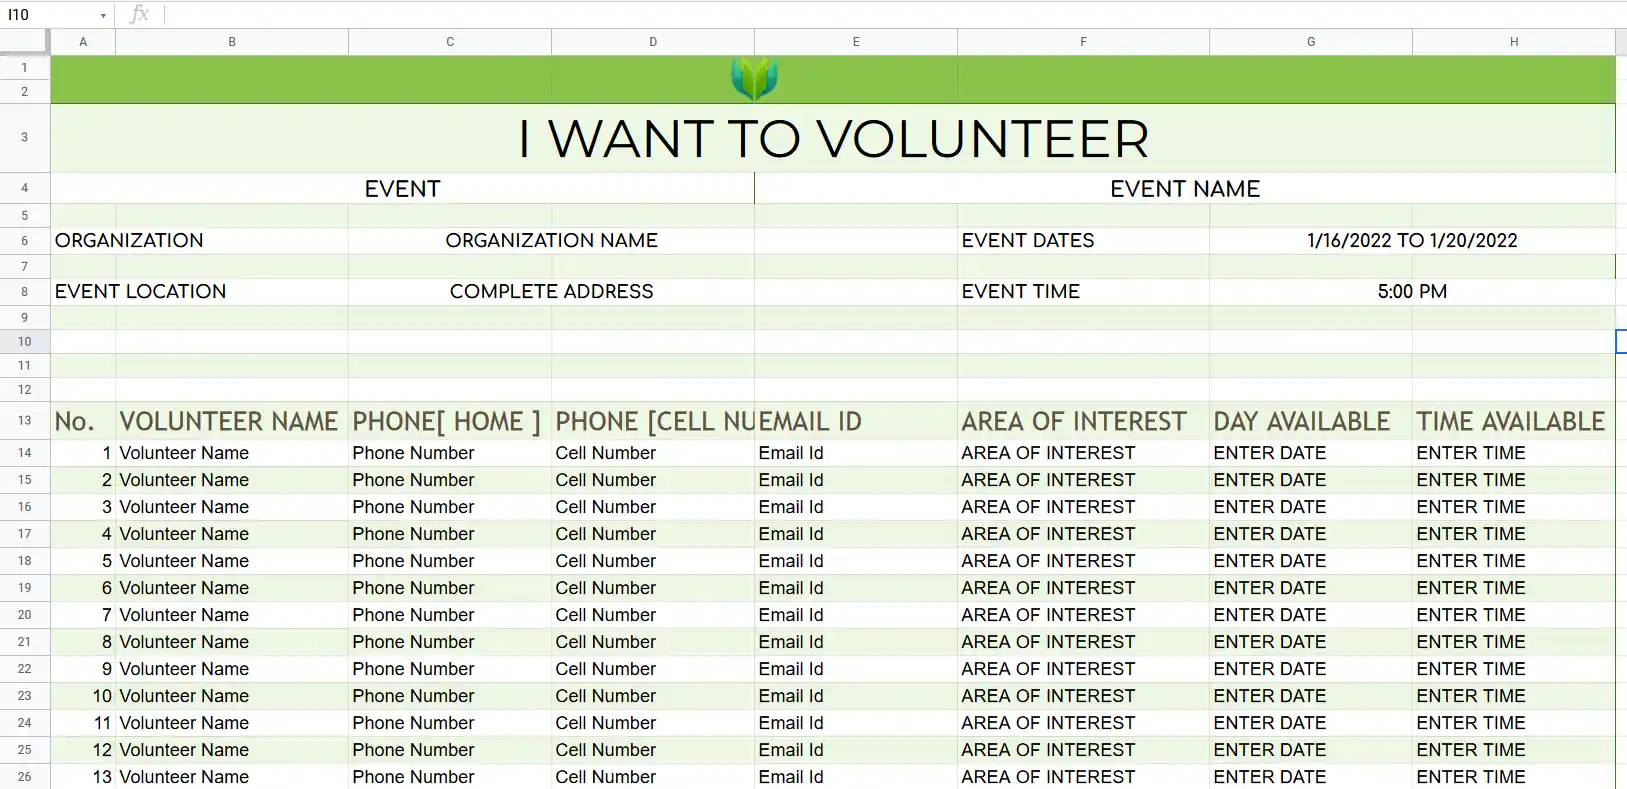
The following picture shows the front of the VOLUNTEER SHEET.
HOW TO USE VOLUNTEERING SHEET?
STEP 1:
FOR THE EVENT ORGANIZER:
These steps should be done by the person who is managing the event.
After copying the sheet into your account, open it.
The different parts of the sheet are shown in the picture below.
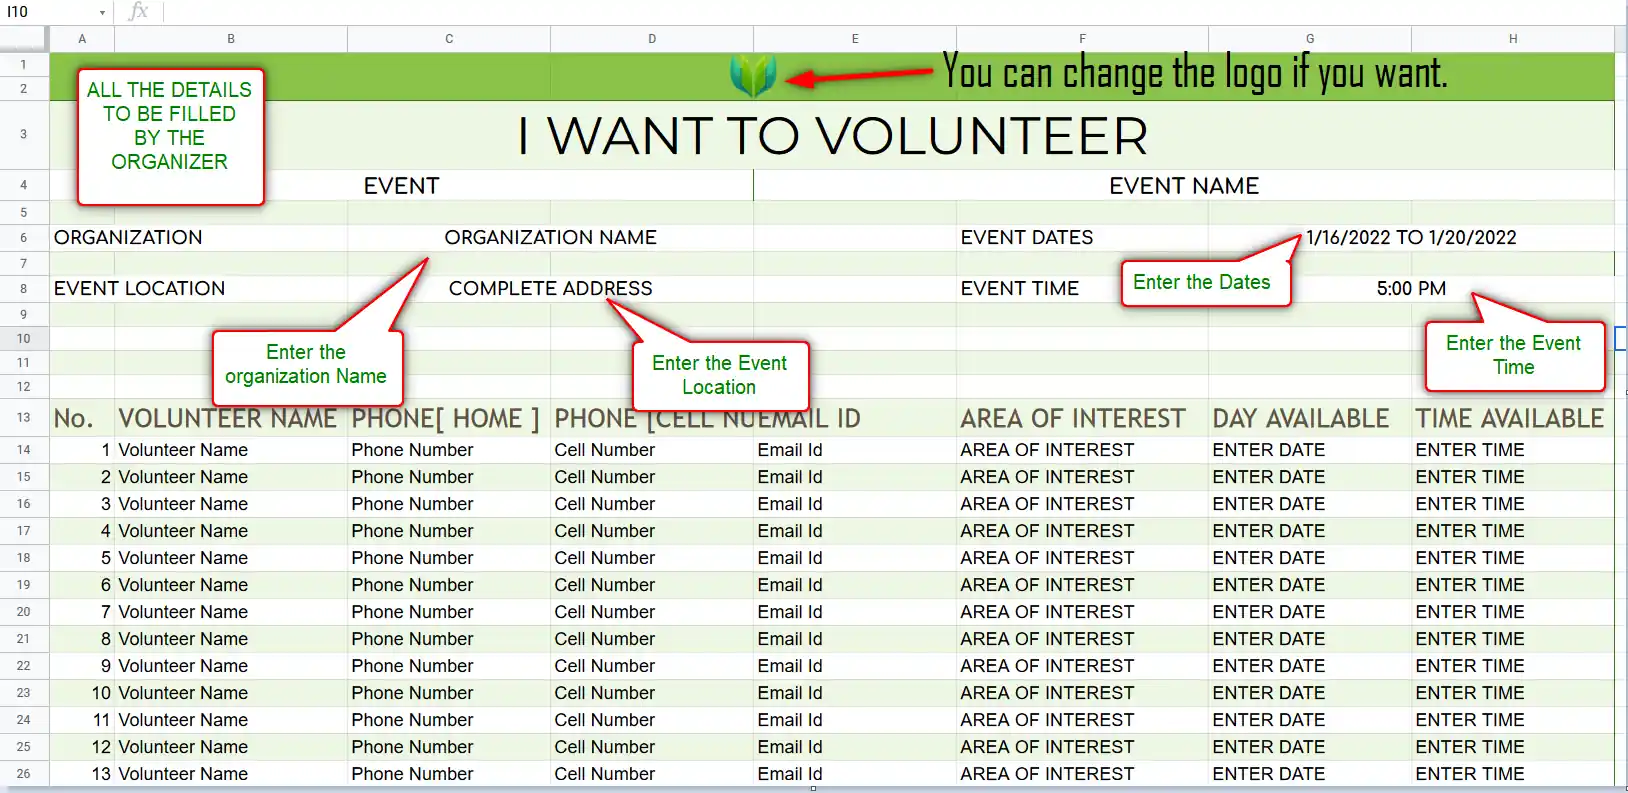
ORGANIZATION– Put your name of the organization in the space showing ORGANIZATION NAME.
EVENT LOCATION– Enter the event location.
EVENT DATES– Enter the Event Dates.
EVENT TIMES-Enter the event times.
LOGO– You can change the logo if you want by simply clicking the image and choosing the different one.
STEP 2:
SHARE THE LINK:
- After the sheet is ready, we can share it.
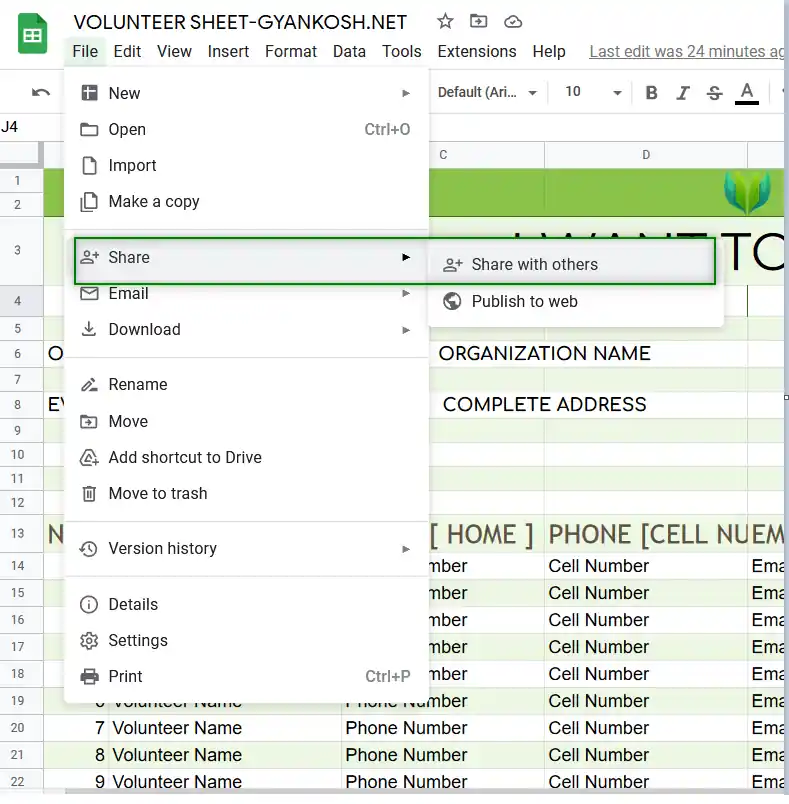
- Go to the FILE MENU and choose SHARE>SHARE WITH OTHERS.
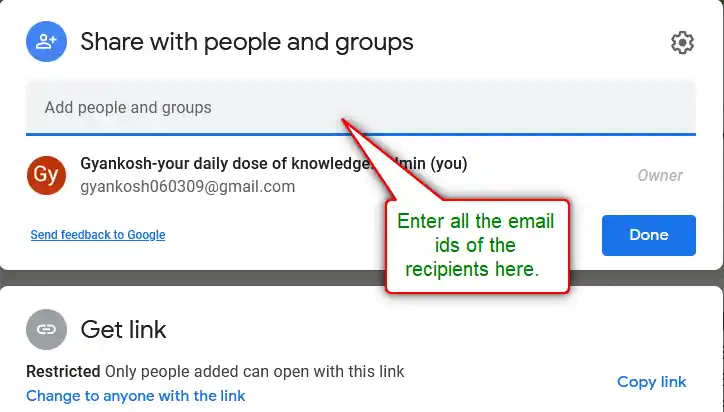
- It’ll open a small window, asking for all the email ids with who you want to share the sheet.
- Enter all the ids to who you want to send the invite to.
- After entering the email ids, choose the role as EDITOR as shown in the picture below. [ YOU ARE GOING TO KEEP THE EDITING OPEN FOR THE USERS].
- Enter the custom message to your invitees.
- Click SEND.

A mail containing your message and the link for the sheet will be sent to all the email ids.
If you don’t want to send the mail automatically from the GOOGLE SHEETS, you can get the link separately and share it with the others.
Follow the STEPS:
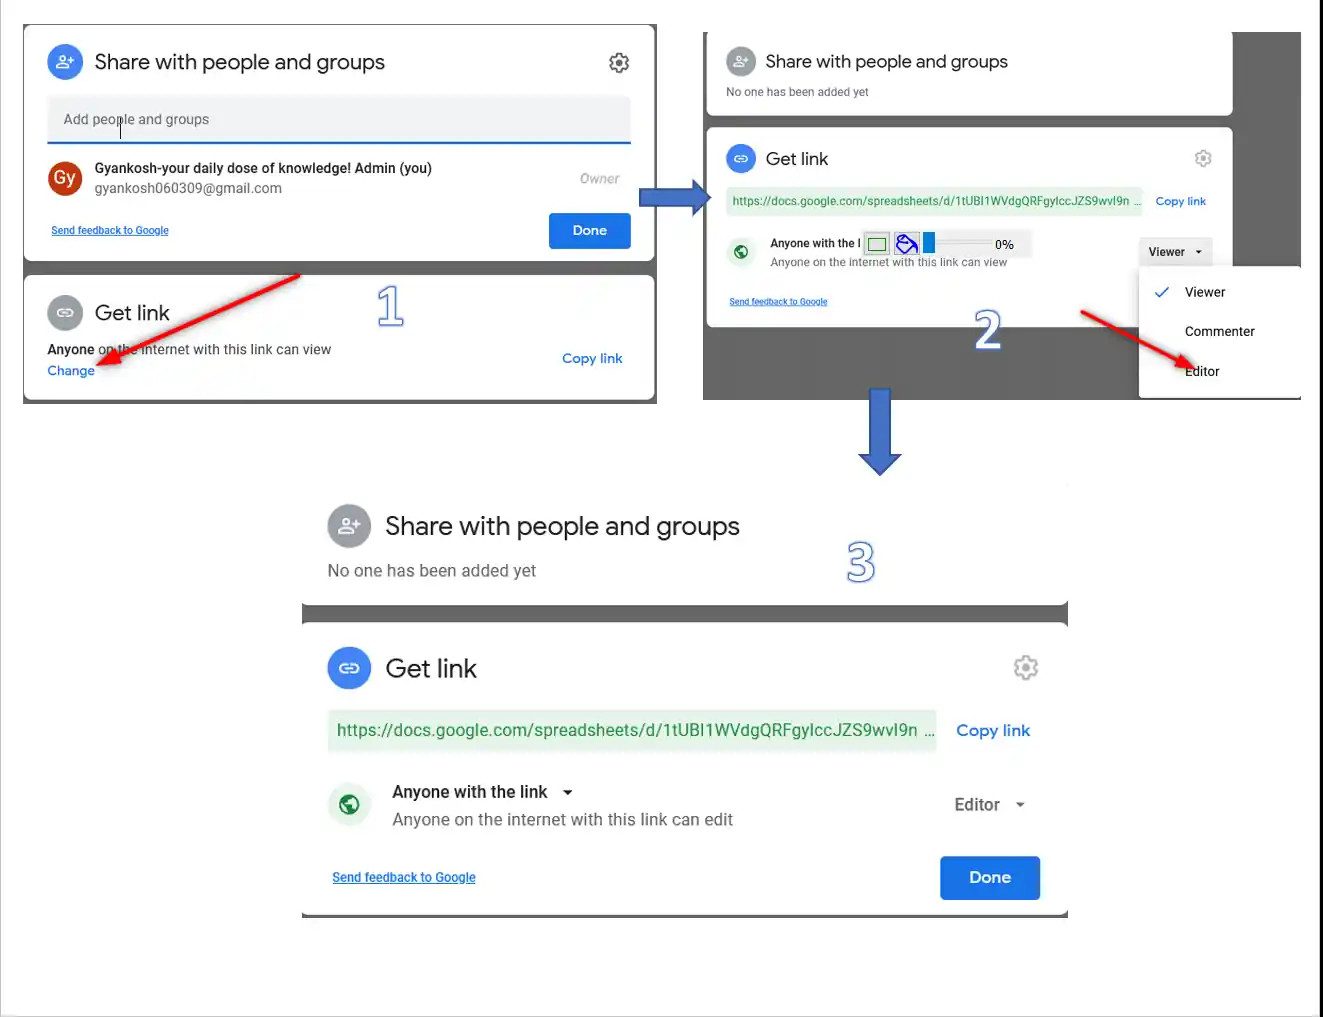
LOOK AT THE PICTURE BELOW- PART 1
- Rather than putting the email ids of the recipients , go to the bottom of the SHARE WITH PEOPLE AND GROUPS window and click CHANGE under GET LINK as shown in the picture below.
LOOK AT THE PICTURE BELOW – PART 2
- Change the ROLE from VIEWER to EDITOR as shown in the picture below from the dropdown.
LOOK AT THE PICTURE BELOW- PART 3
- Click COPY LINK.
STEP 3: SEND AN EMAIL
Send this link through any email to the recipients.
You are done.
In this article, we created and used a volunteer registration sheet with the help of a template.