Table of Contents
- INTRODUCTION
- WHAT IS PRINT AREA IN EXCEL?
- WHERE IS BUTTON LOCATION TO SET PRINT AREA IN EXCEL ?
- UNDERSTANDING THE PRINT AREA IN EXCEL
- STEPS TO SET PRINT AREA
- EXPLANATION
- HOW TO REMOVE PRINT AREA IN EXCEL?
INTRODUCTION
In this article, we’ll learn how we can set the print area in Microsoft Excel.
After we have prepared our reports, most of the time we go for a print. But if you work with Excel, you must have felt that printing the sheet on a proper page is a tricky task many times.
Setting the print area helps us to simply fix the area of the sheet which will be printed.
So in this article, we’ll learn how we can set the print area in Excel.
“SETTING PRINT AREA” is an option for setting the printing area as per need.
WHAT IS PRINT AREA IN EXCEL?
Print area is simply the area or portion of the sheet which will be printed.
Excel sheet doesn’t have a clear boundary as we have in the case of the MICROSOFT WORD which is the reason there are so many different options to set the printing areas or preview the printing areas so that it might not become a problem to print the sheet.
One of such great features is PRINT AREA which is very simple to use but helps us to fix the printing area.
PRINT AREA IS THE PORTION OF THE SHEET WHICH WILL BE PRINTED. IT CAN BE LARGER THAN THE DEFAULT PAGE OR SMALLER THAN THE DEFAULT PAGE.
WHERE IS BUTTON LOCATION TO SET PRINT AREA IN EXCEL ?
The button location for the SETTING PRINT AREA is shown below in the picture.
The button for setting the print area is found under the PAGE LAYOUT TAB under the PAGE SET UP section and inside the menu shown by the button named PRINT AREA.
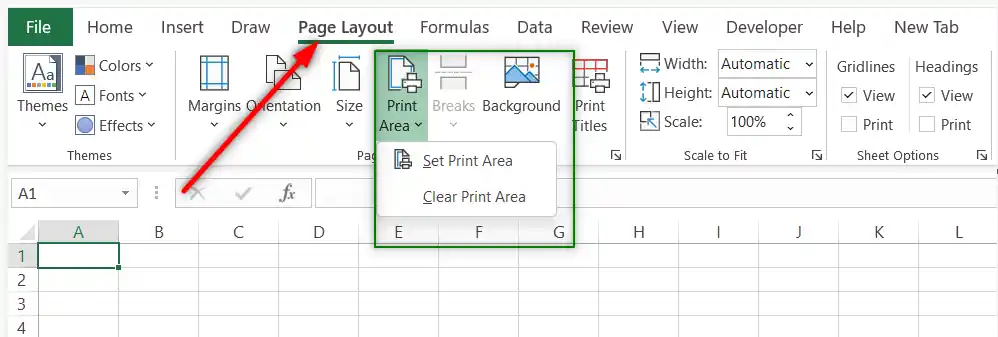
Two buttons under the PRINT AREA are- SET PRINT AREA and CLEAR PRINT AREA.
We can use these buttons or options to set or clear the print area.
UNDERSTANDING THE PRINT AREA IN EXCEL
Have a look at the pic below.

The picture shows the different portions shown by different letters.
We have selected an area and clicked SET PRINT AREA.
In the picture, check out the a b r y letters area inside the dotted line rectangle. It is the selected print area.
If we print this sheet, only the selected portion will be printed.
STEPS TO SET PRINT AREA
- Just select the area.
- Go to PAGE LAYOUT > PRINT AREA > SET PRINT AREA.
- The PRINT AREA is set.
- The animation below shows the steps to set print area in Excel.

EXPLANATION
The animated picture shows the different steps needed to set the print area.
We select the area and go to PAGE LAYOUT TAB and click the PRINT AREA button under which we click the SET PRINT AREA button and the job is done.
Now we can print this area.
HOW TO REMOVE PRINT AREA IN EXCEL?
We can remove the set print area by simply going to PAGE LAYOUT TAB and choosing PRINT AREA> CLEAR PRINT AREA.