Table of Contents
- INTRODUCTION
- WHERE TO USE PICTURES, CLIP ART, ICONS, SHAPES AND SMART ART
- LOCATION OF BUTTONS FOR ILLUSTRATIONS
- HOW TO INSERT PICTURE IN EXCEL?
- HOW TO INSERT CLIP ART IN EXCEL?
- HOW TO INSERT ICONS IN EXCEL?
- HOW TO INSERT SHAPES IN EXCEL?
- HOW TO INSERT SMARTART IN EXCEL?
INTRODUCTION
Beautification is a part of the presentation skills. When we present our report to somebody, the first and foremost aspect which strikes somebody’s mind is the look of the report.
How we are trying to present our data???
Is the blend of text and graphics correct or its just a boring report containing pages filled with numbers and text ?
Insertion of pictures or clip art (pictures provided by Excel) or the different shapes (e.g. a line, line with arrow, directional arrows etc.) are needed for the better presentation of data. It can be done easily using these options.
Let us find out the location of the buttons.
WHERE TO USE PICTURES, CLIP ART, ICONS, SHAPES AND SMART ART
All these options are going to be used a lot. Let us try to enlist the situations when we can use each of them in our reports.
PICTURE: The picture needs to be inserted into report frequently.
If we are presenting some real time report in which we need to show the current situation , the picture needs to be inserted into the report.
Pictures can be any important graphics, logos, banners etc. which are required in the reports.
CLIP ART , ICONS : The clip art or icons [icons has replaced clip art in newer versions of EXCEL] contains a data base of graphic images which we can use in our report at some apt places if we feel so. We have got online support too, if we can’t find the one we need.
It is completely on our discretion where to use these icons or clip arts.
SHAPES: Excel offers the insertion of different ready shapes. We can use shapes in various problems such as creating some graphics for the description of any issue, creating customized charts, creating any marks etc.
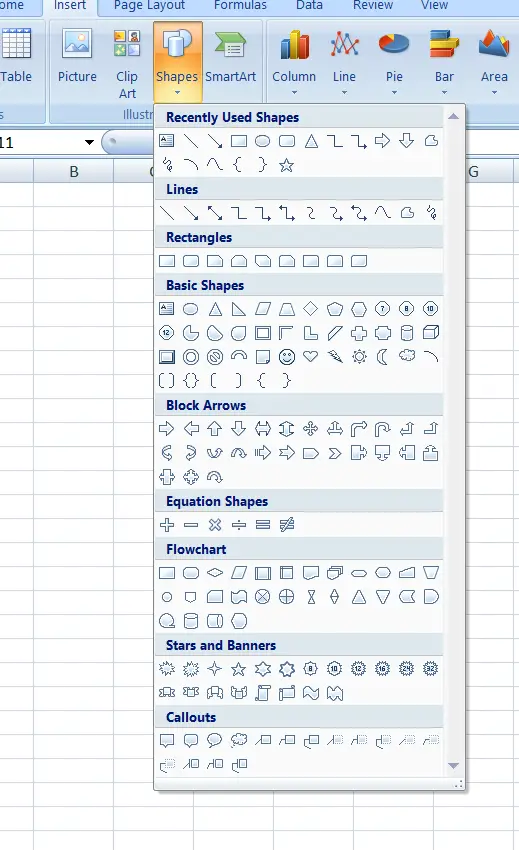
The shapes include square, rectangle, arrows, circles and many others.
SMART ART: It was a very new and unique option given by the Excel.
It is used extensively in showing some hierarchy, some process, any sequence of steps etc.
There are many options available.
Let us see how we can insert all of these.
LOCATION OF BUTTONS FOR ILLUSTRATIONS
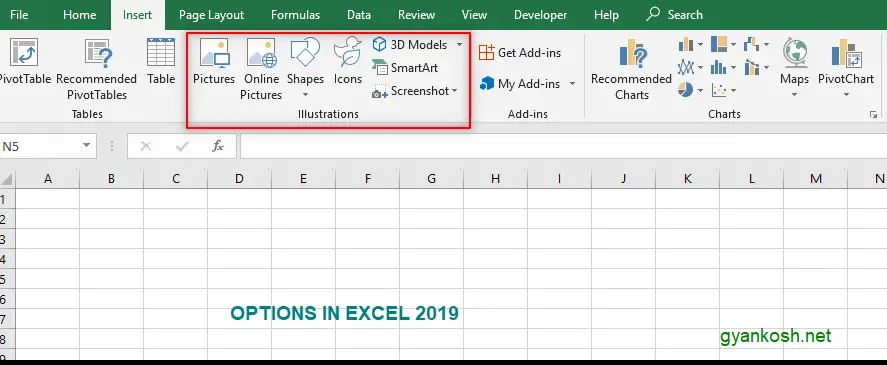
The option for inserting picture, clip art , icons or smart art is present under the INSERT TAB under ILLUSTRATIONS SECTION as shown in the picture below.
HOW TO INSERT PICTURE IN EXCEL?
STEPS:
- Click the location, where we want to insert the picture.
- Click on the picture button.
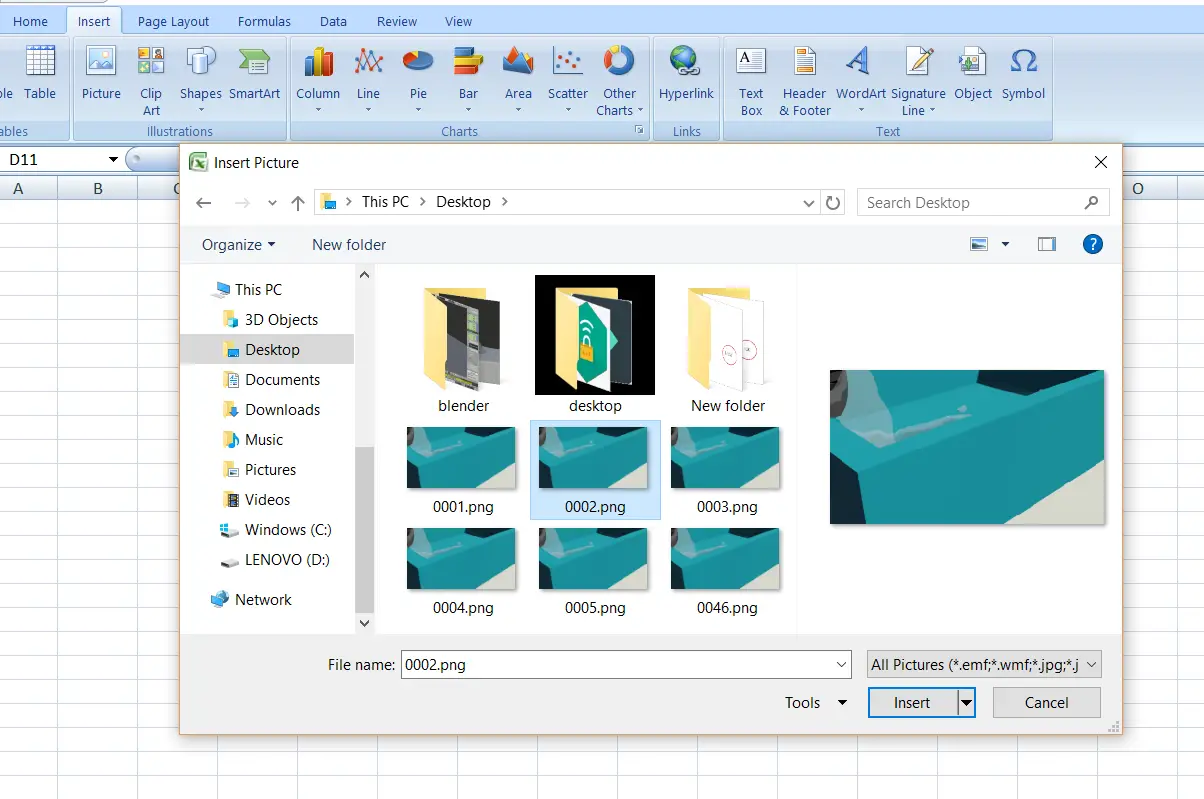
- Picture Selection dialog box will open, as shown in the picture below.
- Browse the picture to be inserted.
- Click INSERT.
- The picture will be inserted at the selected location.
- After the insertion, picture becomes an entity and we can change the style of the picture play with its colors etc.
HOW TO INSERT CLIP ART IN EXCEL?
STEPS:
- Click the location, where we want to insert the clip art.
- Click on the clip art button.
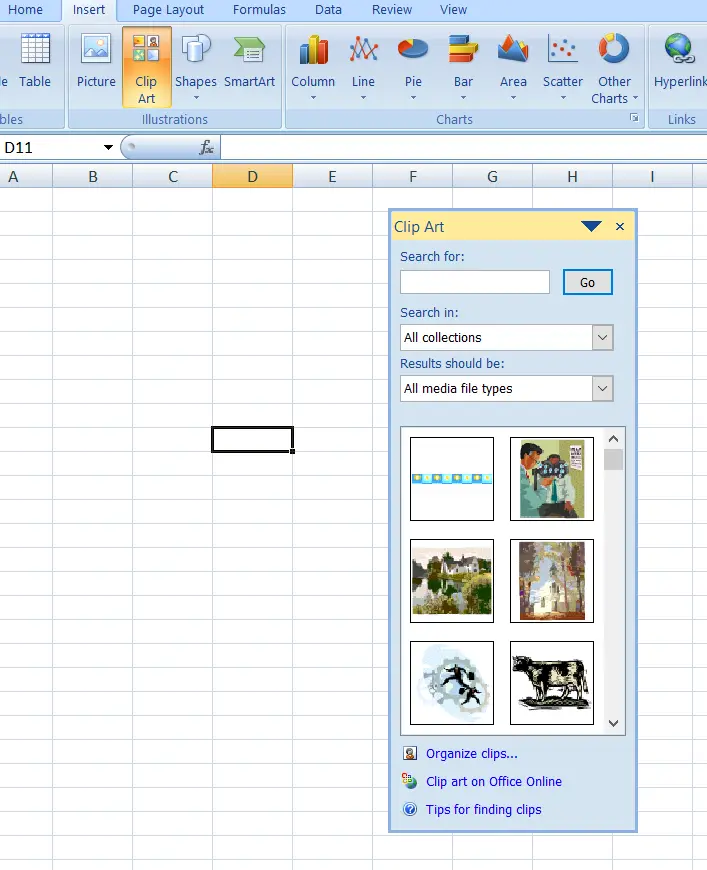
- Picture Selection dialog box will open, as shown in the picture below.
- We can search the clip art or choose the selections.
- Choose the clip art to be inserted.
- Double Click it.
- The clip art will be inserted in the location.
HOW TO INSERT ICONS IN EXCEL?
ICONS ARE PRESENT IN THE NEWER VERSIONS OF EXCEL. [2019 AND 365]
STEPS:
- Click the location, where we want to insert the icon.
- Click on the icon button.
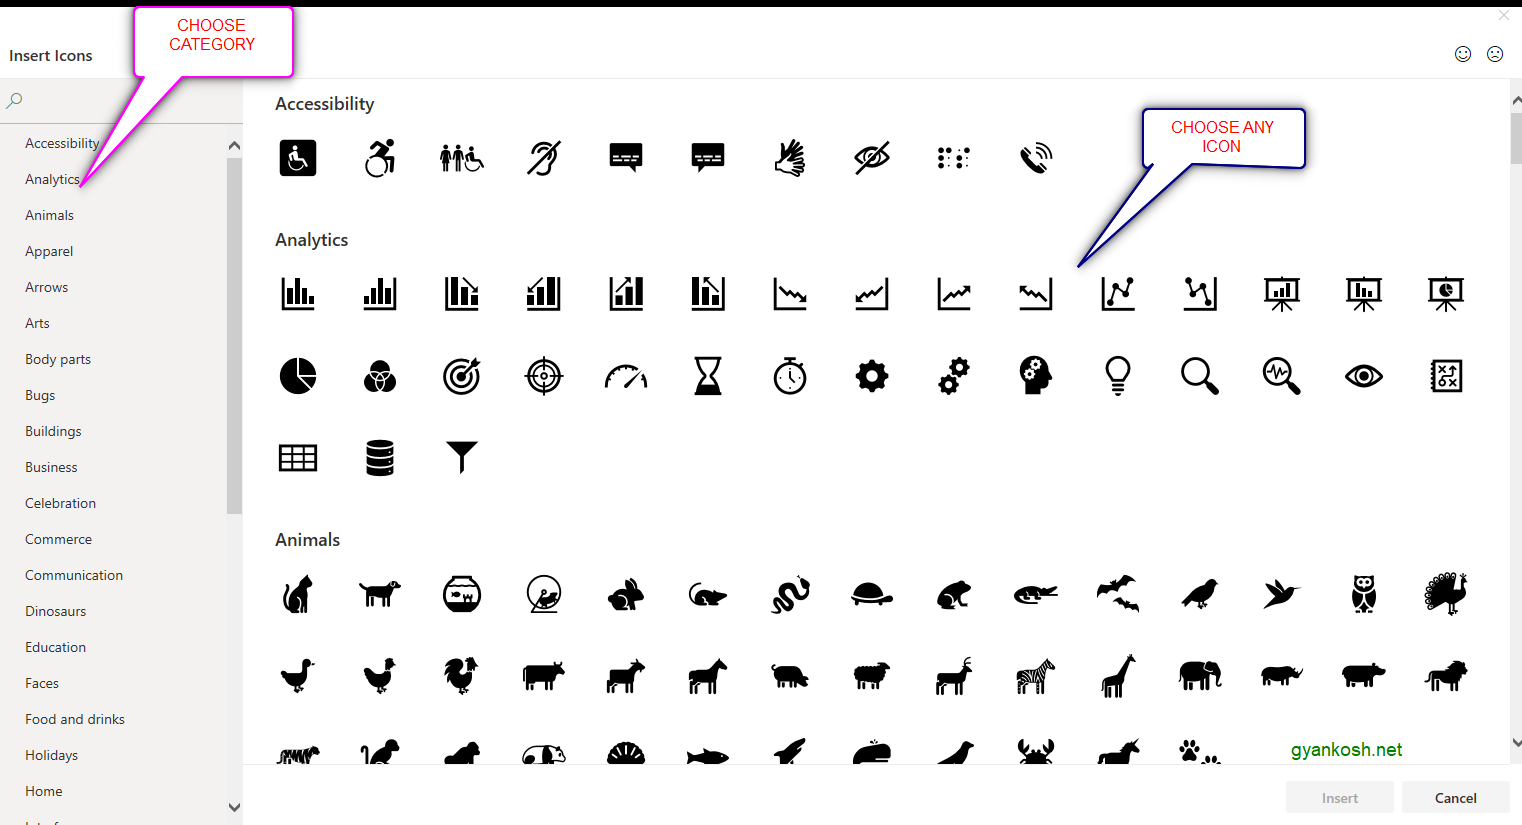
- A detailed icon dialog box will open. [ As shown in the picture below]
- Choose the category on the left, and choose the desired icon from the right as mentioned in the pictures.
- Double click the icon.
- The icon will be inserted.
- After the insertion, icon becomes an entity and we can change the style of the picture play with its colors etc.
HOW TO INSERT SHAPES IN EXCEL?
STEPS:
- Click on the SHAPES button.
- A Choice box will open.
- Double Click on the desired shape and the shape will be inserted into the sheet.
HOW TO INSERT SMARTART IN EXCEL?
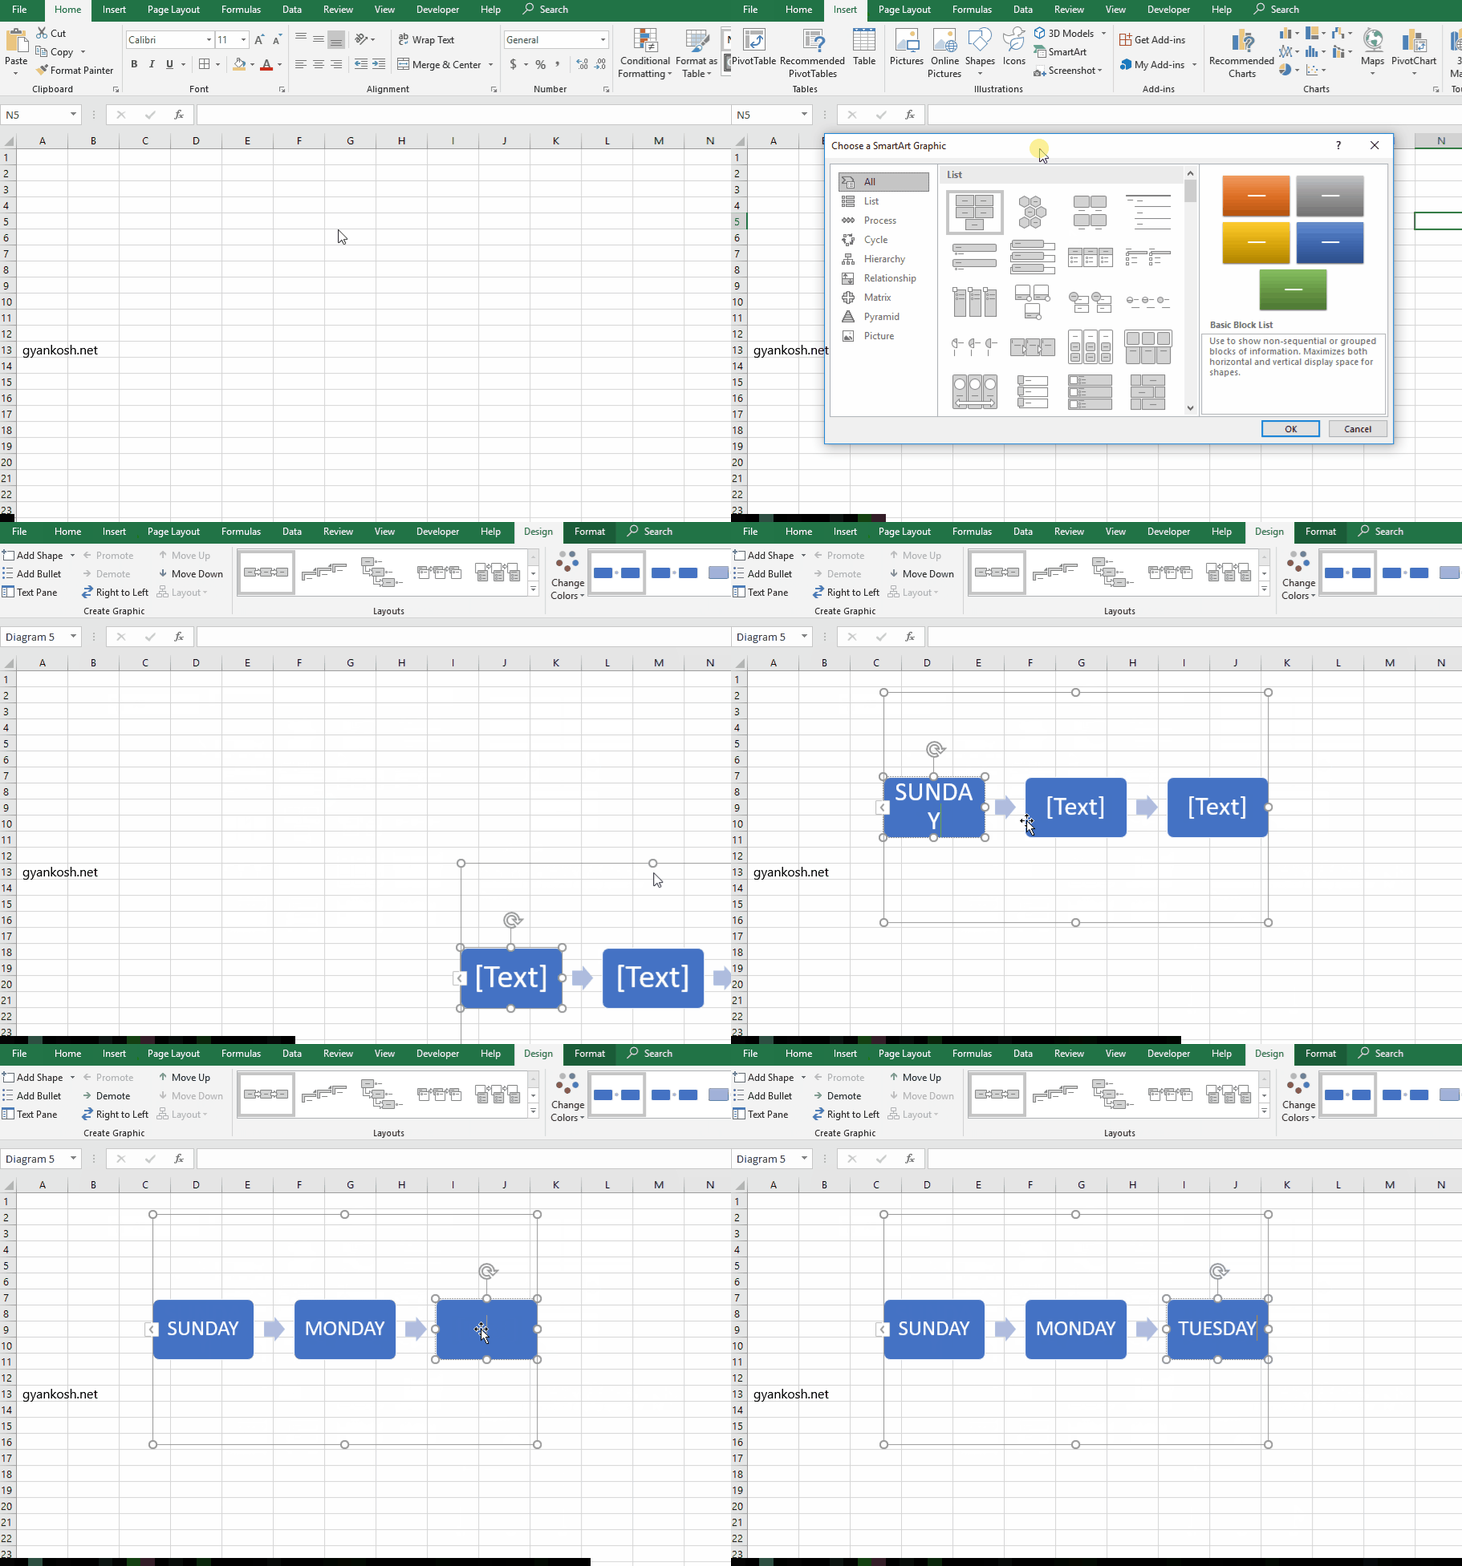
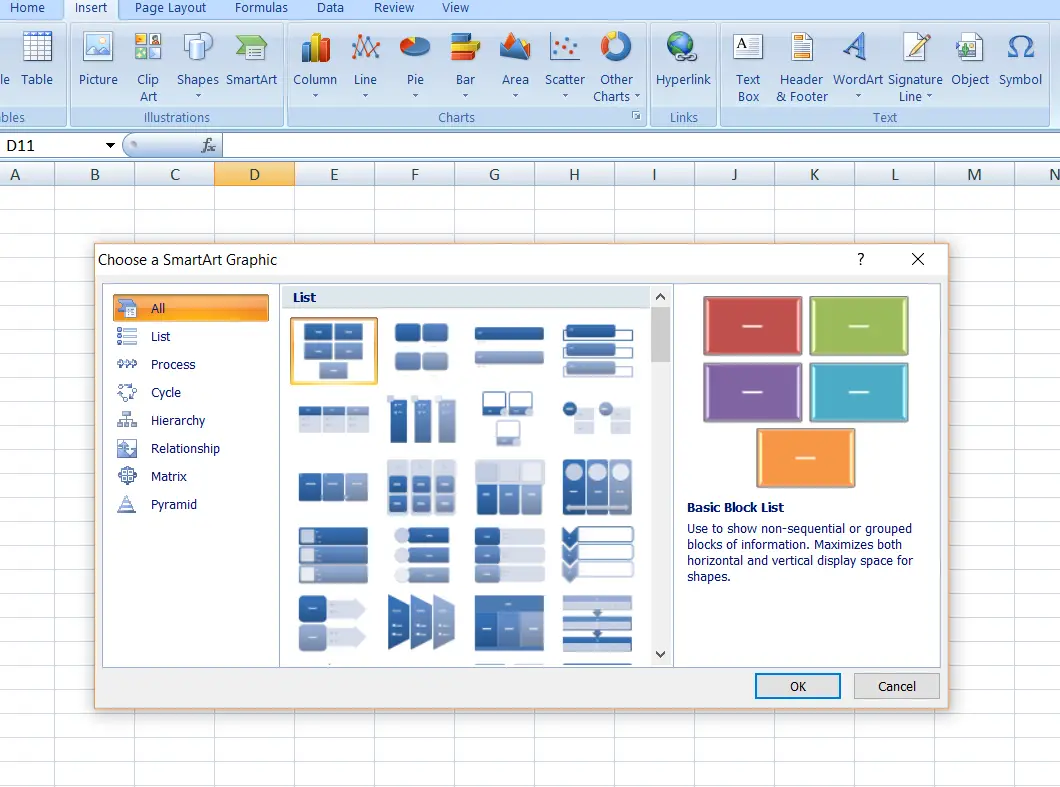
The smart shapes are used for describing different types of lists, processes, cycles , hierarchy, relationships, matrix and pyramid etc.
STEPS:
- Click on the SMART ART BUTTON.
- Choose the type of smart art you want from the given list.
- Double click on the smart art you want to insert.
- Add the data to the smart art.
EDITING THE DATA
- Click on the center of the shapes one by one.
- As we click, the cursor will change to the EDIT TEXT.
- Put the text in all the shapes one by one.
- The smart shape is ready.
- Refer to the picture below for reference.
