Table of Contents
- INTRODUCTION
- WHAT IS UNSORTING OR REVERSE SORTING IN GOOGLE SHEETS?
- WAYS TO REVERSE SORT DATA IN GOOGLE SHEETS
- REVERSE SORT USING UNDO OPTION
- UNSORT DATA IN GOOGLE SHEETS USING HELPER COLUMN
- UPDATE 1
- UNSORT THE DATA USING THE VERSION HISTORY OPTION
INTRODUCTION
Sorting is putting up a number of things in a particular fashion as per the selected criteria. Sorting in GOOGLE SHEETS is one of the very basic and frequently used operation.
SORTING IN GOOGLE SHEETS IS THE PROCESS OF ARRANGING THE TEXT OR VALUES SYSTEMATICALLY AS PER THE SELECTED CRITERIA.
WE HAVE ALREADY LEARNT ABOUT THE SORTING DATA IN GOOGLE SHEETS. CLICK HERE TO VISIT.
But there can be situations when we want our data to be in the original state.
There can be many reasons for that such as
1.We just need to find out any data temporarily and need to come back to the original data.2. There is some mistake and we haven’t kept any copy of the data.
For these options, let us find out the ways with which we can keep a track and come to the original sequence of the data.
** There can be some confusion about the terminology here.
Unsort or reverse sort used here are specifically meant for the situation when we want to get back to the original state.
If you want to REVERSE THE SORT ORDER OF THE DATA.Click here.
or
If you want to RANDOMIZE YOUR DATA Click here.
WHAT IS UNSORTING OR REVERSE SORTING IN GOOGLE SHEETS?
Unsorting here, will be referred to reverse the sorting process.
As we know, sorting data on the basis of any value means to put it in a particular fashion on the basis of the values of the data. It can be ascending or descending.
This article will discuss the ways to undo sort in google sheets.
WAYS TO REVERSE SORT DATA IN GOOGLE SHEETS
There is no direct option to reverse the sorting of the data in Google Sheets.There are mainly two ways to reverse the sorting.
1. Using the UNDO OPTION.
2. Using the HELPER COLUMN.
3. Using the VERSION HISTORY provided in Google Sheets.
REVERSE SORT USING UNDO OPTION
The UNDO OPTION is a life saver in the software or applications as well as in GOOGLE SHEETS if we performed any action which didn’t result in the outcome as per expectation.
This happens many times while working.
In the case of sorting, it can happen when we need to remove all the steps and get the original data. For that, we can use UNDO OPTION.
THIS SECTION DISCUSSES THE WAY TO USE UNDO OPTION IN THE GOOGLE SHEETS. YOU CAN USE THIS OPTION NOT JUST TO UNSORT THE DATA BUT TO UNDO ANY OTHER ACTION TOO.
UNDO MEANS TO GO BACK TO YOUR LAST ACTION.
The button location for UNDO OPTION is shown in the picture below.
STEPS TO USE UNDO OPTION:
- Simply press the UNDO BUTTON as shown in the picture above.
- One press will take you ONE OPERATION BACK.
- We can also use KEYBOARD SHORTCUT CTRL+Z for the same. One press means one step back.
- Click UNDO again and again till we get the original data.
IF, BY MISTAKE, WE REACH THE PREVIOUS STEP OF THE ONE WHERE WE INTENDED TO STOP, WE CAN USE CTRL+Y , OR THE BUTTON NEXT TO UNDO WHICH IS KNOWN AS REDO, TO GO TO THE NEXT STEP.
UNSORT DATA IN GOOGLE SHEETS USING HELPER COLUMN
This step is to be used before we start any kind of SORTING OPERATION on our data.
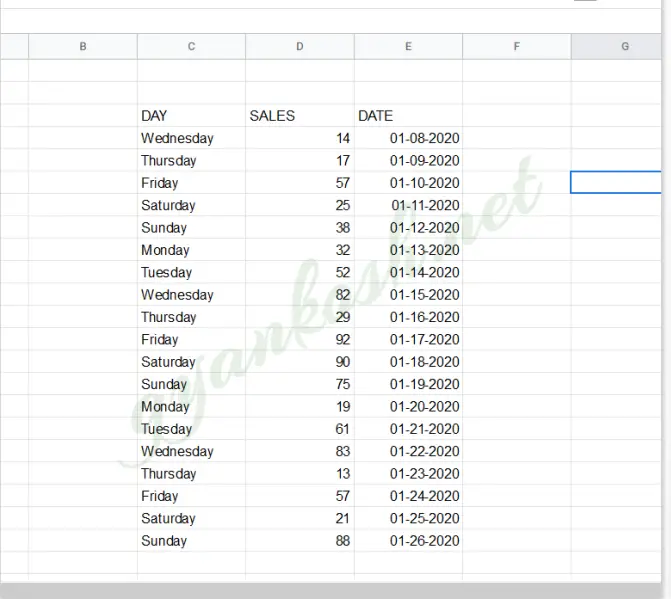
Let us take a sample data to learn the steps.
The data shown above is the original sequence of the data.
If we want to preserve it, or if we doubt that a situation may occur when we need to recover this data or bring the original data, follow the steps.
STEPS TO UNSORT THE DATA.
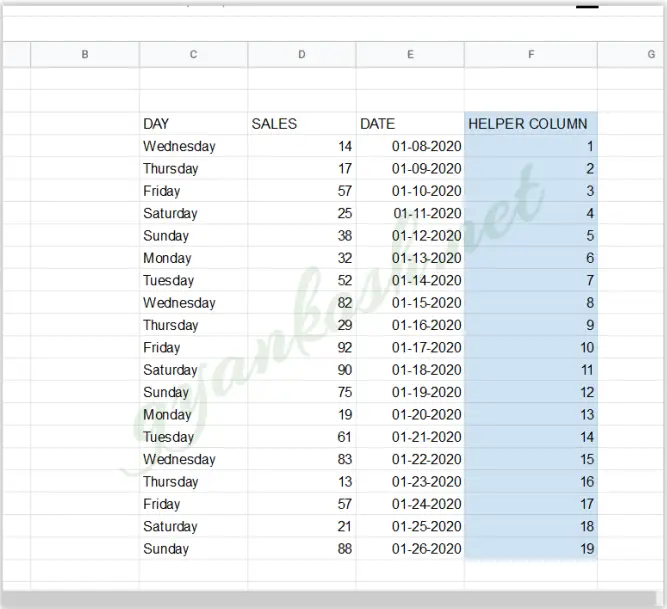
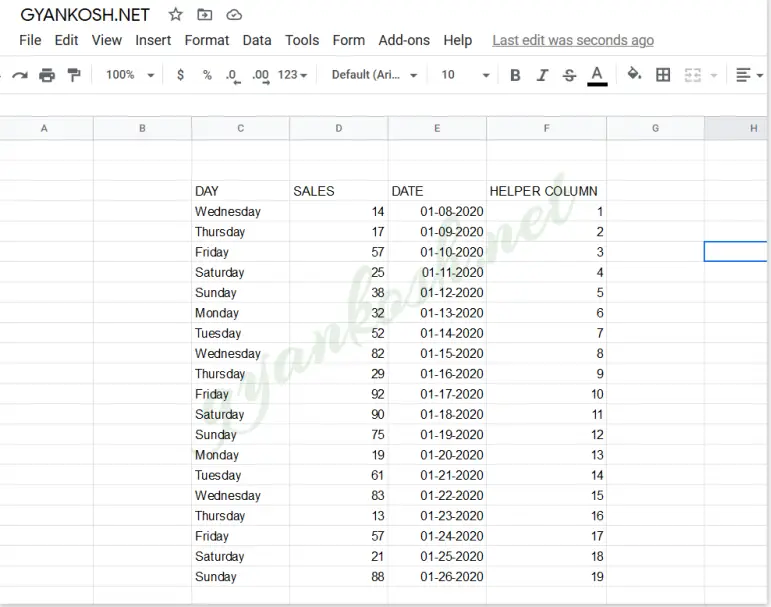
- Before, sorting the data, create a helper column and name it anything. For our example we’d call it HELPER COLUMN as shown in the picture below.
- Put the content in the column as the location number starting from 1 up to the last number.
- In the mentioned example, we have 19 items so in our helper column the number goes from 1 to 19. This is the actual initial position of the items.
- Now we are free to sort the items as the way we want. We are free to do any operation [Except the operation which create any change in the helper column ].
Let us sort the table with respect to the Days, followed by the increasing sales.
YOU CAN LEARN SORTING IN GOOGLE SHEETS HERE.
After the sorting, our data will be something like this.
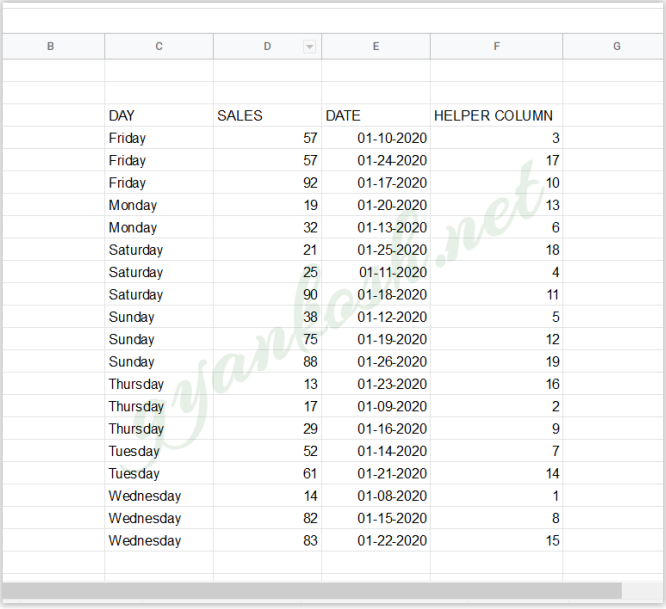
In the above picture, we applied the sorting on the first column, followed by the decreasing order of sales.
[ Kindly don’t confuse the decreasing sales, as it is sub sorting under the day column, if two or more days are same, it’ll sort the sales in descending order.
TO UNSORT THE DATA
Simply sort the data in the ASCENDING ORDER by the helper column.
It’ll bring back the original sequence of the items as required.
Follow the steps to sort the data as per helper column.
- Select the Table.
- Go to DATA MENU > SORT RANGE
- The above shown dialog box will open.
- Check DATA HAS HEADER NOW, if you have selected the Headers also for the sorting.
- Now the COLUMN HEADER NAMES will replace the SORT BY DROP DOWN options as the column header names.
- Choose SORT BY – HELPER COLUMN and A –> Z to get the ascending order.
- Click Sort.
- The original position of the data will result.
UPDATE 1
UNSORT THE DATA USING THE VERSION HISTORY OPTION
Google sheets provides a very important feature which is very helpful for us in UNDO a sort easily.
This feature provides us with a full copy of the document before the edit and after the edit.
The option is known as VERSION HISTORY.
LOCATION OF VERSION HISTORY IN GOOGLE SHEETS
The version history is located on the top of the sheets, in the menu bar.

A VERSION IS A FORM OR A VARIANT OF THE ORIGINAL. WE CAN ALSO UNDERSTAND IT AS THE REVISIONS OVER THE ORIGINAL ONE.
As, version will contain all the version with the changes, we can always try to find out the previous version prior to the sorting which we made by a mistake.
Let us understand the process using an example.
EXAMPLE:
We have a data of 14 STUDENTS whose Height and Weight has been recorded.
We had to sort the data as per the weight but we sorted the data with respect to their height.
| STUDENT NAME | HEIGHT (INCHES) | WEIGHT (KG) |
| STUDENT 1 | 67 | 67 |
| STUDENT 2 | 71 | 65 |
| STUDENT 3 | 73 | 70 |
| STUDENT 4 | 69 | 68 |
| STUDENT 5 | 78 | 65 |
| STUDENT 6 | 70 | 60 |
| STUDENT 7 | 71 | 62 |
| STUDENT 8 | 71 | 75 |
| STUDENT 9 | 73 | 69 |
| STUDENT 10 | 68 | 73 |
| STUDENT 11 | 70 | 79 |
| STUDENT 12 | 73 | 76 |
| STUDENT 13 | 78 | 61 |
| STUDENT 14 | 71 | 69 |

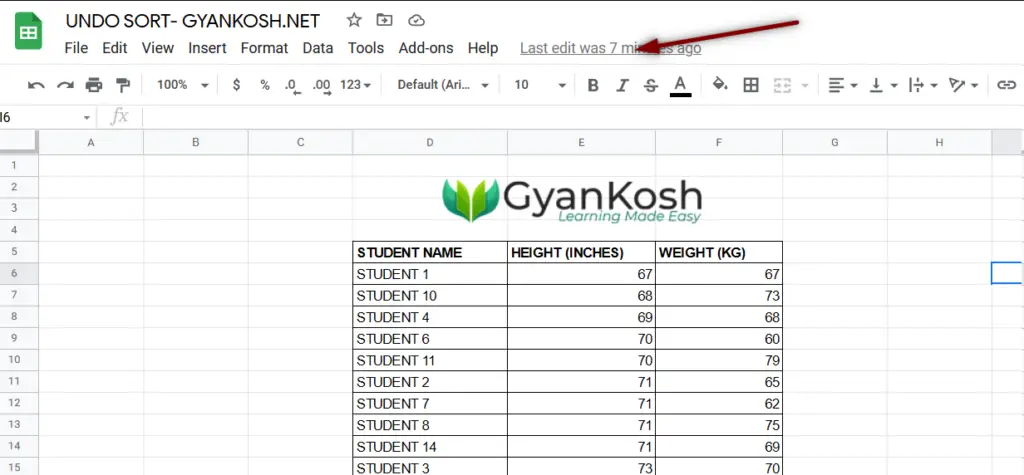
Sort the data with respect to the height of the students.
The data becomes something like the one shown below.

We wanted the data to be restored back to the original before proceeding further.
Let us now try to revert back to the original sequence of the data.
FOLLOW THE STEPS TO UNDO THE SORT BY USING THE VERSION HISTORY OPTION.
- Click on the VERSION HISTORY.
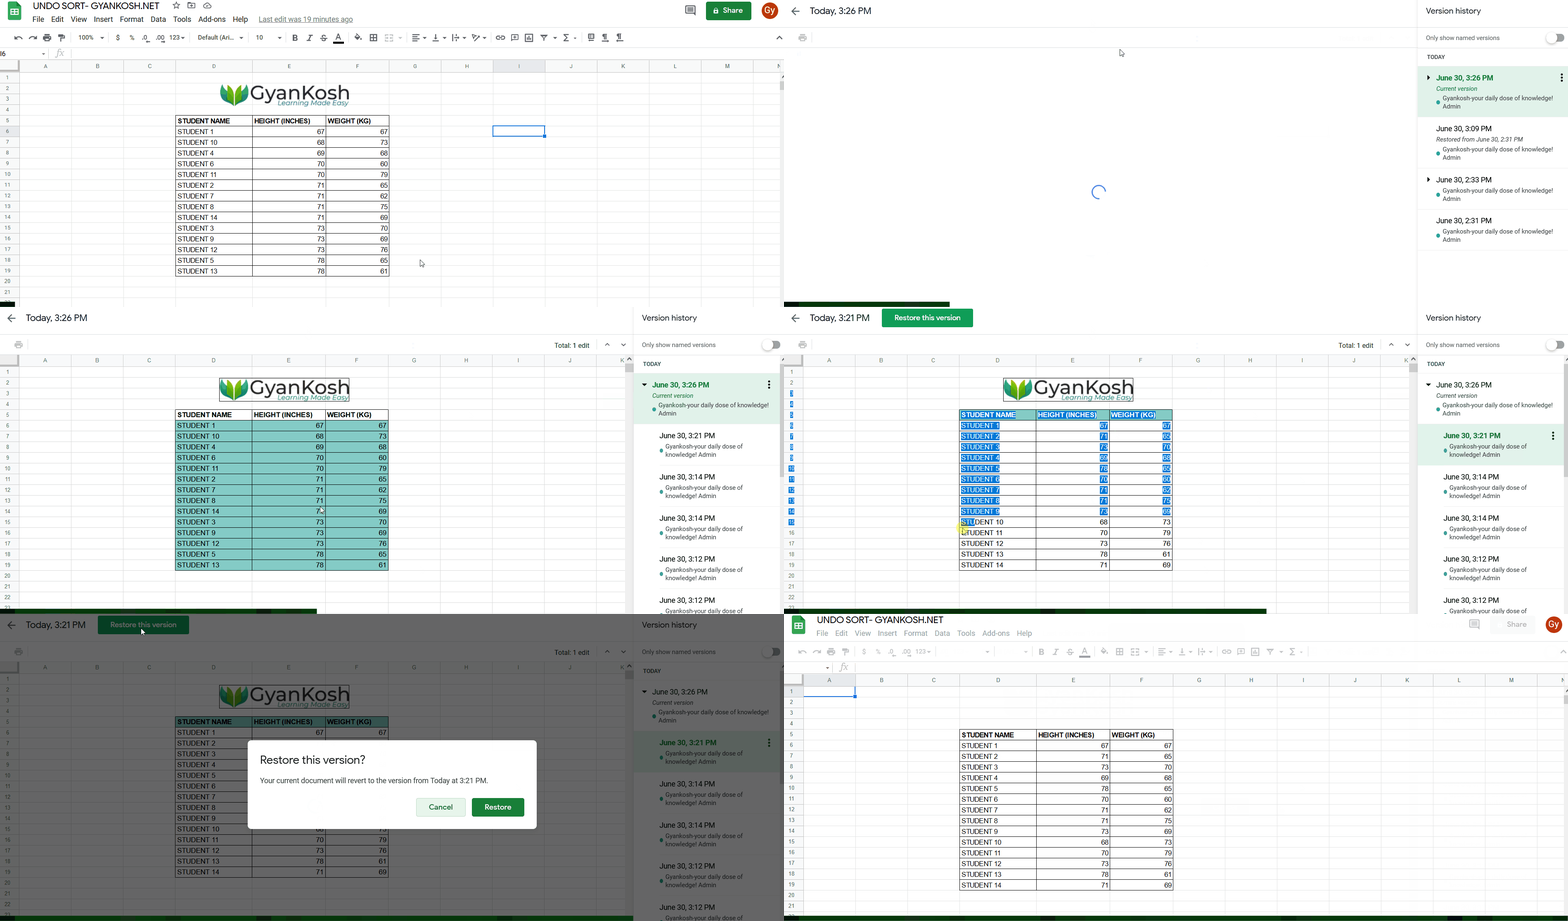
- As we click on the VERSION HISTORY, the following screen will appear.
- Look at the picture below.
- The VERSION HISTORY PANE on the right shows all the versions with the date and time.
- You can choose ONLY SHOW NAMED VERSION if you have named the versions manually otherwise all the available versions will be shown.
Have a look on the date and time to search out the version for our need.
As I have just created this example, I’ll search out the latest version.
- Simply click on the SMALL ARROW before the version to open all the available updates.
- As we click the small arrow, the complete details will open as shown in the picture below.
- Now, click on the version and the data will revert to its state as per the version.

- After we have found the version of our requirement i.e. the immediate version before the sort, simply click it, the data will appear.
- Check the data and if it is the version of our need, click RESTORE THIS VERSION which will appear on the TOP LEFT area near the time.
- The version will be restored and the data will be unsorted and in the original state.
- The complete process is shown in the picture below.
These were a few ways to unsort or reverse sort the data in Google Sheets.

