Table of Contents
- INTRODUCTION
- WHY TO SCAN THE RECEIPTS?
- PREREQUISITES TO SCAN AND IMPORT THE RECEIPTS IN EXCEL
- STEPS TO SCAN AND IMPORT RECEIPTS IN EXCEL
- SCAN THE RECEIPT
- ISSUES WHILE SCANNING OR IMPORTING THE RECEIPTS INTO EXCEL
INTRODUCTION
EXCEL APP for ANDROID offers some of the handy features which are not usable otherwise.
One of such feature is to be able TO SCAN ANY RECEIPT OR DOCUMENT and store it in the sheet.
There can be various and useful reasons to do this which we’ll discuss further in this article.
In this article, we’ll be discussing the complete process, its purpose, pros and cons of scanning and importing the receipts into a spreadsheet using EXCEL application.
WHY TO SCAN THE RECEIPTS?
We get invoices when we purchase any merchandise or when we go to a store to buy households. Although many times we get the digital invoices but still we get printed invoices, bills and receipts frequently.
There can be many reasons for which we want to scan the receipt and import the data to save it for current or future use.
Some of the reasons can be:
- We want to get the data and save the data for monthly budgets.
- We want to check the calculations which otherwise we’d need to do manually.
- Any other type of analysis on our expenditure or any other data.
- Any charts you wanna create for the expenditure like category wise shopping.
- You want the digital copies of the invoices.
and there can be many more individual requirements.
PREREQUISITES TO SCAN AND IMPORT THE RECEIPTS IN EXCEL
The procedure which we are going to discuss here is based on the EXCEL APPLICATION FOR ANDROID ONLY.
It means you must be having the EXCEL APP for android on your phone or tabs.
If you don’t have an EXCEL APPLICATION, simply follow the given steps.
- Open PLAY STORE application from your apps in your mobile phone.
- Enter the application name as EXCEL.
- Click on the appropriate one from the list.
- Click Install and you are done.
YOU CAN CLICK HERE TO FOR A COMPLETE DETAILED PROCESS OF INSTALLING APPLICATION ON ANDROID.
STEPS TO SCAN AND IMPORT RECEIPTS IN EXCEL
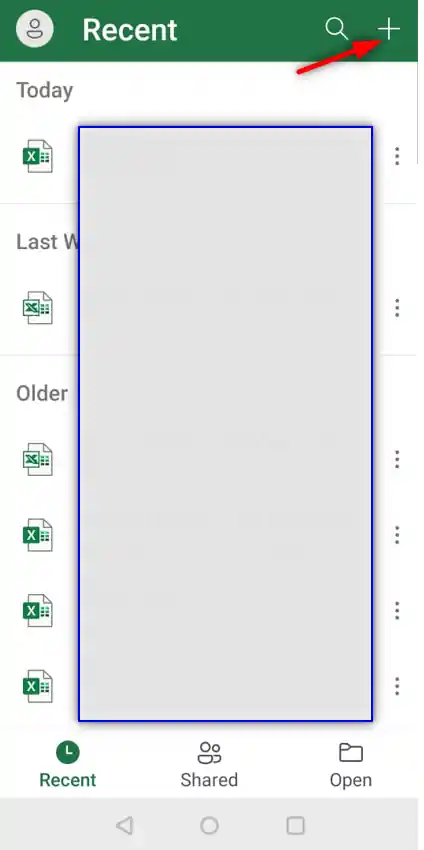
After the application is ready, simply touch the application icon to open the EXCEL APP if not already opened.
YOU MUST BE HAVING A RECEIPT OR ANY OTHER DOCUMENT TO GIVE THIS EXAMPLE A TRY BEFORE YOU START USING THE APP FOR A REAL JOB.
- After the app is opened, the first step is to choose CREATE A NEW SHEET or any other sheet where you want to import your receipt.
- After we create the new file, EXCEL APP will ask for the location.
- Click the location to get more option.
- Select the location of your choice.
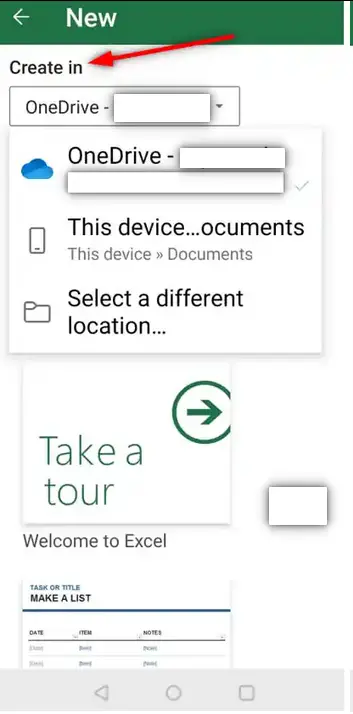
- After the selection of the location , touch
The new sheet is created, or you can simply open the required sheet from the given options.
SCAN THE RECEIPT
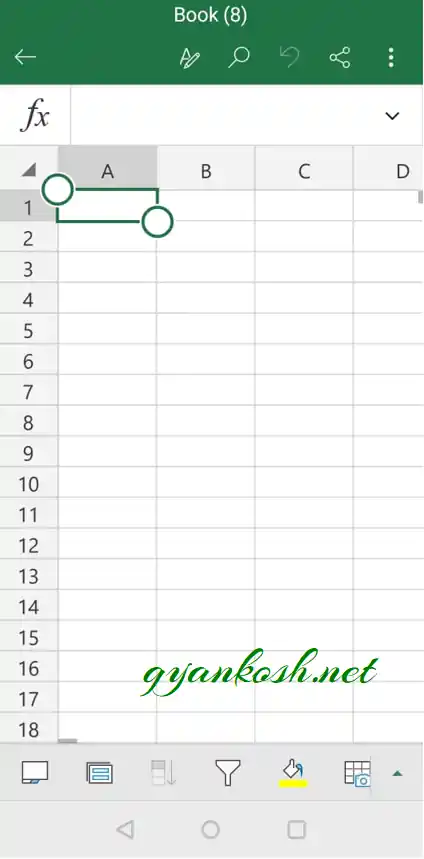
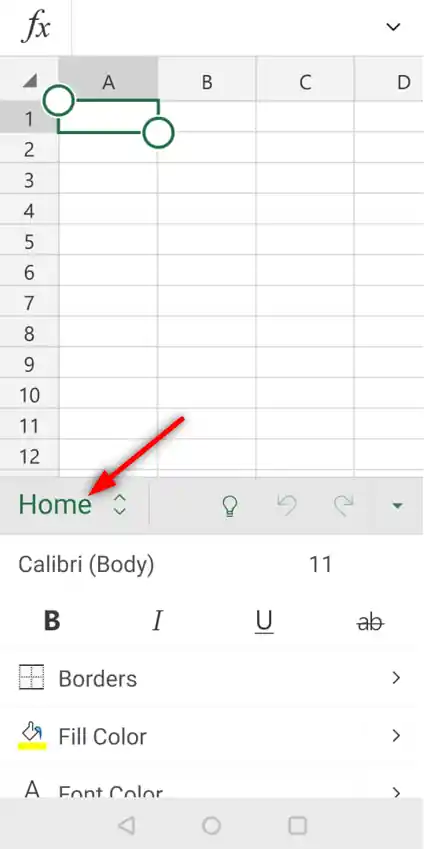
- Open the menu options from the bottom left button on the EXCEL APP.

- As we touch the button, a lot of new options appear.
- Some of the options are visible and some are hidden which are visible when we touch the UPPER ARROW button at the extreme right of the bar at the bottom.
- Touch the UPSIDE ARROW on the extreme right.
THE DATA FROM PICTURE OPTIONS IS DIRECTLY AVAILABLE IN THE VISIBLE TOOLS. IF NOT, FOLLOW THE STEPS.
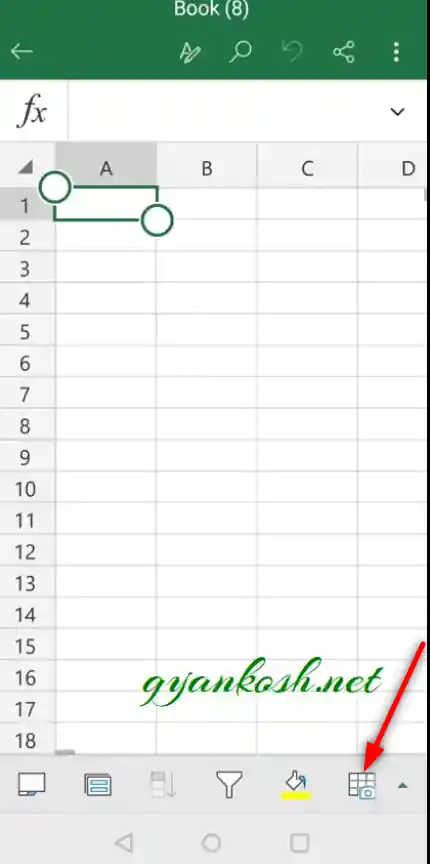
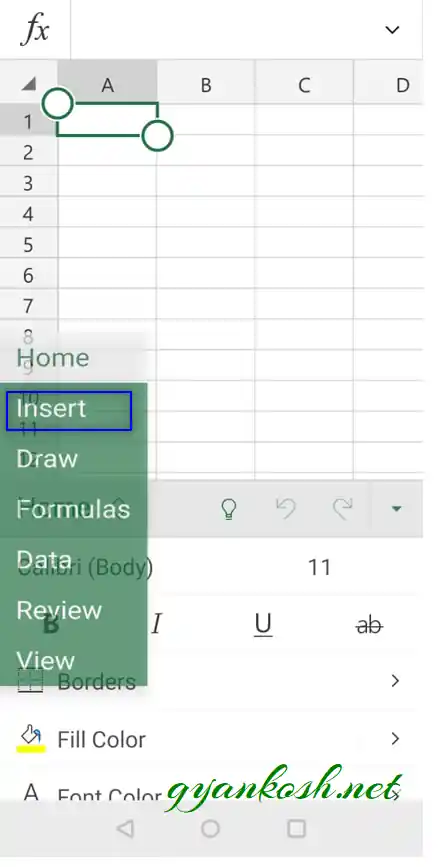
- Go to the TAB BUTTON and touch it to open the complete TAB LIST.
- In the TABS, SELECT INSERT TAB.
- In the INSERT TAB, touch DATA FROM PICTURE, which is the required option.
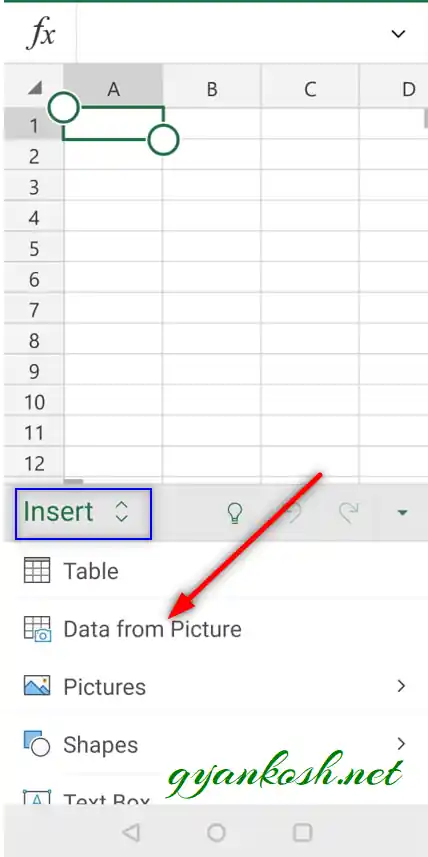
- When we opt DATA FROM PICTURE, camera will open. [ WE CAN ALSO CHOOSE THE ALREADY TAKEN PICTURE FROM THE GALLERY ].
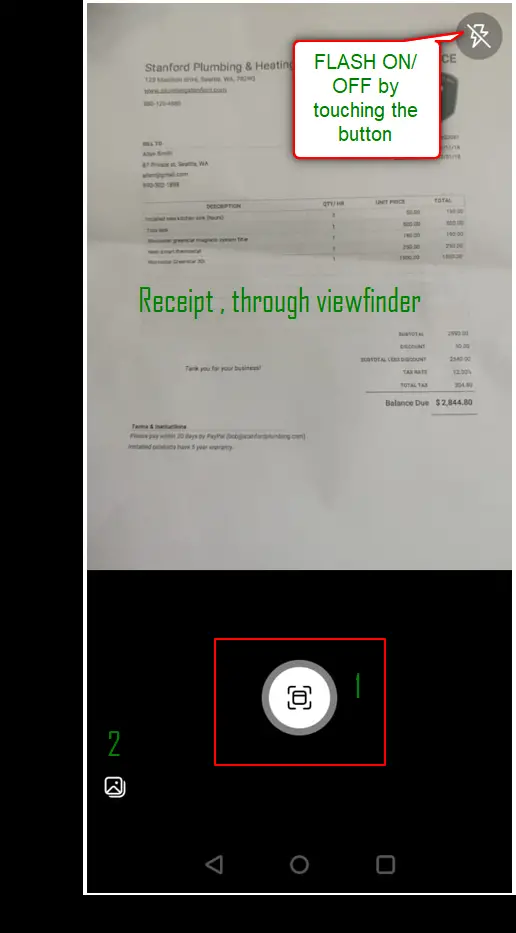
| FLASH ON/OFF | Touch the button to switch the flash on/off. |
| VIEWFINDER | The screen will show you the capture area just the way we use the cam to take a picture. |
| 1 | Touch the shutter button to take the picture. |
| 2 | If you want to get the picture from the GALLERY, click this and choose the picture. |
- Point towards the document of receipt and hold it still till the camera focuses.
- Touch the SHUTTER BUTTON.
- The pic will be taken and the area editing rectangle will appear. [ It’ll be a quadrilateral containing four lines joined by small circles and small bars at the center. ]
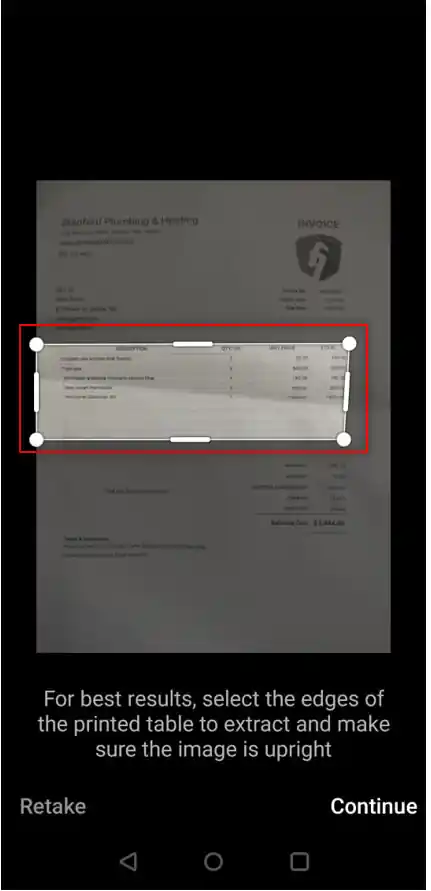
- Adjust the quadrilateral to the required area of the receipt by using the circles and the small bars. [SELECT THE EDGES OF THE RECEIPT FOR THE BETTER RESULTS]
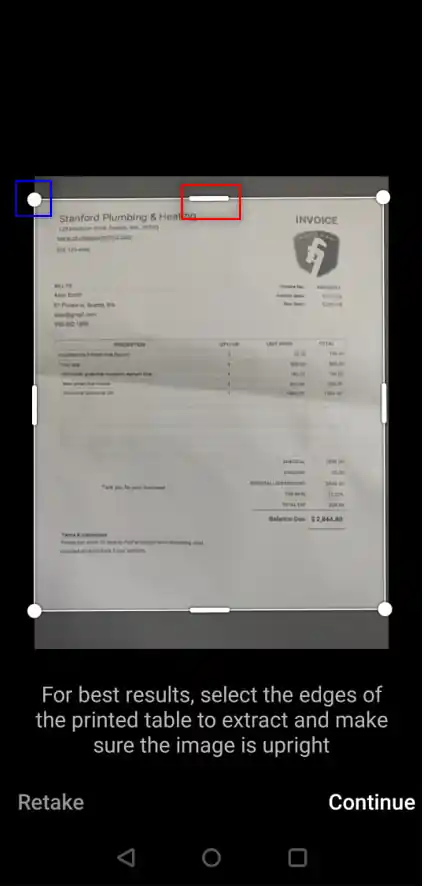
- Click CONTINUE or if you want to get the picture again, click RETAKE.
- As, we click CONTINUE, the EXCEL APP will show you a preview and correction.
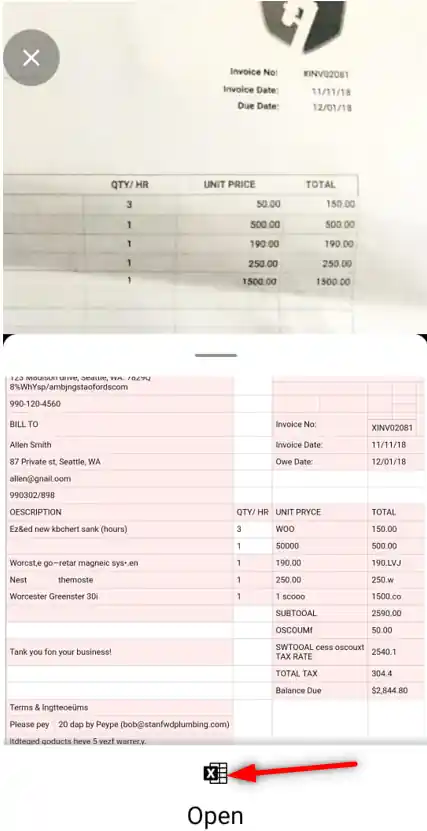
- Simply tap the portion in the lower screen where you want to edit or if everything is correct, directly click the OPEN BUTTON as marked with an arrow in the picture above.
- As we tap on the portion to be edited, the corresponding portion will be highlighted in the upper screen showing the actual receipt for comparison. The lower portion will be editable, choose edit as shown in the picture below.
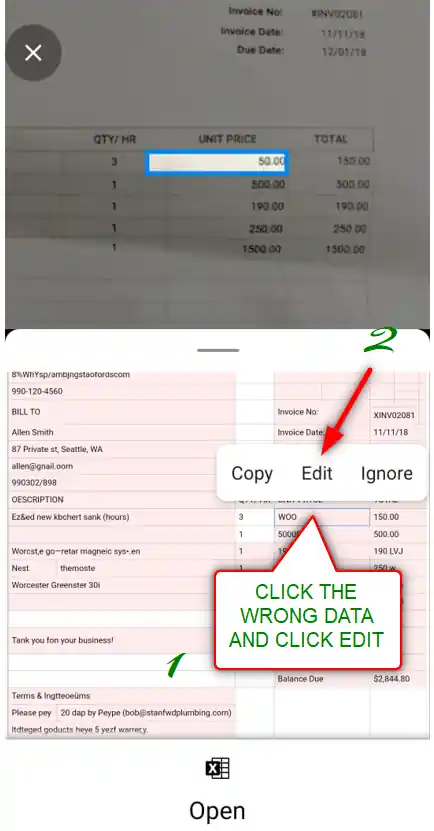
- Repeat the process till you make all the corrections and click OPEN at the bottom.
- If any reviews are pending, Excel will warn you if you want to open the data directly in the Spreadsheet or still want to review the data.
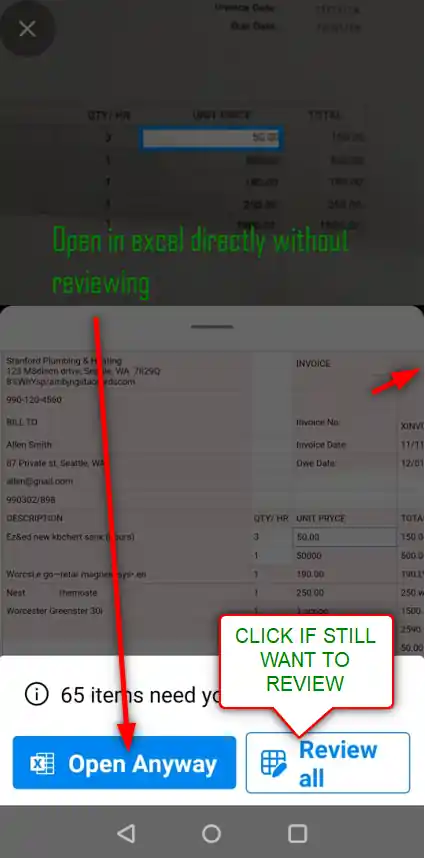
- Click OPEN ANYWAY if you want to make the rest of the changes in the spreadsheet itself otherwise, again choose REVIEW ALL.
- After all the changes are done, click OPEN IN EXCEL BUTTON AT THE BOTTOM.
- If, still reviews are left, Excel would ask if you want to continue to spreadsheet or CONTINUE the review.
- If you choose REVIEW ALL, you can edit the data with reference to the captured picture as already discussed.
- If you choose to continue to spreadsheet, the data will be transferred to the open sheet as shown in the picture below.
- You can edit the data here too but there won’t be any COMPARISON SUPPORT as we did in the earlier steps.
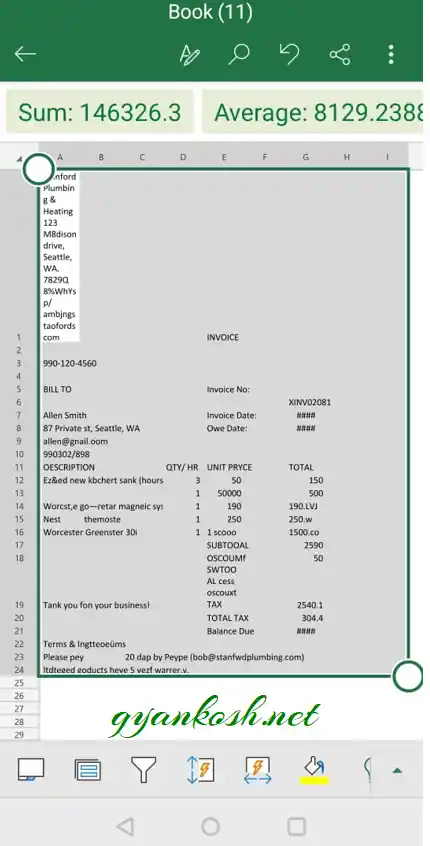
- We have successfully imported the data from receipt or invoice into Excel.
- Save the sheet with the desired name.
Let us discuss a bit confusions about the whole process.
ISSUES WHILE SCANNING OR IMPORTING THE RECEIPTS INTO EXCEL
WHY THE SCANNED DATA IS NOT CORRECT ?
Of course, Excel can’t give you the accuracy as compared to a human being.
It simply tries to process the image taken by the camera and tries to recognize the data. Many times it won’t be able to do so which can be due to the many reasons.
You can try these following options to improve the capture and importing the data.