INTRODUCTION
We frequently need many operations in GOOGLE SHEETS when we are cleaning the data or making it more usable for us.
The applications has their limitations while performing some specific operations. That is the situation when we need some built in operations which can be taken into service whenever needed.
One such need which arises over and again is to split the cells and convert into many columns.
For Example, If we have a date, which is in text format such as
19.12.2020 which is not being recognized by Google Sheets as Date, we can use the utility TEXT TO COLUMNS directly to create three columns having Date, Month and Years separately to get our job done.
In this article, we would learn how to convert TEXT to COLUMNS in GOOGLE SHEETS.
WHEN TO USE TEXT TO COLUMN IN GOOGLE SHEETS
We can use TEXT TO COLUMN in GOOGLE SHEETS under following situations.
When
– We have a column containing many words and we want each word to be in different columns. For Example, if we have a cell containing the Name of the employee as well as his age in the same cell and we want to separate them.
Andrew 45
Ravi 24
Daniel 34
Cameron 44
We can separate both the components into different columns.
– we want to get rid of a portion in the cell. We can use the utility to separate the data and then delete the whole column. Again concatenate the data into one.
WHERE TO FIND TEXT TO COLUMN OPTION IN GOOGLE SHEETS
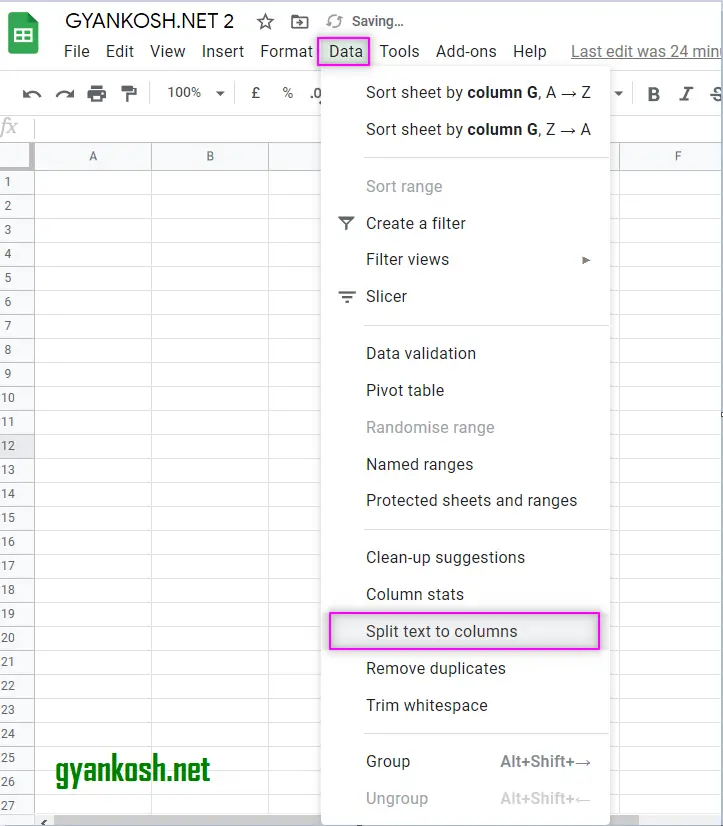
We can find the option of TEXT TO COLUMN under DATA MENU as SPLIT TEXT TO COLUMN.
The location is shown below in the picture.
STEPS TO CREATE TEXT TO COLUMN IN GOOGLE SHEETS
TEXT to COLUMNS:
Its a good feature in GOOGLE SHEETS which facilitates us to convert the text to columns or simply saying to segregate the text to different columns or separate the cell content into different columns on the basis of a delimiter.
EXAMPLE
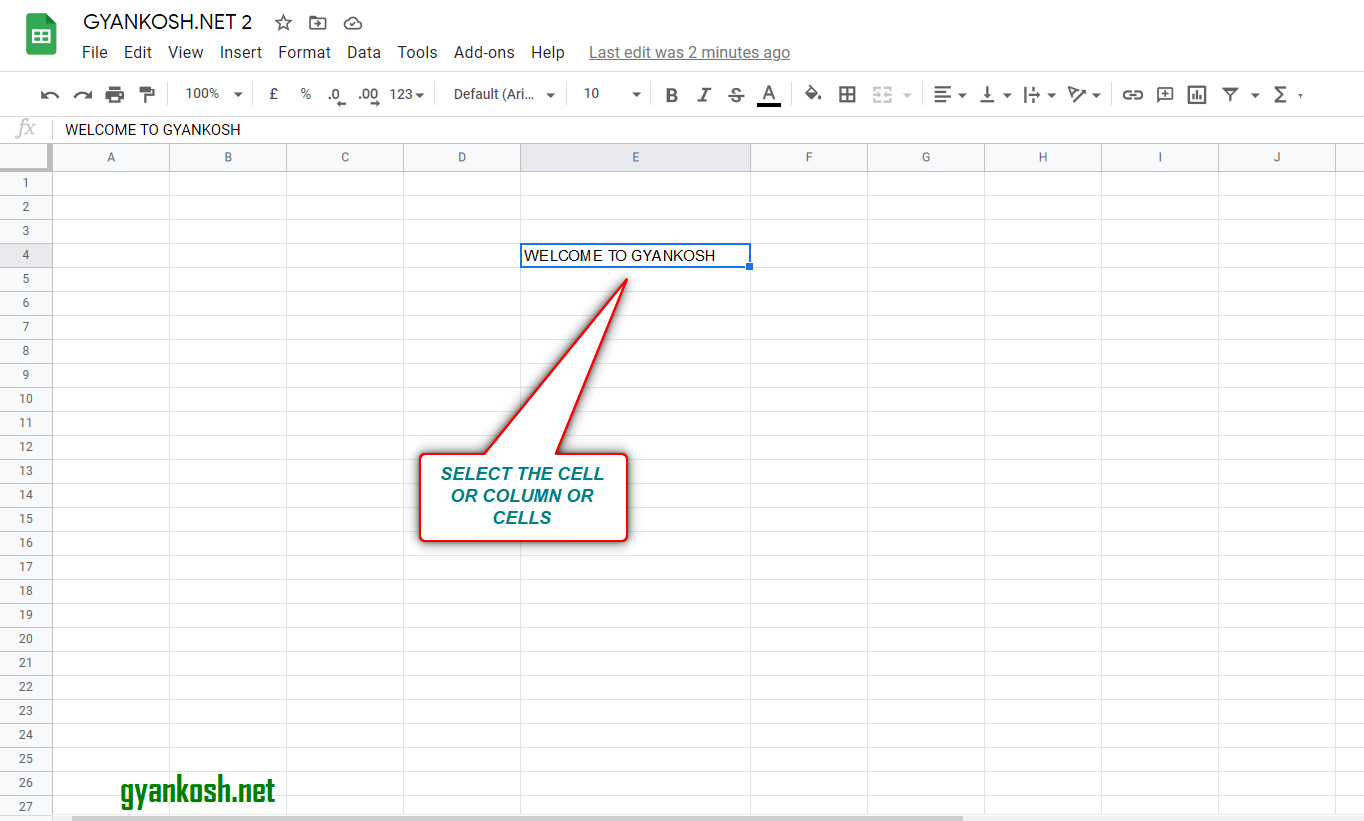
Suppose we have a cell containing the text
WELCOME TO GYANKOSH (SEPARATOR IS “SPACE”)
TARGET is to segregate the above phrase into three columns which is our objective to split a cell into columns. So follow the steps to split the text into columns.
STEPS:
- Select the cell containing the text. (A full column can be there but for our example, we are taking a cell only).
- After Selecting the cell, go to DATA MENU and choose SPLIT TEXT TO COLUMNS.

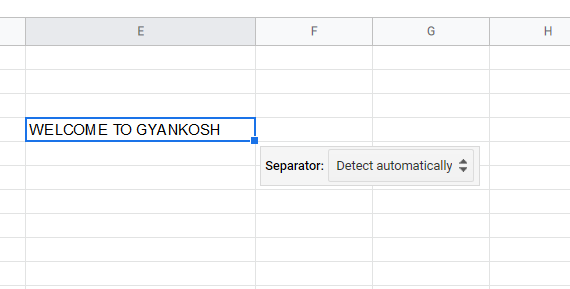
- As we click the option, a small popup would appear near the selection asking for the type of separator.
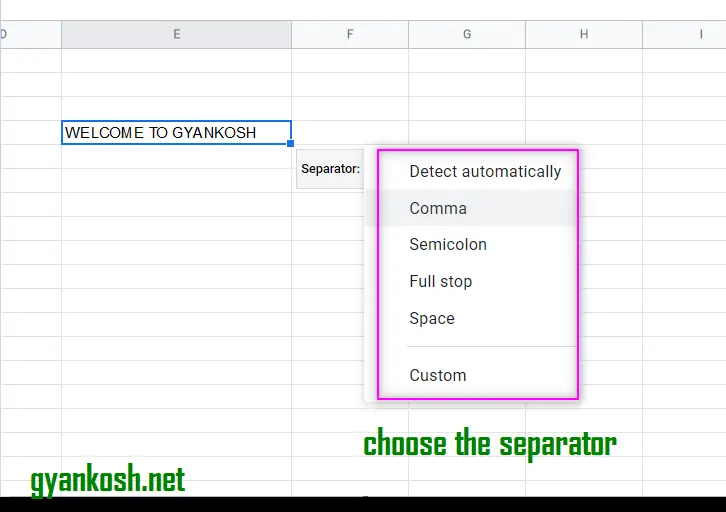
- Click the DROP DOWN as shown in the picture below and choose SPACE as we only have space in our data. We can also choose other types of separators.
- The picture below shows the process.
- As we choose the option, the text will be split and would be divided on the spaces and put in the different adjacent columns as shown in the picture below. The first column being the cell containing the text.
- The picture below shows the process.
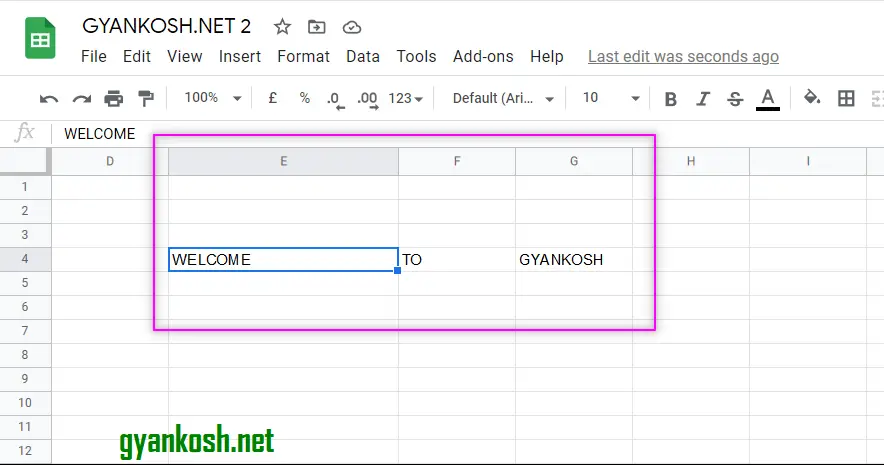
The picture above shows the result of USING SPLIT TEXT TO COLUMNS in GOOGLE SHEETS.
SEPARATING TEXT TO COLUMNS USING CUSTOM SEPARATOR
Although , frequently used separators are enlisted in the dropdown list, but if we need some other delimiter [ separator ] we can choose the custom option.
Let us take an example and learn to use custom separator in brief.
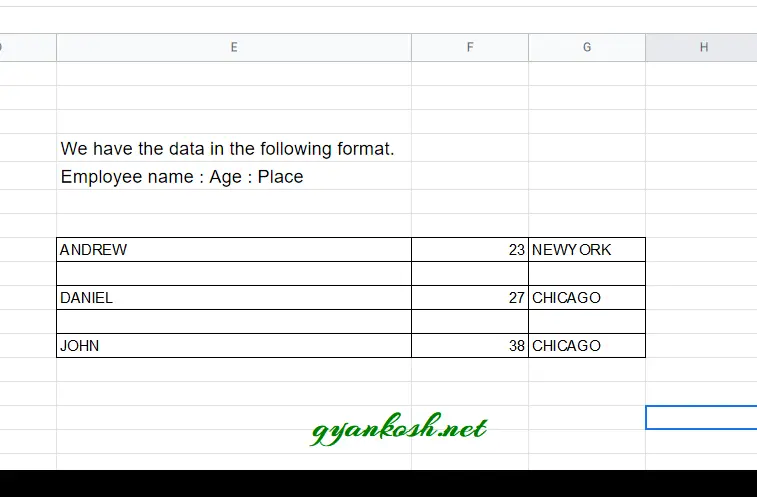
For Example if our cell contains the text as
ANDREW:23:NEWYORK
DANIEL:27:CHICAGO
JOHN:38:CHICAGO
These three employees’ data is to be separated into different columns.
FOLLOW THE STEPS TO SPLIT THE GIVEN TEXT INTO DIFFERENT COLUMNS:
- Select all the three cells.
- Go to DATA MENU>SPLIT TEXT TO COLUMN.
The following screen will appear.
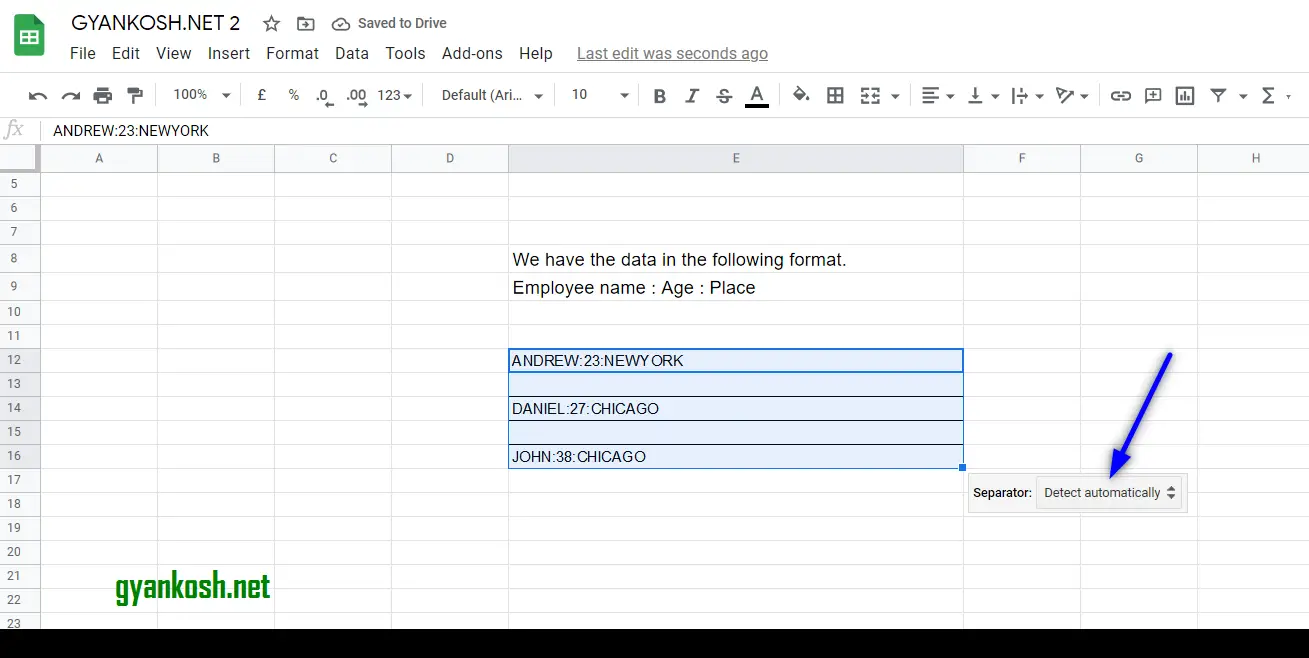
- After clicking the option, GS [ Google Sheets ] will ask for the separator.
- Click on the dropdown and try to find our separator which is a colon [ : ]
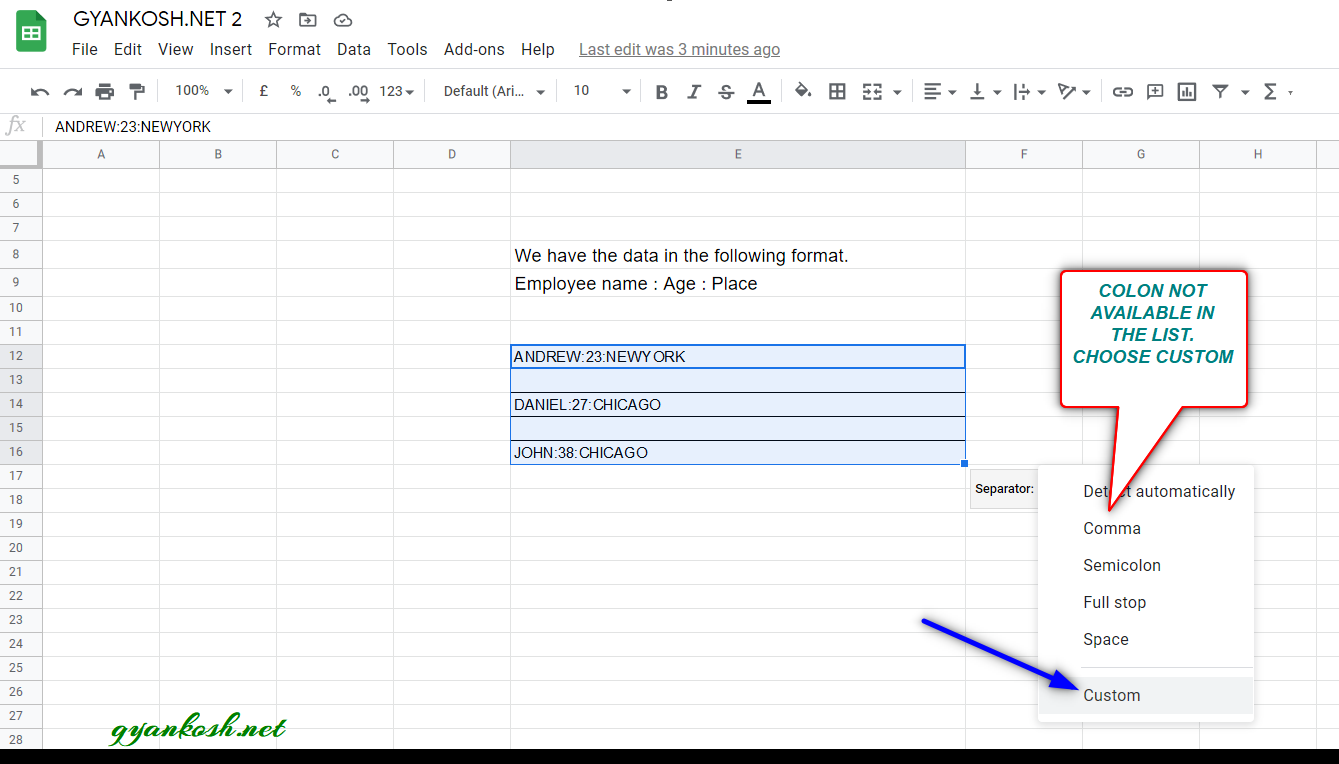
We can’t find the colon separator , so we need to enter it.
Click CUSTOM.
A small field will be opened.
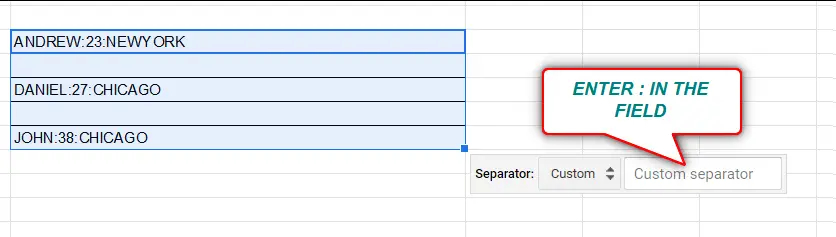
In this field, enter : [ colon ].
As we put the separator, the data will be split into three columns.
The following picture shows the results.
A FEW POINTS TO REMEMBER WHEN USING TEXT TO COLUMN UTILITY IN GOOGLE SHEETS
Here are a few points to remember while using TEXT TO COLUMN option in google sheets.
- It is a one go option. It’ll act only once when we select the cells or columns and use it. After we have already used it, it doesn’t matter what happens to the original data, there won’t be any change in the result.
- If there are more than one separator continuously, it’ll give a break in the columns and blank columns will be inserted in the result. For Example, if the text to be split is HELLO;HOW;;ARE;YOU and we want to split it with the delimiter semicolon [;] , it’ll create an empty column at the position 3 due to two continuous separators.