INTRODUCTION
“GOOGLE SHEETS is the name given to the spreadsheet software offered by GOOGLE ” which comes bundled with the GSUITE or it is also available free of cost for personal use.
Google Sheets is also becoming a popular option among the users due to the various additional features of sharing and protection which are very easy to use.
Recently , a new great feature was added into Google Sheets which makes us to be able to see the complete history of a cell like what changes were done and by whom.
This feature is going to be very useful to check the different changes made by the different sheet users.
WHEN TO CHECK THE CELL HISTORY IN GOOGLE SHEETS ?
The feature to be able to see the different changes made by the different users on the common shared sheet [ Which is shared by us to be worked upon by many people ] is useful to check the different changes made by the users.
The complete information of the old value and new value within the cell is shown with the user name, who did it.
HOW TO CHECK THE CELL HISTORY IN GOOGLE SHEETS?
Let us find out the steps to see , how we can check out the history in google sheets. But , first of all, let us understand the CELL HISTORY.
Cell History is the function about which we ‘ll be learning in this article.
CELL HISTORY IS THE LIST OF PAST ACTION SUCH AS THE VALUE CHANGES AND THE USER , WHO MADE THOSE CHANGES, IN A PARTICULAR CELL ONLY.
EXAMPLE – HOW TO CHECK THE CELL HISTORY IN GOOGLE SHEETS
Let us learn the usage using an example.
The following picture shows the WORKING HOURS DATA of TEN EMPLOYEES for FIFTEEN DAYS.

We’ll make changes in a random cell and check the history after that.
Let us make some changes in the working hours of Employee 5 on DAY 8 from 16 > 10 >8 >2>9
STEPS TO CHECK THE HISTORY
Follow the steps to check the history.
Right click the cell where we want to check the editing history.
In our example, we made the changes in cell K11 but let us check any other cell.
Right click the cell N9.
Choose SHOW EDIT HISTORY.
We can see that the USER is shown with a small instruction at the bottom which shows the ACTION such as REPLACED = RANDBETWEEN…. which was the initial function we used to get the random data.
After this, let us find out the cell where we made the changes.
Right click K11, and choose SHOW EDIT HISTORY.
The result will show the user which is GYANKOSH and the instructions will show the action made on that cell.
The complete process is shown below in the animated picture.
HOW TO CHECK THE DIFFERENT STEPS OF THE HISTORY
We already learnt the way we can check the history of the editing in any cell.
Now let us find out the way to check different steps.
We can do that using the <> arrows shown in the right upper corner of the small window.
The user is already shown in the animation above.
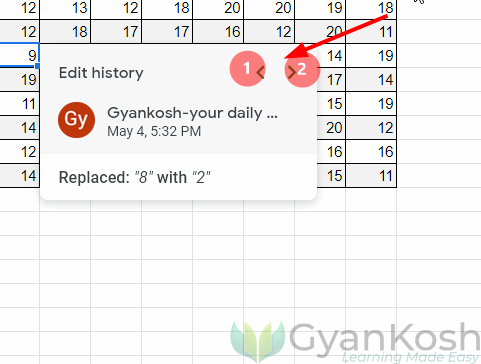
The picture above shows the arrows which can be clicked to check the different steps.
- Check the previous step.
- Check the next step.
FEW THINGS TO REMEMBER
- History will show the past values and actions related with the values and not with the formatting.
- History will be shown for the cell only i.e. a single cell.