Rows and columns are the building blocks of any spreadsheet application like GOOGLE SHEETS which makes it mandatory to learn the ways to edit the rows and columns at our will.
We can add the columns and rows in a number of ways in Google Sheets.
Let us first understand what a column is.
Simply stating
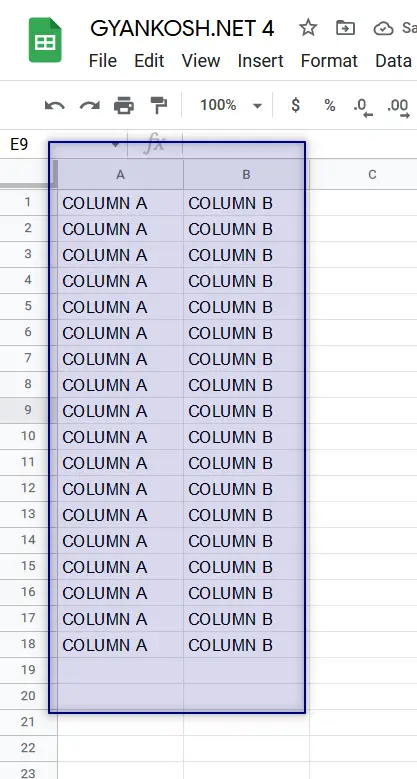
A COLUMN IS THE VERTICAL SET OF CELLS IN GOOGLE SHEETS. [ OR ANY OTHER SPREADSHEET APPLICATION ]
The following figure shows a column. The blue color lines shows the columns.
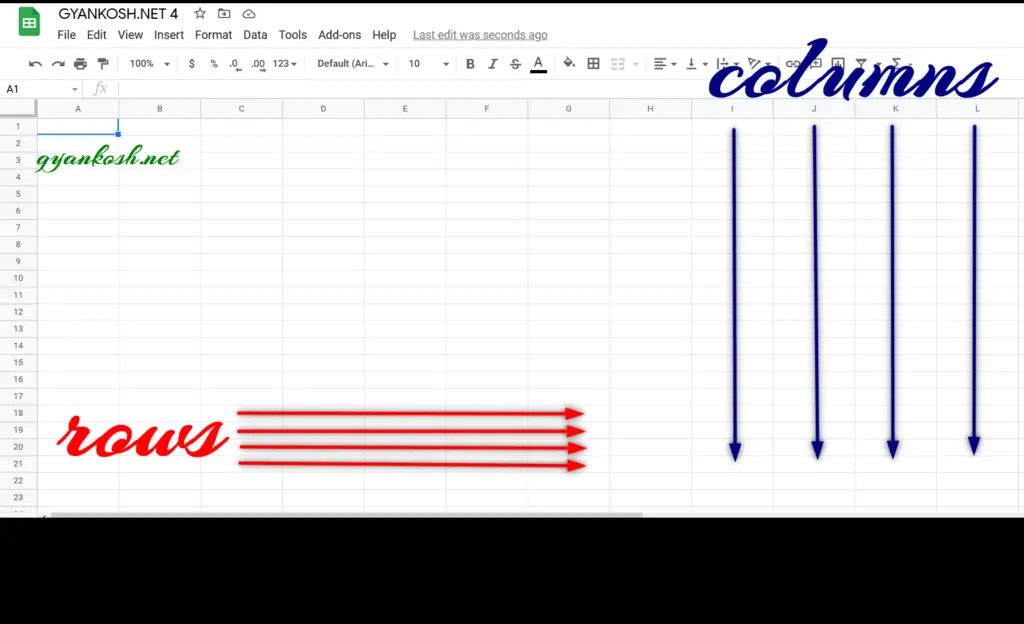
The columns are needed to segregate the data in the vertical categories which is a frequently used layout for the reports.
In this article, we’ll learn different ways to add a single or multiple number of columns in any required position in google sheet easily.
WHEN DO WE NEED TO INSERT A SINGLE OR MULTIPLE COLUMNS IN GOOGLE SHEETS
There are many situations when we need to insert a single or multiple columns.
We have all the columns available when we are building a report. But while proof reading or checking any report or a point of time when we can’t go back and rebuild our report, we might need to insert a single column at a specific position. The position can be mentioned as to the left or the right of a particular column.
Similarly , we might need to insert more than one column or a group of columns at a specific position mentioned with a column name.
The good news is that we have the option of inserting a column or group of columns anywhere in the sheet at any point of time while report making.
A SINGLE OR MULTIPLE COLUMNS WILL ALWAYS NEED A POSITION TO BE INSERTED AND THAT’LL BE POSSIBLE ON THE BASIS OF A REFERENCE COLUMN. FOR EXAMPLE, SINGLE COLUMN TO THE LEFT OR RIGHT OF COLUMN E OR THREE COLUMNS TO THE LEFT OR RIGHT OF COLUMN G AND SO ON…
ADDING SINGLE COLUMNS IN GOOGLE SHEETS
Single columns can be added in google sheets in the following ways which are discussed further in the article.
WAY 1 : ADD SINGLE COLUMN TO THE RIGHT IN GOOGLE SHEETS
We can insert a single column easily anywhere in the sheet with the help of a reference column.
For example, if we want to insert a column at position C, we’ll select the column B and then use the process discussed below and we’ll have a new column at place of C.
We can insert a single column to the RIGHT OF THE SELECTED COLUMN in the following way.
Follow the steps to insert the column to the right of the selected column.
- Select the column of whose RIGHT, you want to insert the column.
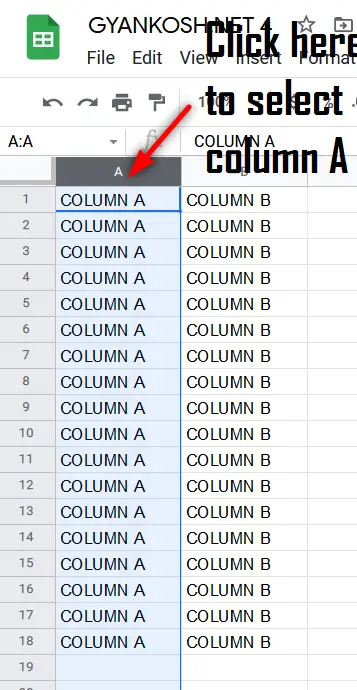
- For the example, let us suppose that we want to insert a new column to the right of the column A, that means, at the position B.
- The current situation is as shown in the picture below.

- The picture above shows the current positions of the columns.
- We need to insert a new column or create a new position in the RIGHT OF COLUMN A.
- Select column A by clicking on the column name as shown in the picture below.
- Right Click anywhere on the selection.
- The following options would appear.
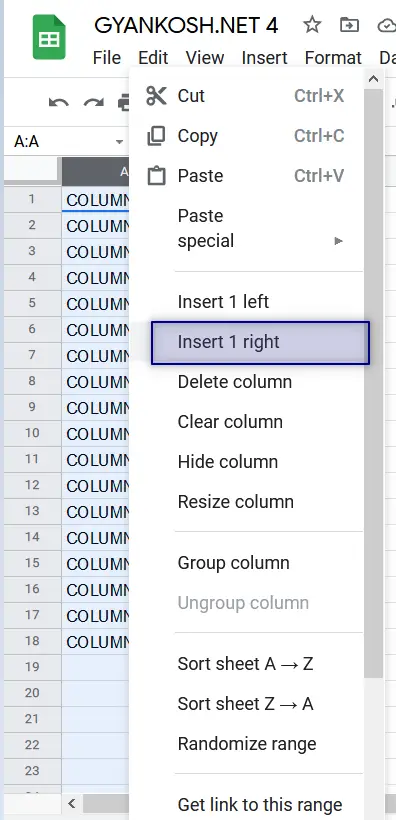
- Select INSERT 1 RIGHT. [ It may seem confusing sometimes but there are a few options being tried to be used in the layman language. Here, as we have selected a column, it means to INSERT 1 COLUMN TO THE RIGHT.
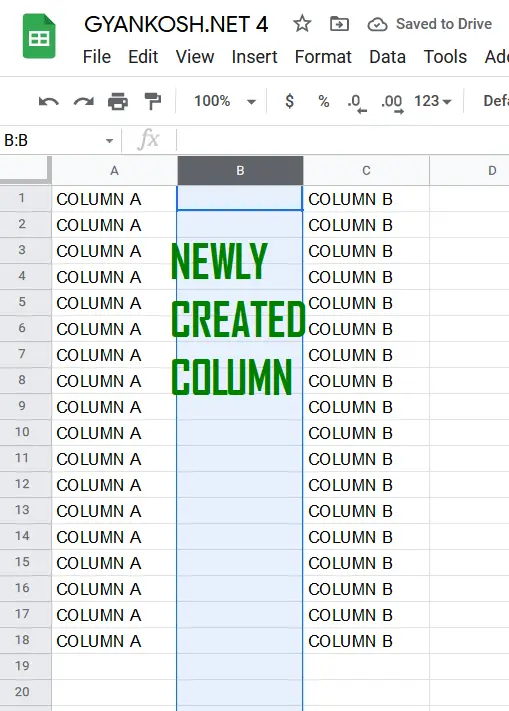
- A column to the RIGHT OF THE COLUMN A will be inserted as shown in the picture below.
SHORTCUT 1:
We can achieve the same result by simply RIGHT CLICKING the COLUMN NAME.
By right clicking, the column will be selected and the RIGHT CLICK option menu will open in a single step. Rest process is same as discussed above.
SHORTCUT 2:
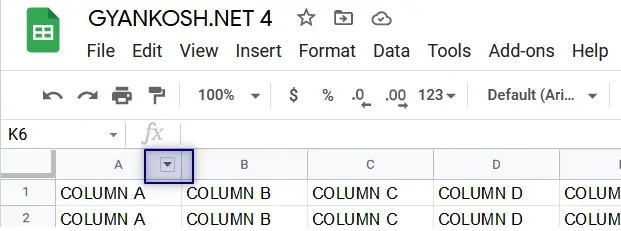
The columns are given a special button for the column options which can be used directly for options.
The following picture shows the button.

The column option button will appear when you hover the mouse on the column name.
Click the button and it’ll select the column and open the column options directly.
The rest of the process is same as elaborated above.
WAY 2: ADD ONE COLUMN TO THE LEFT IN GOOGLE SHEETS
Similar to the way discussed above, we have one more option to insert a single column which can be used the same way as the previous did.
The way is to add a single column to the left of any reference column.
For example, if we want to insert a column at position C, we’ll select the column D and then use the process discussed below and we’ll have a new column at place of C.
We can insert a single column to the LEFT OF THE SELECTED COLUMN in the following way.
Follow the steps to insert the column to the LEFT of the selected column.
- Select the column of whose LEFT, you want to insert the column.
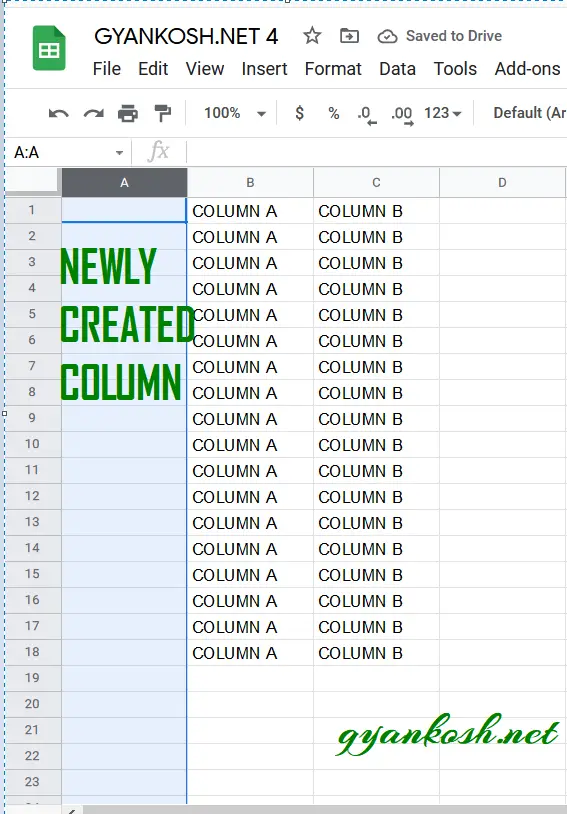
- For the example, let us suppose that we want to insert a new column to the LEFT of the column A, that means, at the position A and sliding the COLUMN A at position of COLUMN B.
- The current situation is as shown in the picture below.
- The picture above shows the current positions of the columns.
- We need to insert a new column or create a new position at LEFT OF COLUMN A.
- Select column A.

- Right Click anywhere on the selection.
- The following options would appear.
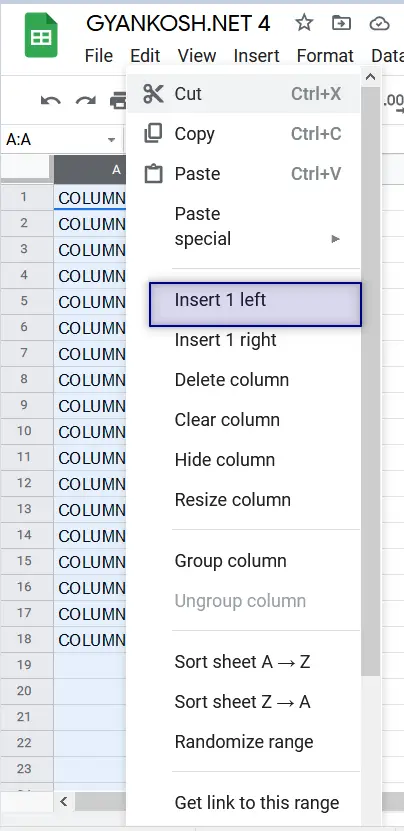
- Select INSERT 1 LEFT. [ It may seem confusing sometimes but there are a few options being tried to be used in the layman language. Here, as we have selected a column, it means to INSERT 1 COLUMN TO THE LEFT.
- A column to the LEFT OF THE COLUMN A will be inserted as shown in the picture below.
SHORTCUT 1:
We can achieve the same result by simply RIGHT CLICKING the COLUMN NAME.
By right clicking, the column will be selected and the RIGHT CLICK option menu will open in a single step. Rest process is same as discussed above.
SHORTCUT 2:
The columns are given a special button for the column options which can be used directly for options.
The following picture shows the button.
The column option button will appear when you hover the mouse on the column name.
Click the button and it’ll select the column and open the column options directly.
The rest of the process is same as elaborated above.
ADDING MULTIPLE COLUMNS IN GOOGLE SHEETS
If you want to add many columns or multiple columns at once, the following ways will be helpful.
We can insert multiple columns easily by taking a reference column and being careful about the left or right direction for insertion. Go through the ways and examples.
WAY 1 : ADD MULTIPLE COLUMNS TO THE RIGHT IN GOOGLE SHEETS
We just learnt to insert a single column in a specific position such as left of a certain column or right of a certain column in Google Sheets.
What if we want to insert multiple columns at an instant say 3 columns.
Well, that is possible too.
Let us first learn to insert three columns to the right of the selected column.
We can insert a multiple columns to the RIGHT OF THE SELECTED COLUMN in the following way.
Follow the steps to insert the multiple columns to the RIGHT of the selected column.
- Select the columns of whose RIGHT, you want to insert the column. [The selection procedure follows]
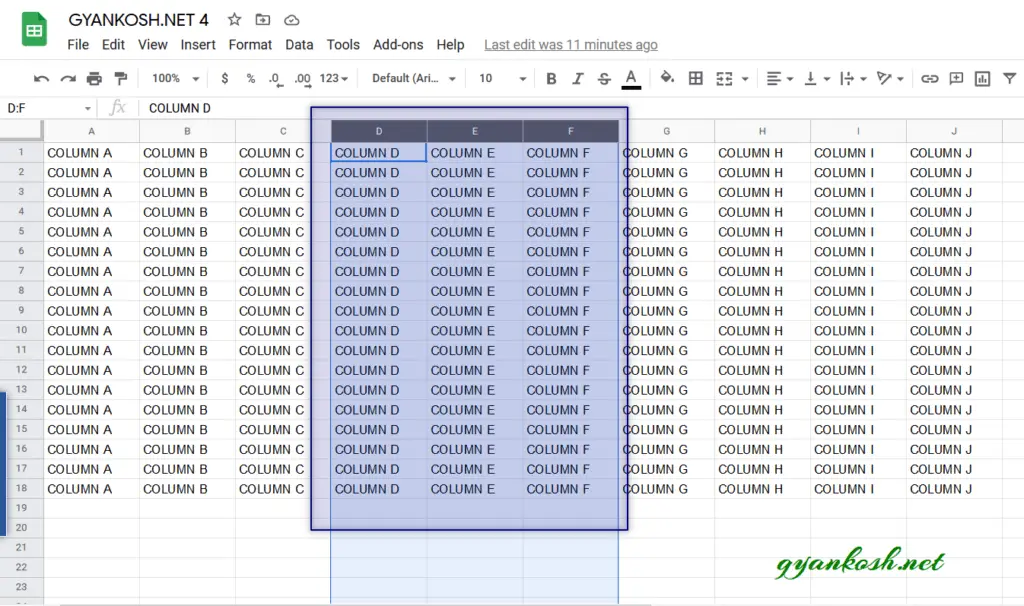
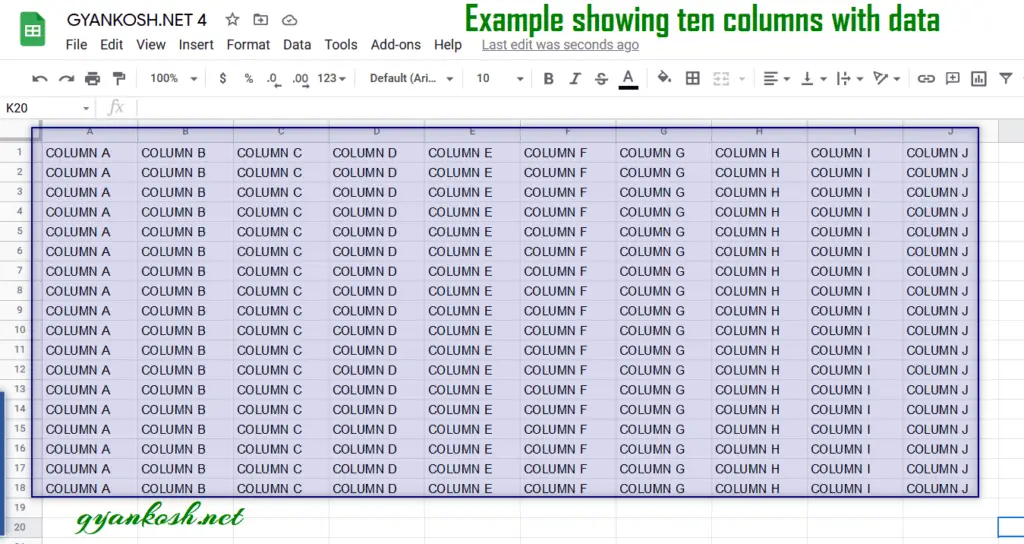
- For the example, let us suppose that we want to insert three columns to the right of COLUMN F, that means, at the position G, H & I.
- The current positions of the data is as shown in the picture below.

- The picture above shows the current positions of the columns.
- We need to insert new columns or create three new columns to RIGHT OF COLUMN F.
- Select three columns starting COLUMN F towards the left side. [ column F or the last selected column will act as a reference ].
THE NUMBER OF COLUMNS SELECTED SHOULD BE EQUAL TO THE NUMBER OF COLUMNS NEEDED TO BE INSERTED. IF WE WANT TO INSERT 4 COLUMNS, 4 COLUMNS WILL BE SELECTED IN WHICH THE LAST COLUMN WILL BE THE COLUMN , RIGHT OF WHO WE WANT TO INSERT THE COLUMNS.
- Right Click anywhere on the selection.
- The following options would appear.
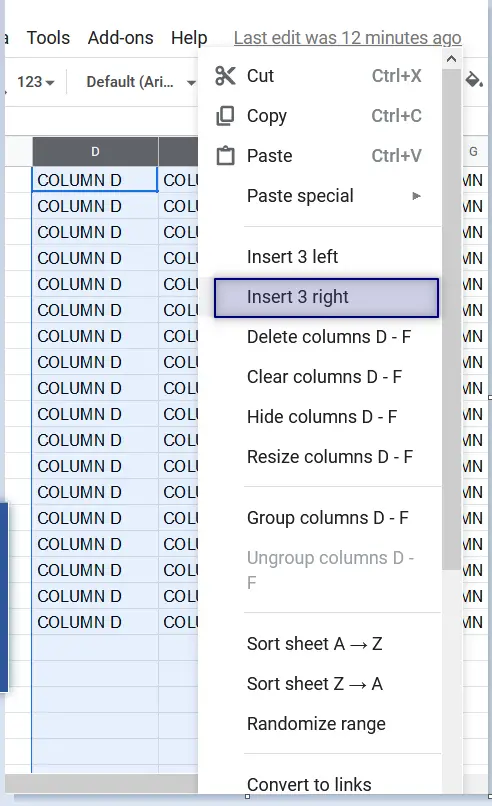
- Select INSERT 3 RIGHT. [ It may seem confusing sometimes but there are a few options being tried to be used in the layman language in google sheets . Here, as we have selected a column, it means to INSERT 3 COLUMNS TO THE RIGHT.
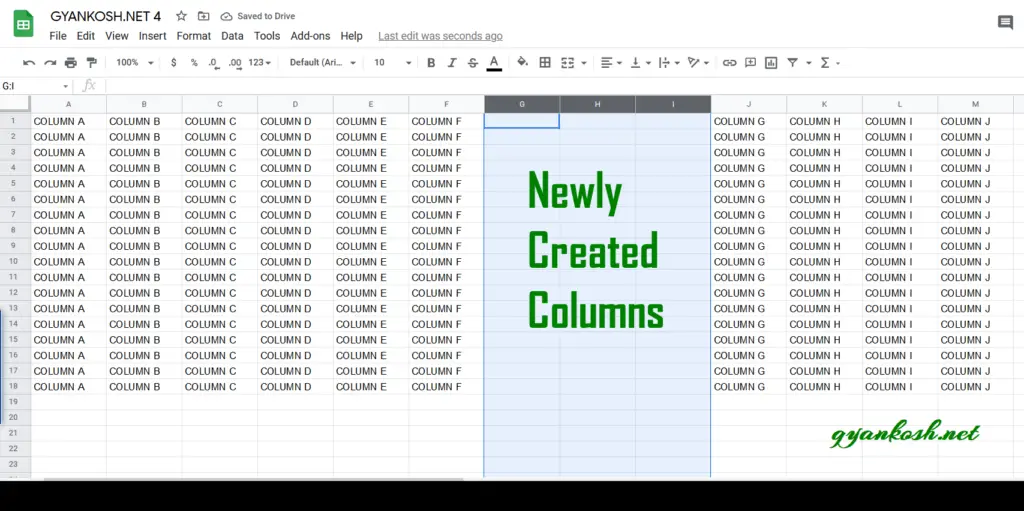
- THREE COLUMNS WILL BE INSERTED TO THE RIGHT OF THE COLUMN F , WHICH ACTED AS THE REFERENCE HERE. THE DATA IN THE COLUMN G WILL BE SHIFTED TO THE COLUMN J, WHICH IS THREE COLUMNS RIGHT. REST ALL DATA WILL SHIFT THREE COLUMNS TO THE RIGHT SO NO CHANGE WILL APPEAR IN THE DATA OR CALCULATIONS EXCEPT ABSOLUTE REFERENCED CELLS.
WAY 2: ADD MULTIPLE COLUMNS TO THE LEFT IN GOOGLE SHEETS
We have already learnt to insert multiple columns instantly when we need to add them to right of a reference column.
Let us now learn to insert the columns, if they need to be inserted to the left of a reference column .
We can insert a multiple columns to the LEFT OF THE SELECTED COLUMN in the following way.
Follow the steps to insert the column to the LEFT of the selected column.
- Select the columns of whose LEFT, you want to insert the column. [ The selection procedure follows ]
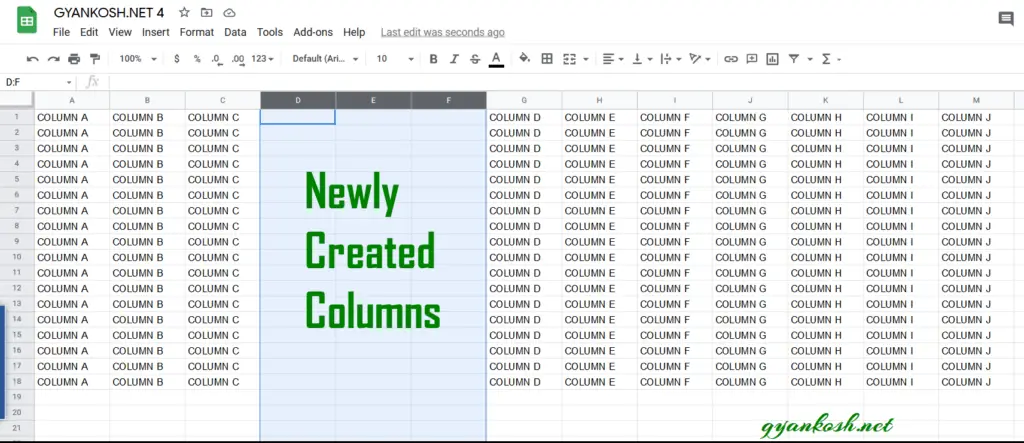
- For the example, let us suppose that we want to insert three columns to the left of COLUMN D, that means, at the position D and sliding the COLUMN D to COLUMN G.
- The current situation is as shown in the picture below.
- The picture above shows the current positions of the columns.
- We need to insert a new column or create three new columns to LEFT OF COLUMN D.
- Select three columns starting COLUMN D. [ column D or the selection starting column will act as a reference ].
THE NUMBER OF COLUMNS SELECTED SHOULD BE EQUAL TO THE NUMBER OF COLUMNS NEEDED TO BE INSERTED. IF WE WANT TO INSERT 4 COLUMNS, 4 COLUMNS WILL BE SELECTED IN WHICH THE FIRST COLUMN WILL BE THE COLUMN , LEFT OF WHO WE WANT TO INSERT THE COLUMNS.

- Right Click anywhere on the selection.
- The following options would appear.
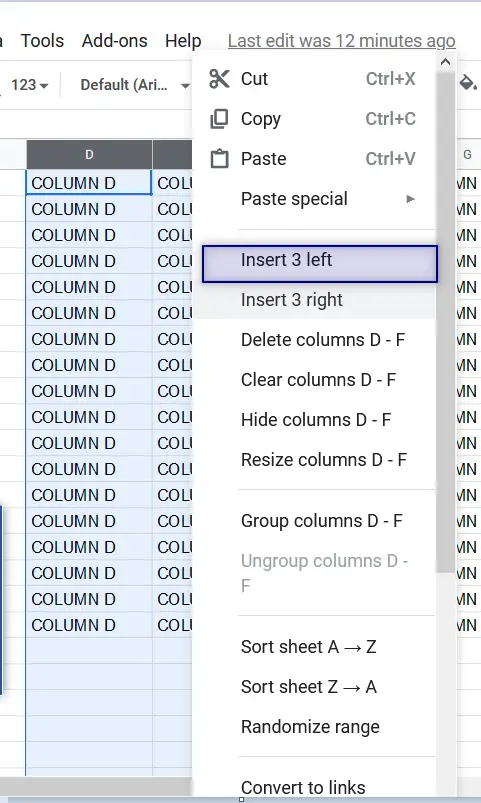
- Select INSERT 3 LEFT. [ It may seem confusing sometimes but there are a few options being tried to be used in the layman language. Here, as we have selected a column, it means to INSERT 3 COLUMNS TO THE LEFT.
- THREE COLUMNS WILL BE INSERTED TO THE LEFT OF THE COLUMN D , WHICH ACTED AS THE REFERENCE HERE. THE DATA IN THE COLUMN D WILL BE SHIFTED TO THE COLUMN G, WHICH IS THREE COLUMNS RIGHT. REST ALL DATA WILL SHIFT THREE COLUMNS TO THE RIGHT SO NO CHANGE WILL APPEAR IN THE DATA OR CALCULATIONS EXCEPT ABSOLUTE REFERENCED CELLS.
So these were the ways to insert a single or multiple columns in google sheets.
The insertion should always be confident so that we don’t mess up with our data.