INTRODUCTION
When we are printing the reports in Excel, there may arise a need to print some headings on all the printouts, so that the report can be tracked easily. In addition to the headings we might need to print page numbers, dates, some other details, author name or any information on the top portion or bottom portion of the report.
We can print any customized portion of the page repeatedly easily such as the top row of the report to repeat it over and again or we can put header and footer to be repeated on the print.
Header and Footer, themselves are present on all the pages, so they can be printed on all the pages easily.
In this article we’ll see separately , printing of different items on different parts of the page.
STEPS TO PRINT HEADER ON EACH PAGE IN EXCEL
Before learning , how to print header on each page, let us learn how to insert the header.HEADER IS A TEXT , WHICH IS PRESENT ON THE TOP OF EVERY PAGE OF THE SHEET.Let us first insert a header to our data.
STEP 1: INSERT THE HEADER
The button for printing titles is located under the
INSERT TAB> TEXT> HEADER & FOOTER
The location is shown below.
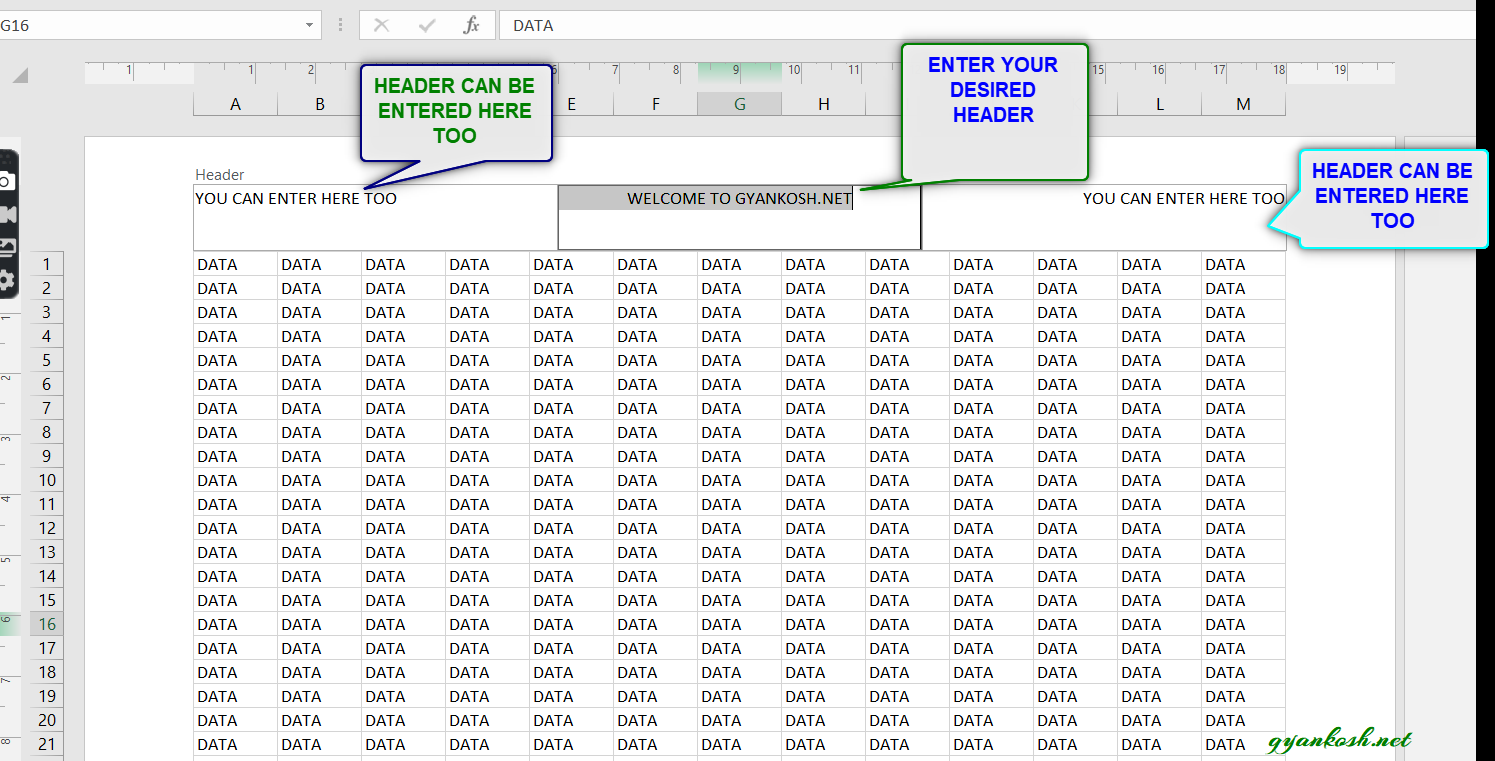
After clicking the HEADER AND FOOTER BUTTON, following screen will appear. The sheet will divide itself to different pages with THREE SPACES EDITABLE TO ADD HEADER IN THEM.We can enter any text which we want to repeat in all the pages as HEADER while printing.

STEP 2: ENTER THE HEADER TEXT
In the picture above, we can see THREE DEDICATED PLACES for HEADER TEXT.Enter the text in the headers.
STEP 3: PRINT PREVIEW
- Go to FILE MENU>PRINT OPTION.
- There are many other useful options but they are not needed in our case this time.
- Check PRINT PREVIEW.
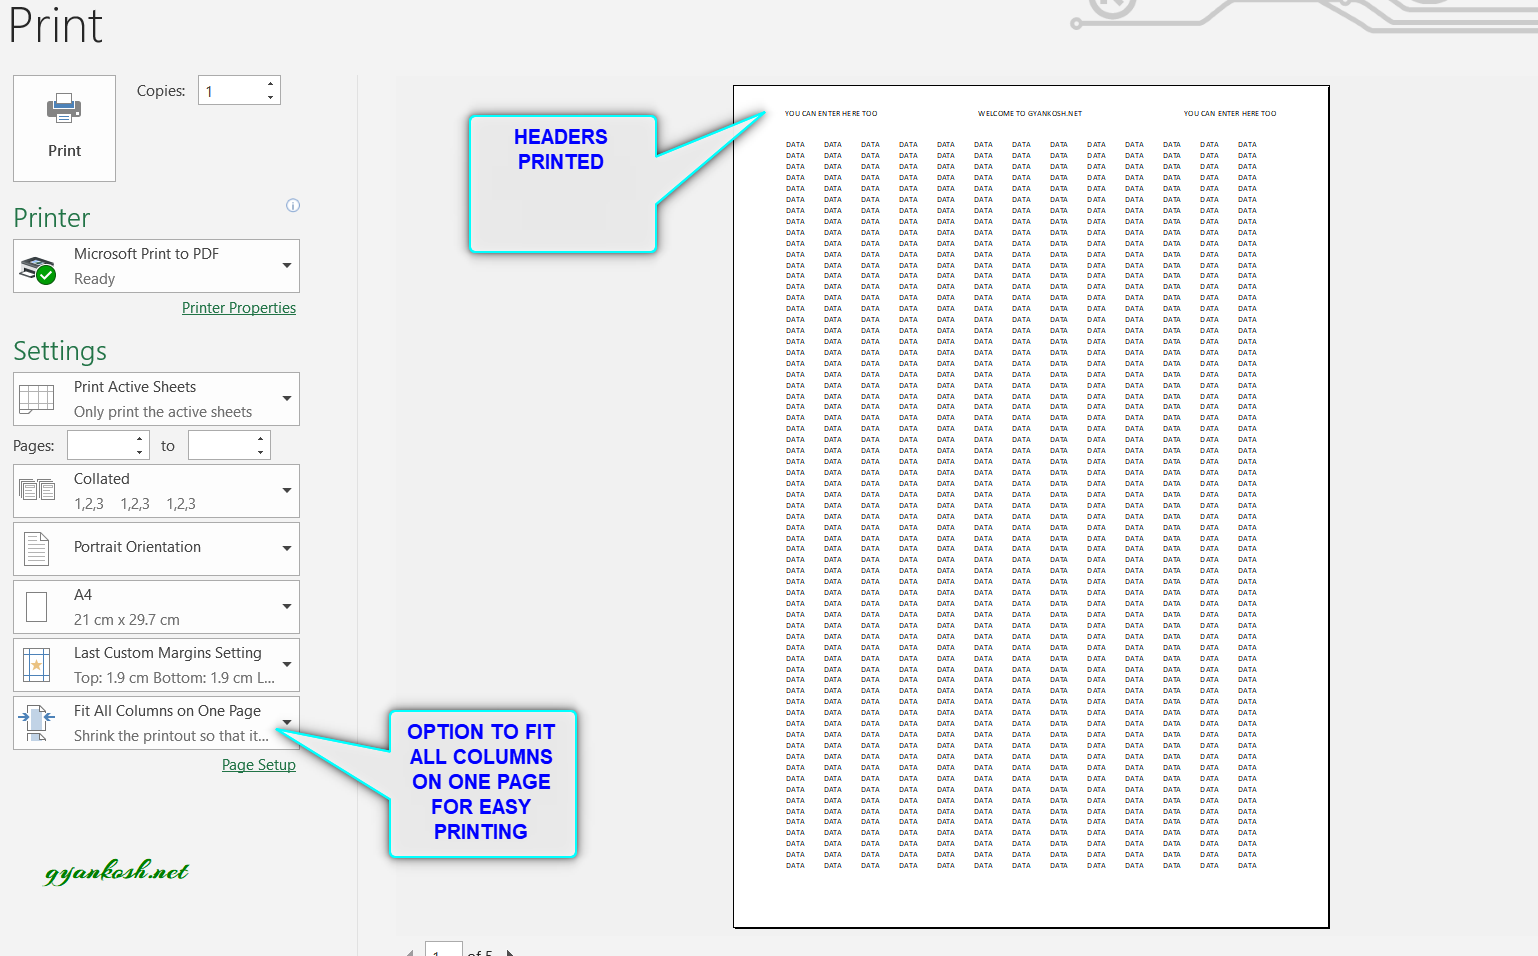
- The following screen will appear
STEP 4: OTHER SETTINGS AND PRINT
- If the preview is ok, Set the printer.
- Set the number of copies needed.
- Set other settings.
- Click PRINT.
The output print will contain all the pages with HEADER PRINTED


