Excel helps us in consolidating data very easily which ultimately results in better results with lesser effort and in lesser time.
Out of many difficult situations while creating reports using Excel, most challenging is merging two different reports and creating a final report. Merging of the reports poses many issues like formatting, matching, looking up, rotation of the data and so on.
Rotation of the data means when one of your reports has the horizontal information flow and the final sheet you are creating has the vertical data flow.
To solve this issue , you need to carry the data from the horizontal info sheet to vertical one by one or we may make use of some tools available in Excel and do this in second.
In this article , we’ll focus on the ways to convert row to column i.e. copy the data from the horizontal workflow and paste it in the vertical workflow with accuracy and less efforts.
WHAT IS A ROW AND A COLUMN?
A row is the horizontal group of cells whereas a column is the vertical group of cell in Excel. We have a grid of cells in Excel Sheet.
WHY CONVERSION OF ROW TO COLUMN IS NEEDED IN EXCEL?
We are discussing the ways to convert rows to columns but why this conversion is needed.
This conversion is very much important in few situations such as:
- When we are merging two different sheets and one sheet has horizontal information flow but the target sheet has vertical information flow.
- When we want to change the layout of the report.
- When we want to compare data of different sheets with different layouts.
and many other situations.
WAYS TO CONVERT ROWS TO COLUMN
Let us now discuss the ways to convert our row or rows to column or columns.
We have different tools or functions in Excel by use of which we can convert our row to column.
Convert row to column in Excel using PASTE SPECIAL option.
We can make use of this option by using it after copying the row which needs to be converted into a column.
For better understanding , let us take an example of the data which is present in the horizontal view [ A row ] and convert it into a column with the use of Paste Special option.
EXAMPLE:
The following report contains some random data and we need to convert this data from horizontal to vertical i.e. shift all rows to columns.
FOLLOW THE STEPS TO CONVERT THE ROW TO COLUMN
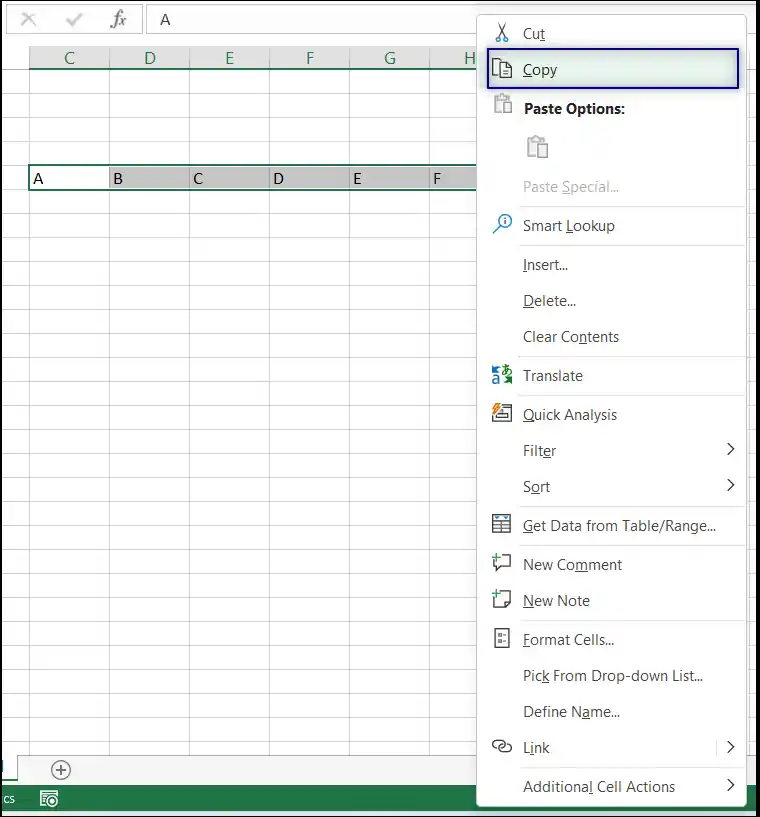
- Select all the data and press CTRL+C or RIGHT CLICK > COPY as shown in the picture below.

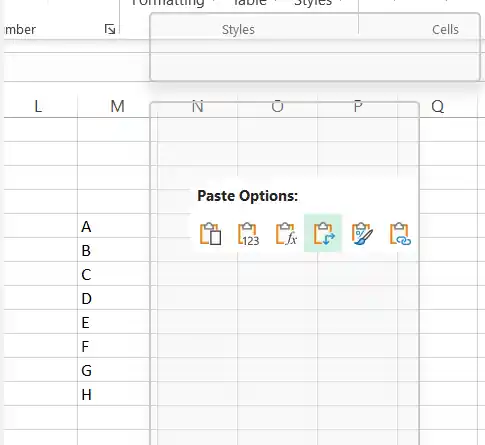
- Right Click the cell where you want the first cell data to be placed and choose PASTE SPECIAL.
- Choose Transpose as shown in the picture below.

- The data will be rotated i.e. all the rows will be converted to column.
- The result will look something like the shown below.

This was the simpler way to convert row to column in Excel.
2. USING TRANSPOSE FUNCTION
We can also do this with the help of Transpose Function.
Transpose , itself means to rotate the data i.e. convert any row into column or column into row.
We can make use of this particular function to simply convert row to column using simple steps.
Let us try this function on the same data as taken in the previous section.
FOLLOW THE STEPS TO CONVERT ROW TO COLUMN USING TRANSPOSE FUNCTION.
CLICK HERE TO LEARN TRANSPOSE FUNCTION IN EXCEL.
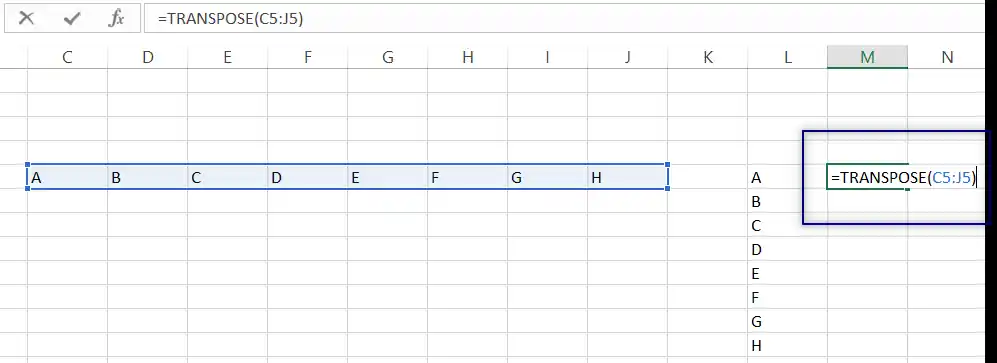
- Select the cell where you want the first cell of the result.
- Enter the function as =TRANSPOSE(FIRST CELL OF THE ROW, LAST CELL OF THE ROW).

- Press Enter ( If dynamic arrays are supported like in Excel 365 or later) or use CTRL+SHIFT+ENTER style. [ Visit Here to learn].
- The result will appear.

These were the ways to convert row to column in Excel which are very easy.
FAQs
CAN WE CONVERT MULTIPLE ROWS TO MULTIPLE COLUMNS IN EXCEL?
Yes.
The example shown above took one row for the conversion. For multiple row conversion, simply select all the rows and use the same steps.
All rows will be converted into columns.
Learn the descriptive process here. ROTATE A TABLE IN EXCEL
I CAN’T USE TRANSPOSE FUNCTION. IT DOESN’T SHOW ANY RESULTS.
Perhaps , dynamic arrays are not supported in your version.
Use CSE method. LEARN CSE METHOD HERE.
CSE method means to enter the formula and rather than simply pressing the ENTER key, holding CTRL and SHIFT key and then pressing ENTER key. Follow the mentioned link for details.