INTRODUCTION
After we have created a report in Excel by using the different formats, borders, functions, formulas etc. , the next step is to present the report.
Most of the time, the report is presented as a print of the report on a paper or sometimes as a pdf.
But taking a print in Excel is a bit tricky in comparison with other applications like Word , powerpoint etc.
The reason is the presence of a big continuous sheet which has no visible borders in Excel. In word, a page is properly defined just as a slide is clearly defined in powerpoint.
So, it is very important to be able to play with the spreadsheet in a way that we get the print of data as we want. This article specially deals with the options of printing a sheet on one page in few seconds.There are a few methods of doing this. We’ll discuss them in details.
DIFFERENT METHODS OF PRINTING A SHEET ON ONE PAGE
DIFFERENT METHODS TO FIT A DATA ON ONE PAGE FOR PRINTING
- USING THE SPECIFIC PRINT OPTION
- BY HIDING THE ROWS OR COLUMNS
- BY CUSTOM SCALING
USING THE PRINT OPTION AVAILABLE
The easiest way to print a sheet on a page is available in Excel now.
Follow the steps to print the sheet on one page.
- Select the data if you want to print only the selected part. If you want to print all the data, no need to select.
- Click FILE MENU.
- Go to PRINT option.
- Select the PRINTER, from which you want to have a print.
- Choose the orientation and paper size.
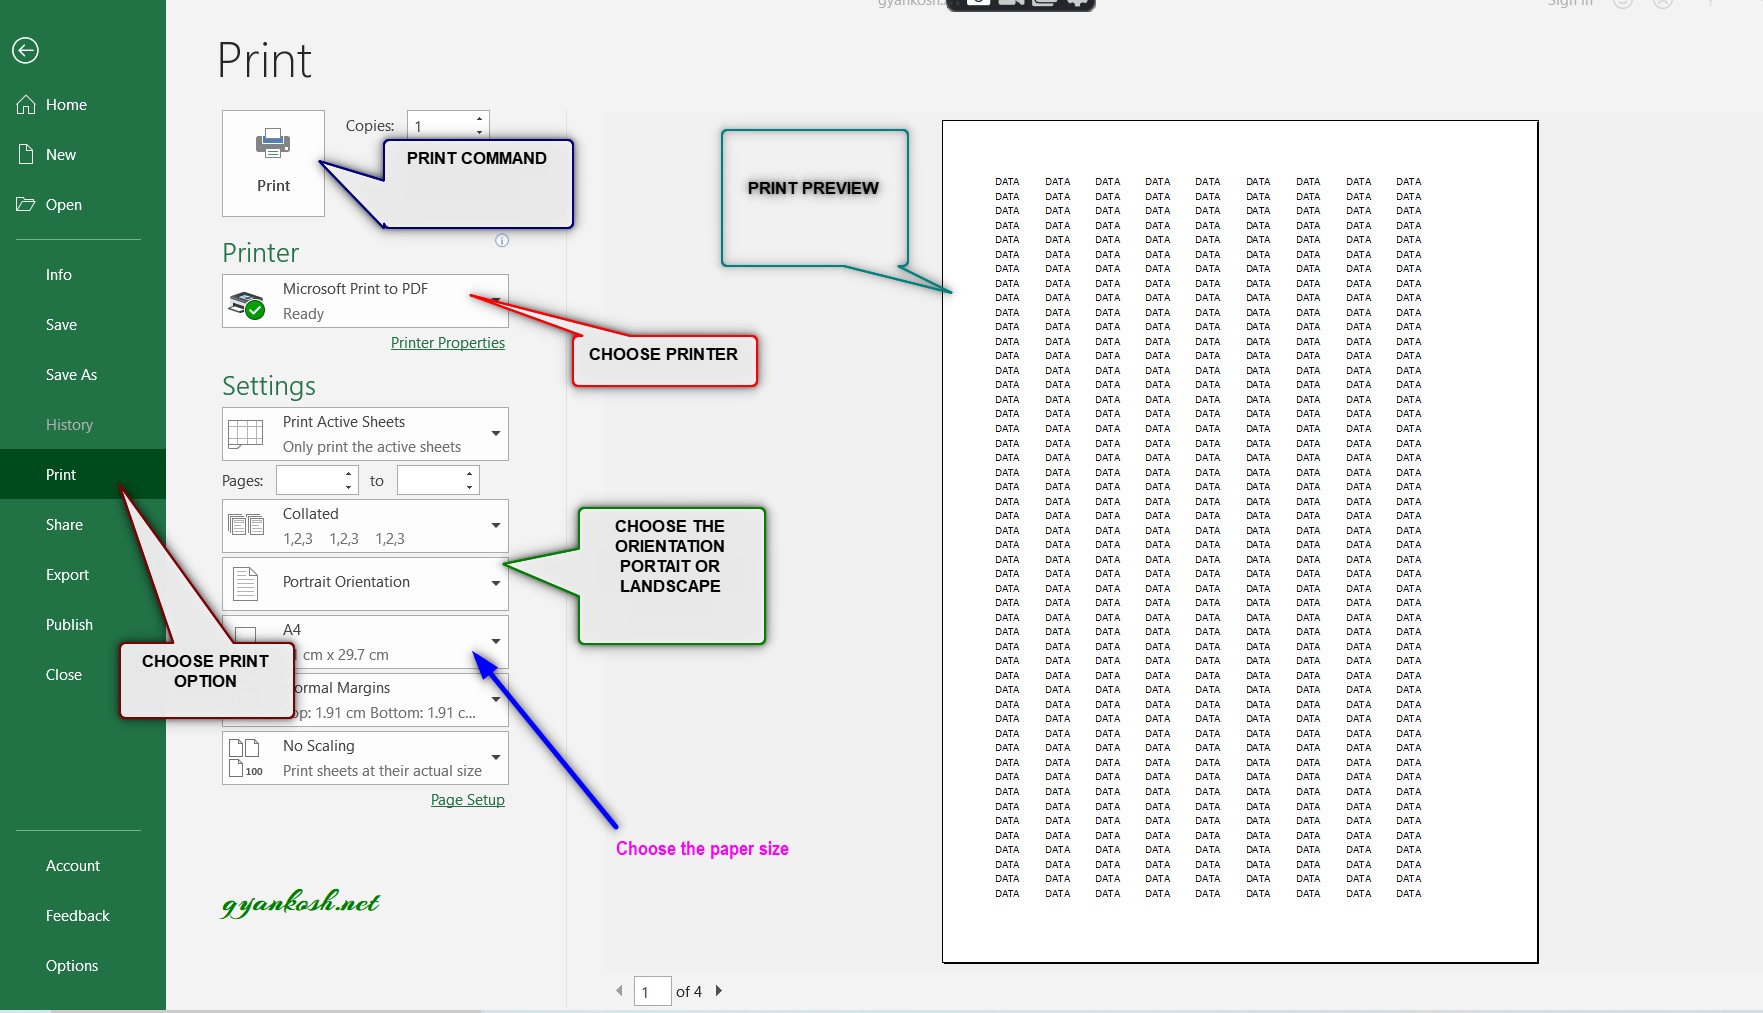
- Finally , the most important setting.
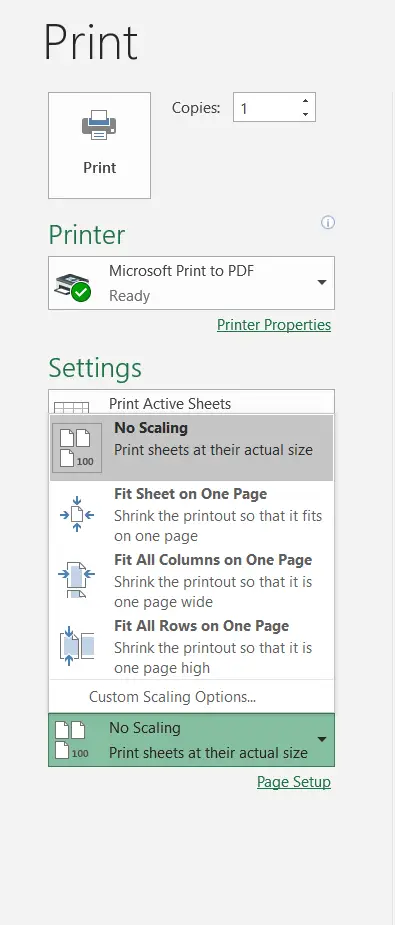
- Open the SCALING MENU as shown in the picture below and click on FIT SHEET ON ONE PAGE.
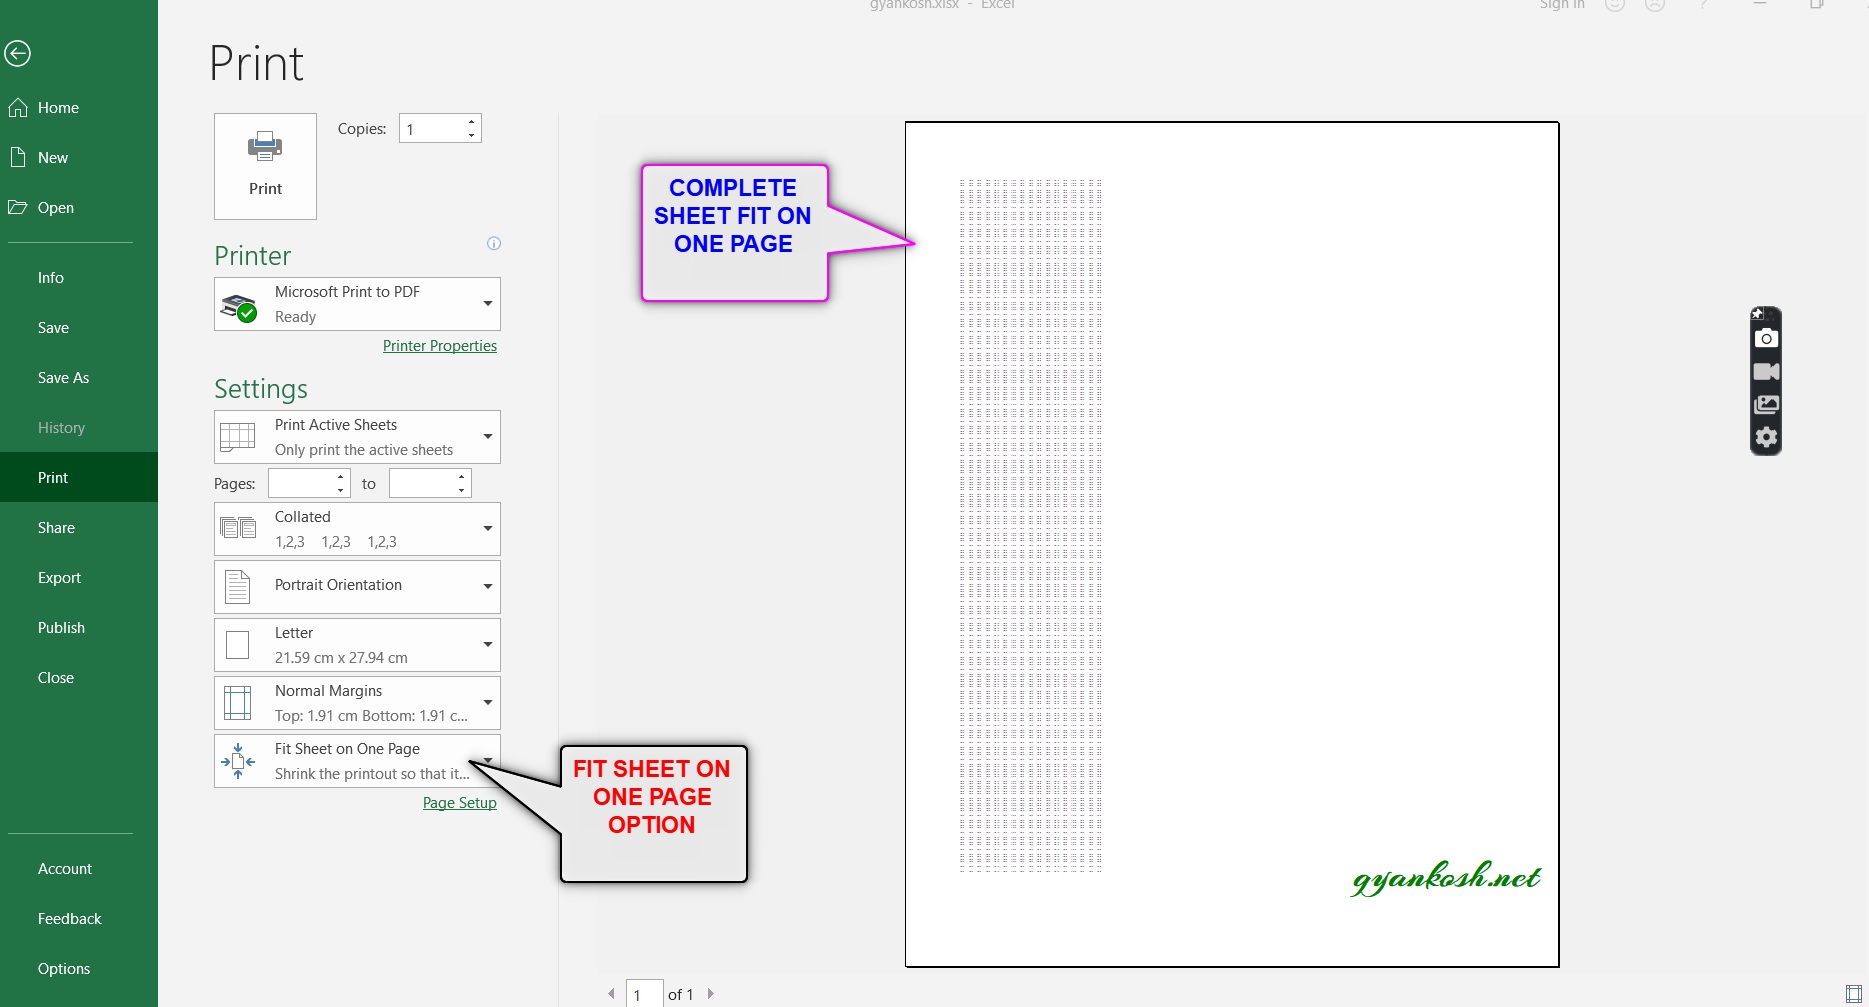
- Check the preview. Complete sheet will be accommodated on the same page.
- Check the preview. Complete sheet will be accommodated on the same page.
WHEN TO FIT SHEET ON ONE PAGE
Did you notice one thing??Look at the previous picture and check out the print preview. We opted for the option, FIT SHEET ON ONE PAGE and it did so, but the text has become so small that if we take out its print, the report is useless as nobody can read it. We never want so.Therefore, it becomes very important to understand when should we use this option.
ALWAYS USE THIS OPTION WHEN WE HAVE A SMALL REPORT WHICH WILL BE READABLE ON A PAGE IF PRINTED. IT’LL SAVE US A LOT OF TIME.
NEVER USE THIS OPTION IF WE HAVE A BIG SHEET.
There are better options for settling this issue.
PRINTING SHEET ON A PAGE BY HIDING ROWS OR COLUMNS
The next method, by the use of which we can print sheet on a page isBY HIDING THE “NOT USEFUL” ROWS AND COLUMNS.This is a manual process. Follow the steps to fit the sheet in one page
STEPS:
- Go to FILE MENU>PRINT.
- Check out if the complete data is able to get printed on a single page or not.
- Go back. Excel for our help will put a dotted line to show the printable area now.
- Check out the picture below.
- The data , on the left of the dotted line and above of the dotted line [ shown by a slim rectangle].
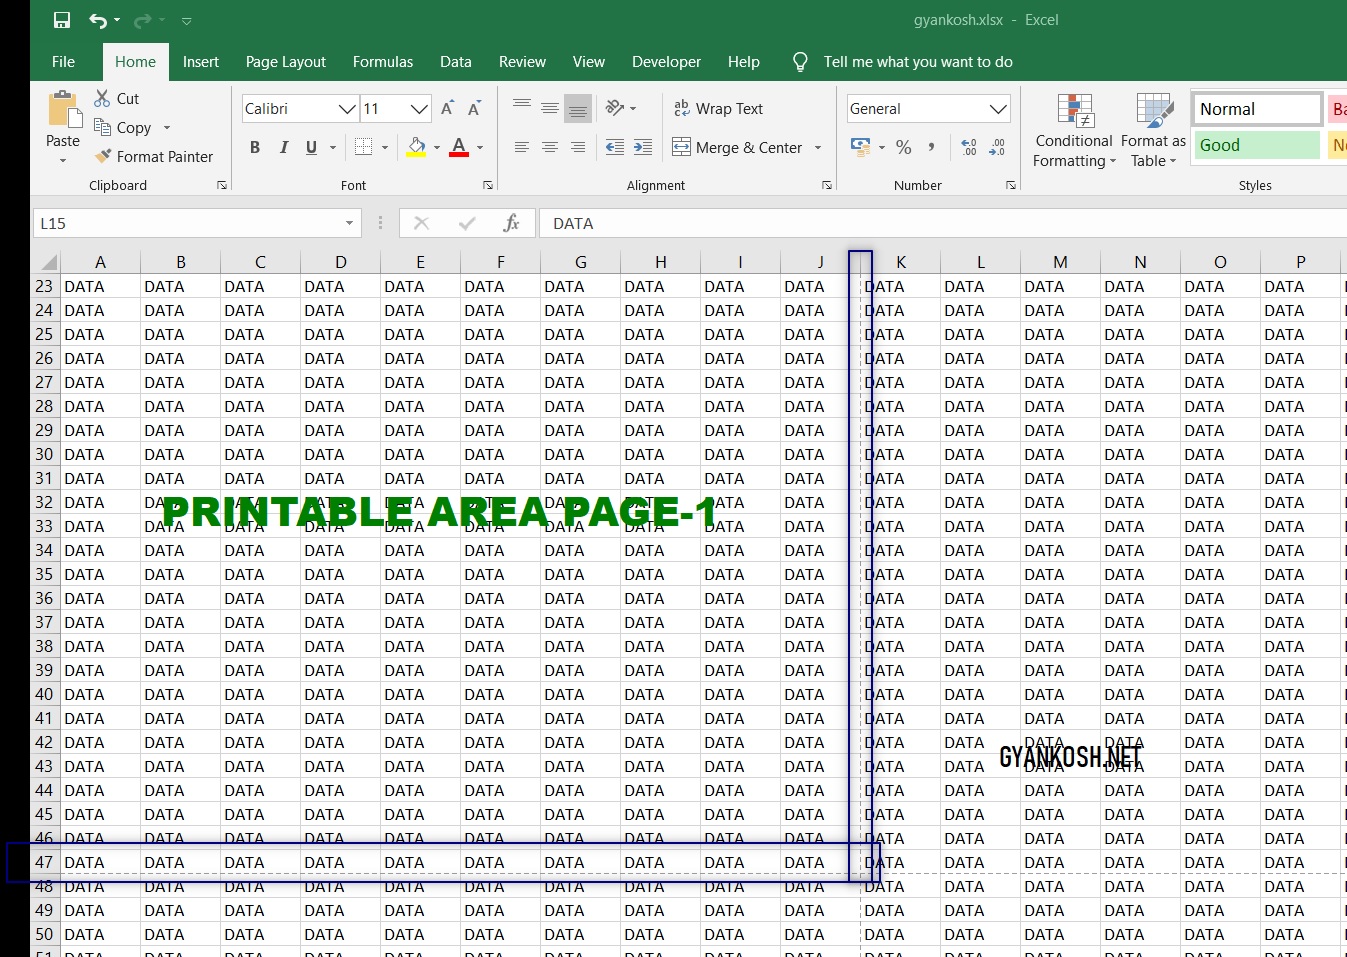
- Find out the rows and columns which are not necessary to be printed.
- We can hide the rows and columns which we don’t want to print.
PROCEDURE TO HIDE THE ROWS OR COLUMNS
- Select the row or column which we want to hide.
- Right Click and choose the option HIDE.
- The concerned rows or columns will be hidden.
- Now check if all the visible data is inside these dotted lines or not.
- Once, the data comes inside the dotted lines we can go to FILE>PRINT and click on PRINT BUTTON to print the sheet in one page.
PRINTING FULL SHEET ON ONE PAGE USING CUSTOM SCALING
DIFFERENT METHODS TO FIT A DATA ON ONE PAGE FOR PRINTING
- USING THE SPECIFIC PRINT OPTION
- BY HIDING THE ROWS OR COLUMNS
- USING CUSTOM SCALING AND SETTING THE MARGINS
We have already discussed two methods. Now let us discuss the option of CUSTOM SCALING to fit our sheet on one page.
FOLLOW THE STEPS
Even if we are unsuccessful in fitting the page and keeping it readable, we can go for our next step which is
CUSTOM SCALING AND SETTING THE MARGINS.
Custom Scaling lets us scale our sheet for the printing purpose, as we want.STEPS:
- Go to FILE MENU >PRINT
- Choose the other options such as orientation, printer, collation etc. as already discussed above.

- Now go to the SCALING OPTION and choose CUSTOM SCALING as shown in the picture below.
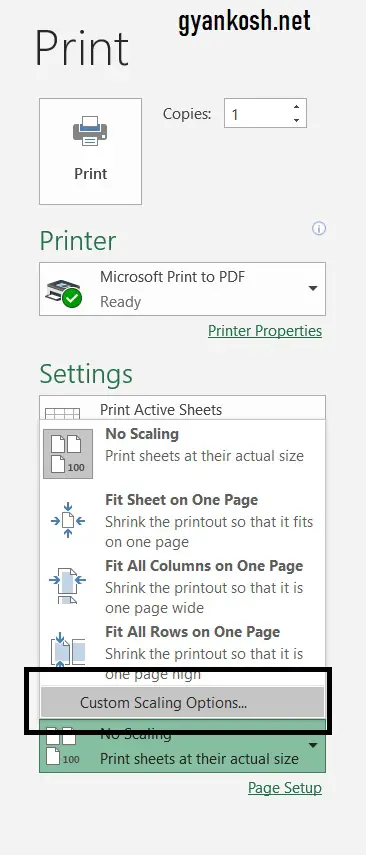
- Click the CUSTOM SCALING OPTIONS and following dialog box will open.
- Set the scaling value [ as the percentage] and click ok.
- Check the preview if it is as per requirement otherwise repeat the process again.
- After this process , we can set the page as per our requirement.
- Now, we can further increase a bit space for the printing by narrowing the margins.
- For that, click the MARGINS TAB as seen in the picture below. [Second Tab]
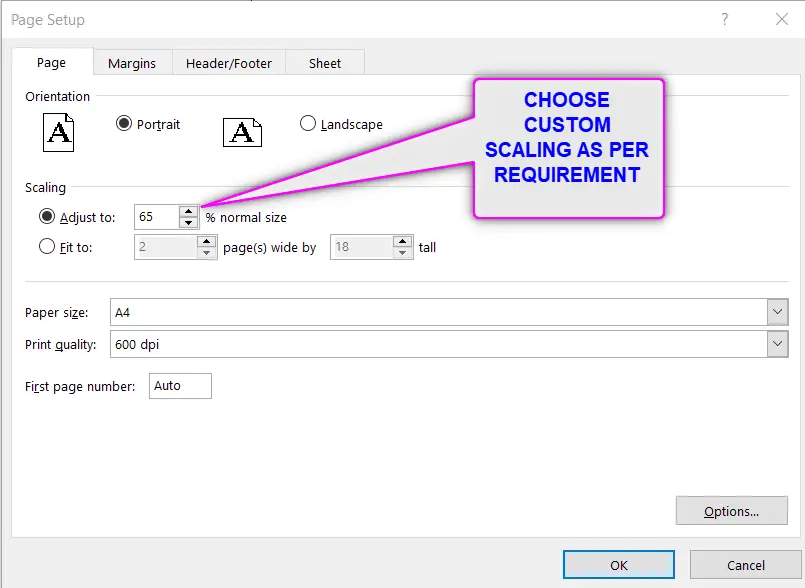
The MARGINS tab will open containing the options for declaring or setting the margins of top , bottom, left or right as per the requirement.
We can increase the printing size a bit and consequently the size of the font would increase so that the report is easy to read.
THESE WERE THE OPTIONS TO PRINT THE SHEET IN ONE PAGE BUT ALWAYS REMEMBER THAT AS WE COMPRESS THE DATA , THE FONT SIZE WILL GET SMALLER. ALWAYS TAKE CARE THAT AT LEAST THE REPORT IS READABLE EASILY. OTHERWISE INCREASE THE PAGES.