INTRODUCTION
After we have created a report in Excel by using the different formats, borders, functions, formulas etc. , the next step is to present the report. Most of the time, the report is presented as a print of the report on a paper or sometimes as a pdf. But taking a print in Excel is a bit tricky in comparison with other applications like Word , power point etc.
The reason is the presence of a big continuous sheet which has no visible borders in Excel. In word, a page is properly defined just as a slide is clearly defined in power point. So, it is very important to be able to play with the spreadsheet in a way that we get the print of data as we want. In this article, we’ll learn how to take a print of sheet in many different ways properly.
STANDARD PRINTING PROCEDURE IN EXCEL
Let us first understand the standard procedure for printing a sheet in Excel.
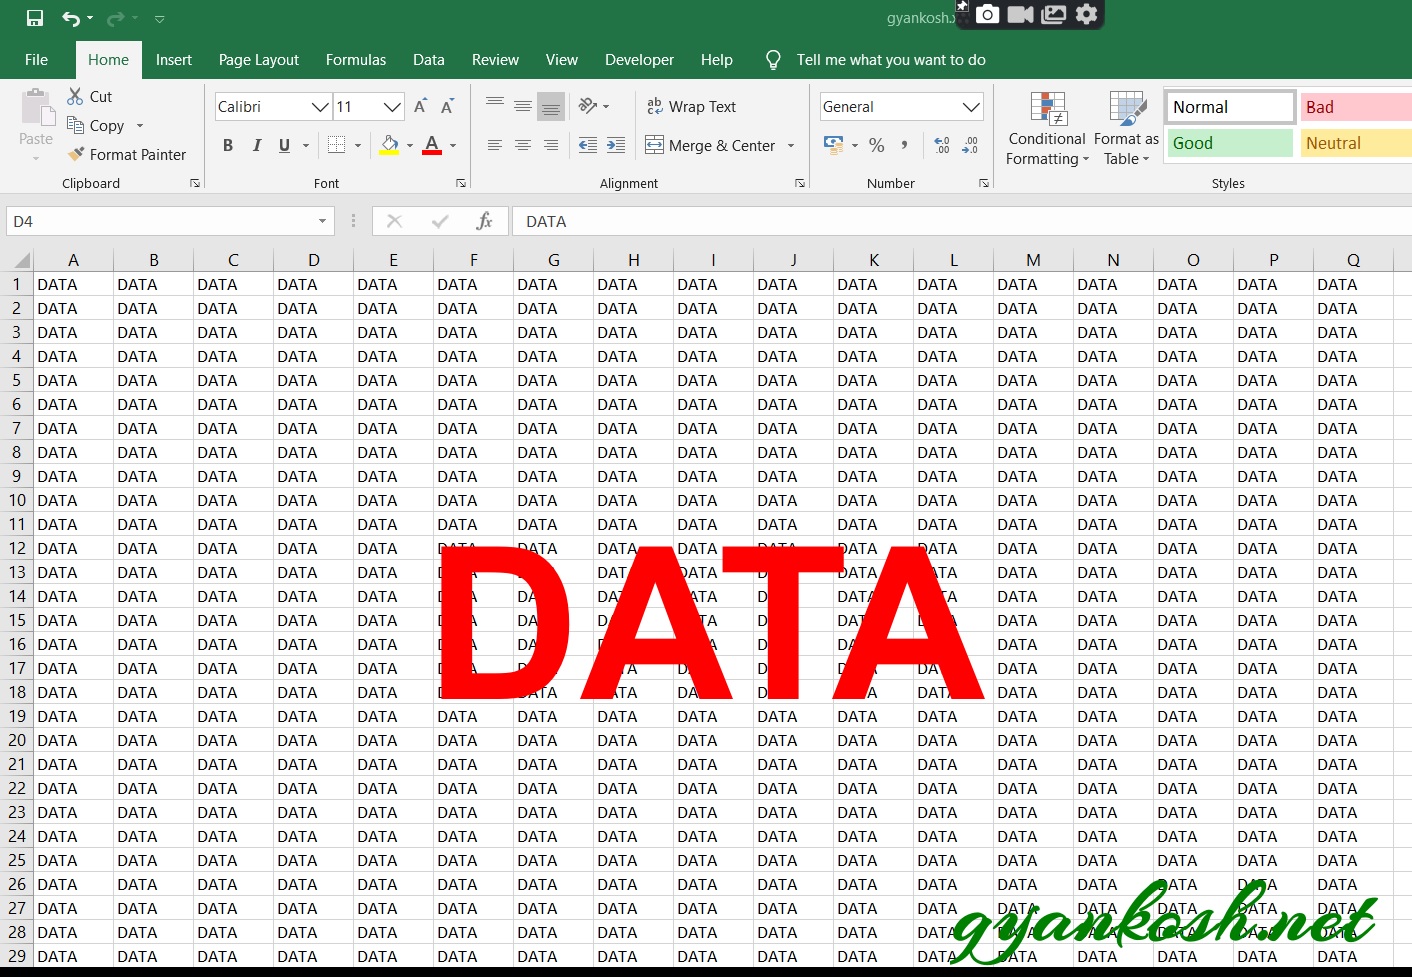
Here is the picture showing the data , which we ‘ll try to print normally.
STEPS TO PRINT A FILE IN EXCEL
Here are the steps to print the data in Excel.
STEPS:
- Go to FILE MENU.
- Choose PRINT OPTION.
- The following Picture will show the different options available in the print screen.
- DESCRIPTION FOLLOWS THE PICTURE BELOW.
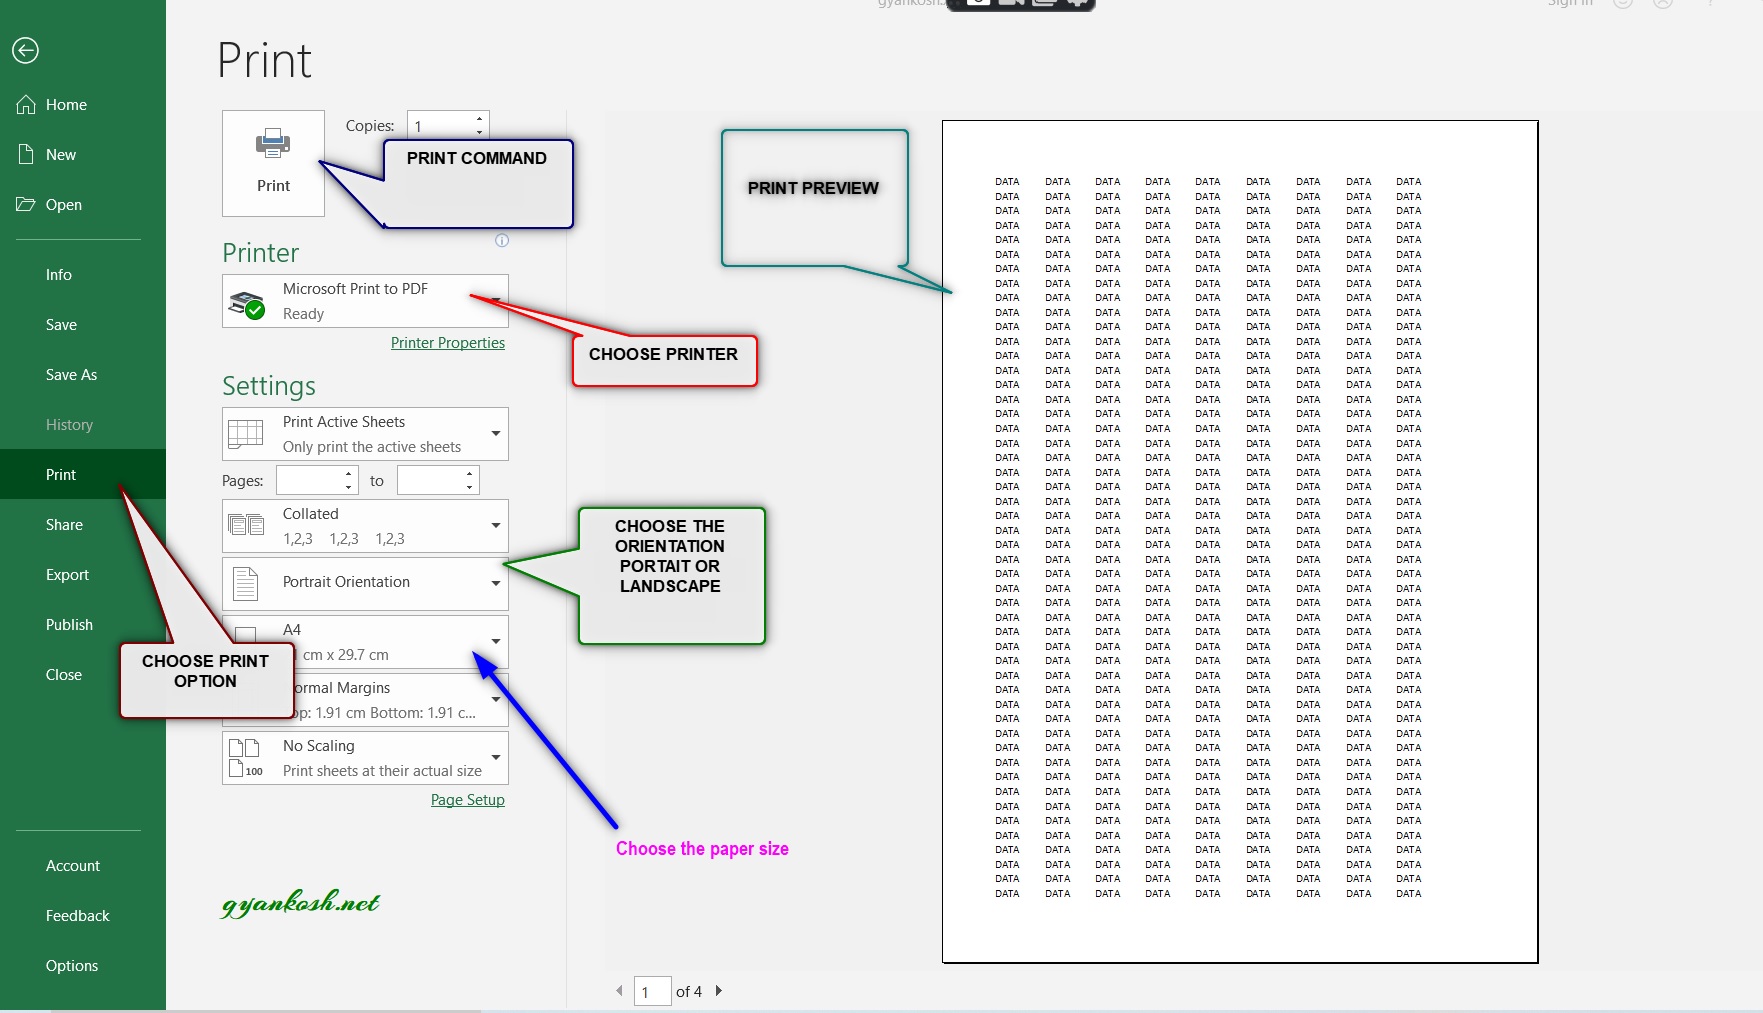
PRINT:The command to print. We’ll press it after all the settings are according to our need.PRINTER:Contains a complete list of installed PRINTERS in your pc. Choose the printer you want to print with.
SETTING FOR PRINTING
UNDER THE SETTINGS OPTIONS , FOLLOWING OPTIONS ARE FOUND.
REFERENCE PICTURE: BELOW.
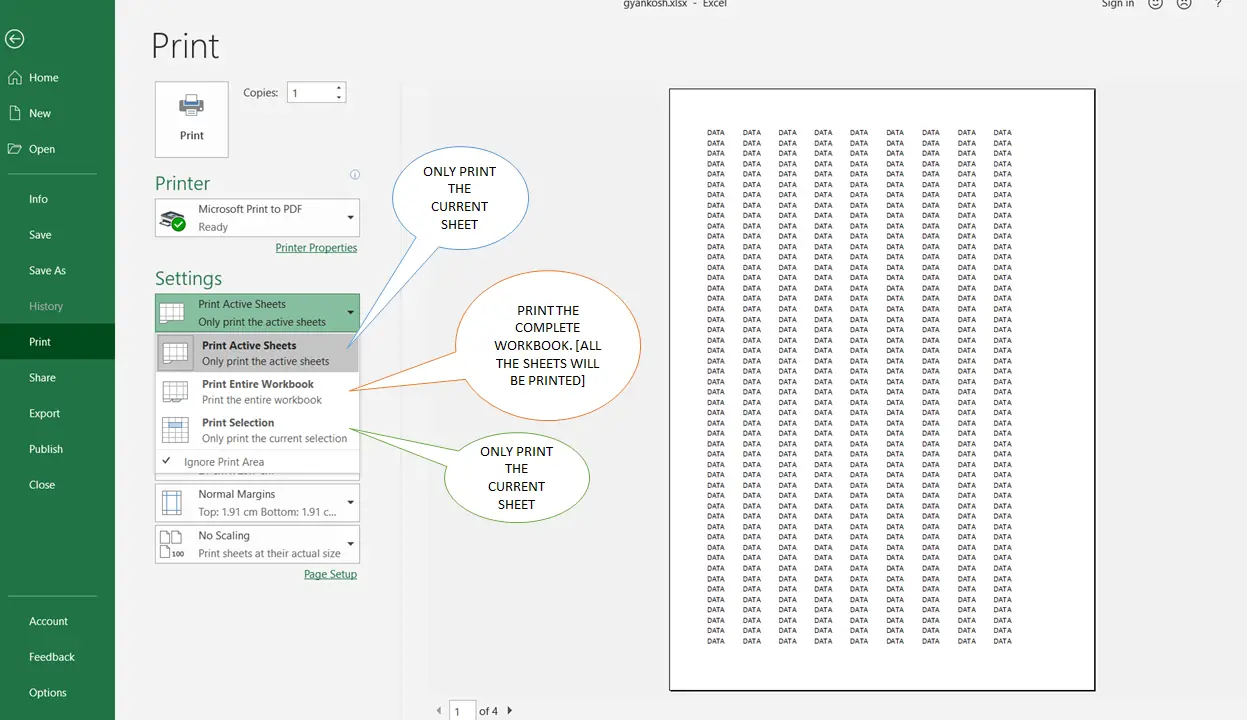
SETTING THE SELECTION:PRINT ACTIVE SHEETS:
Print only the active sheet. [ The sheet which was in focus when we started the printing process is the Active Sheet].
PRINT ENTIRE WORKBOOK:
Print all the sheets present in our workbook. Workbook is the excel files in which we create many excel sheets. Workbook has a collection of the sheets.This option will start printing all the data starting from the first sheet up to the last sheet.
PRINT SELECTION:
If we select a particular section of the sheet and then come for printing, we can choose this option and only the selected area of the sheet will be printed.
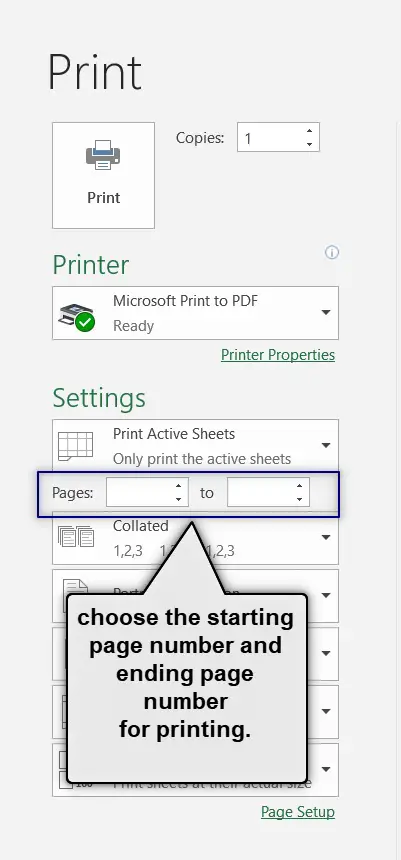
CHOOSE THE PAGE NUMBERS TO PRINT IN EXCEL
- REFER PICTURE BELOW.
- If we don’t want to print all the page, we can specify a range to be printed.
- Choose the starting page for printing in the field specified for PAGES ……… to ……….. the last page for printing.
- When we start printing a sheet in excel it creates them into pages. Now if we want to print only 3 ,4,5 pages then we would use this option and put the values 3 and 5 in the fields marked in the picture.
- Press print after that.
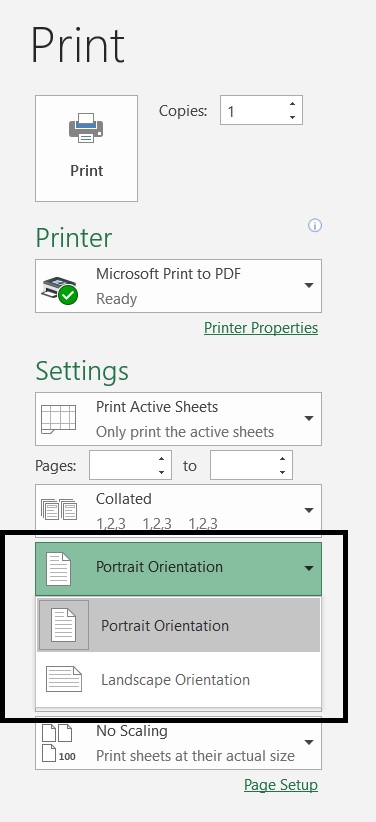
HOW TO CHOOSE THE ORIENTATION OF THE PRINT
- The print option list lets us to choose the printing orientation.
- There are two orientations mainly.
PORTRAIT: When the base is lesser than height of the print area, it is known as PORTRAIT.
To choose the print in the PORTRAIT orientation, choose portrait in the ORIENTATION OPTION as shown in the picture.
LANDSCAPE: When the base is wider than height of the print area, it is known as LANDSCAPE.
To choose the print in the LANDSCAPE orientation, choose portrait in the ORIENTATION OPTION as shown in the picture.
HOW TO CHOOSE THE SEQUENCE OF PRINTING PAGES IN EXCEL
Suppose, we have to print 3 pages and need to make 100 copies.It would be helpful for us to print 1,2,3 or 11…., 2,2….. or 3,3…. 100 times each.
If we need to make the sets, obviously 1,2,3 pattern is better for us or it can be the personal choice.
EXCEL provides us two options to choose the pattern of printing.
1. COLLATED: In this option the printing will be done as 1,2,3 1,2,3 and so on upto the number of copies.
2. UNCOLLATED: In this option, the printing will be done in the series 1,1,…. 2,2,….. and 3,3….. every repetition upto the number of copies.

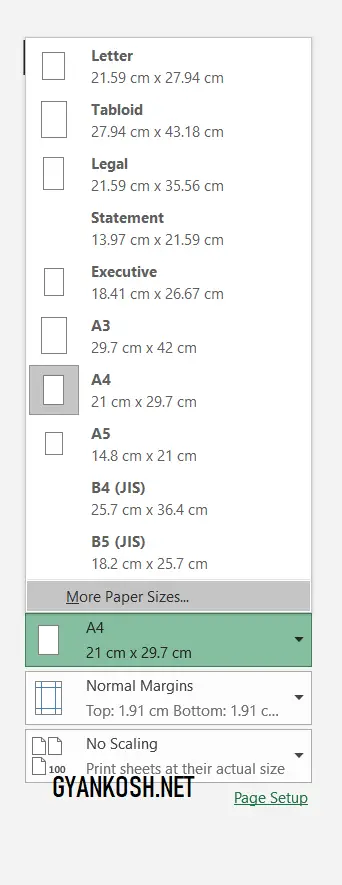
CHOOSING THE PAPER SIZE
There are standards of the pages accepted worldwide. Printers also follow these standards. Printer always needs to know which page is being fed through the paper tray. If the paper setting is wrong, it can create problems while printing.
Although sometime these settings are overridden by the printer setting [ it senses from the paper tray] but even then its better to keep the setting correct.
CHOOSE THE CORRECT PAPER SIZE WHICH IS BEING FED INTO THE PRINTER.
A TABLE FOR SIZE REFERENCE IS GIVEN HERE.
The international standards of paper sizes THE STANDARD PAGE WE USE IS A4.
| Format | Width × Height (mm) | Width × Height (in) |
|---|---|---|
| A0 | 841 × 1189 mm | 33.1 × 46.8 in |
| A1 | 594 × 841 mm | 23.4 × 33.1 in |
| A2 | 420 × 594 mm | 16.5 × 23.4 in |
| A3 | 297 × 420 mm | 11.7 × 16.5 in |
| A4 | 210 × 297 mm | 8.3 × 11.7 in |
| A5 | 148 × 210 mm | 5.8 × 8.3 in |
| A6 | 105 × 148 mm | 4.1 × 5.8 in |
| A7 | 74 × 105 mm | 2.9 × 4.1 in |
| A8 | 52 × 74 mm | 2 × 2.9 in |
| A9 | 37 × 52 mm | 1.5 × 2 in |
| A10 | 26 × 37 mm | 1 × 1.5 in |
| A11 | 18 × 26 mm | 0.7 × 1 in |
| A12 | 13 × 18 mm | 0.5 × 0.7 in |
| A13 | 9 × 13 mm | 0.4 × 0.5 in |
| 2A0 | 1189 × 1682 mm | 46.8 × 66.2 in |
| 4A0 | 1682 × 2378 mm | 66.2 × 93.6 in |
| A0+ | 914 × 1292 mm | 36 × 50.9 in |
| A1+ | 609 × 914 mm | 24 × 36 in |
| A3+ | 329 × 483 mm | 13 × 19 in |
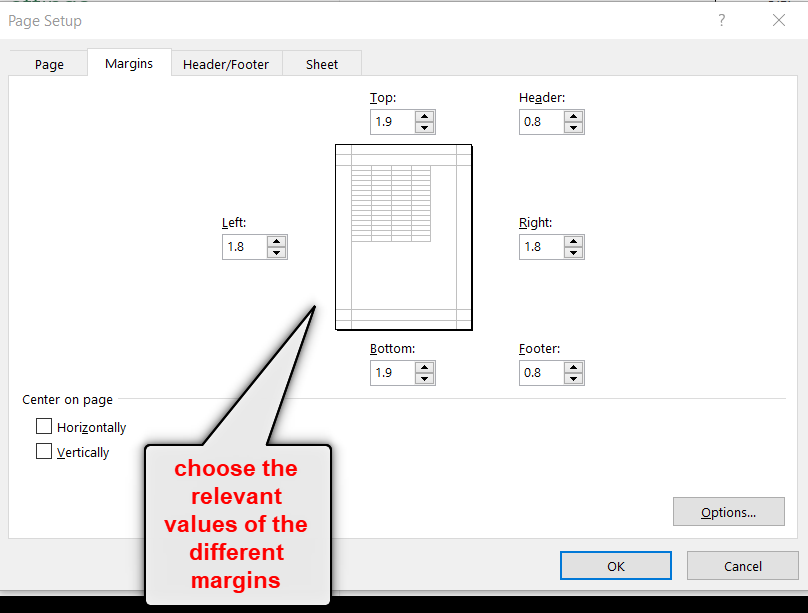
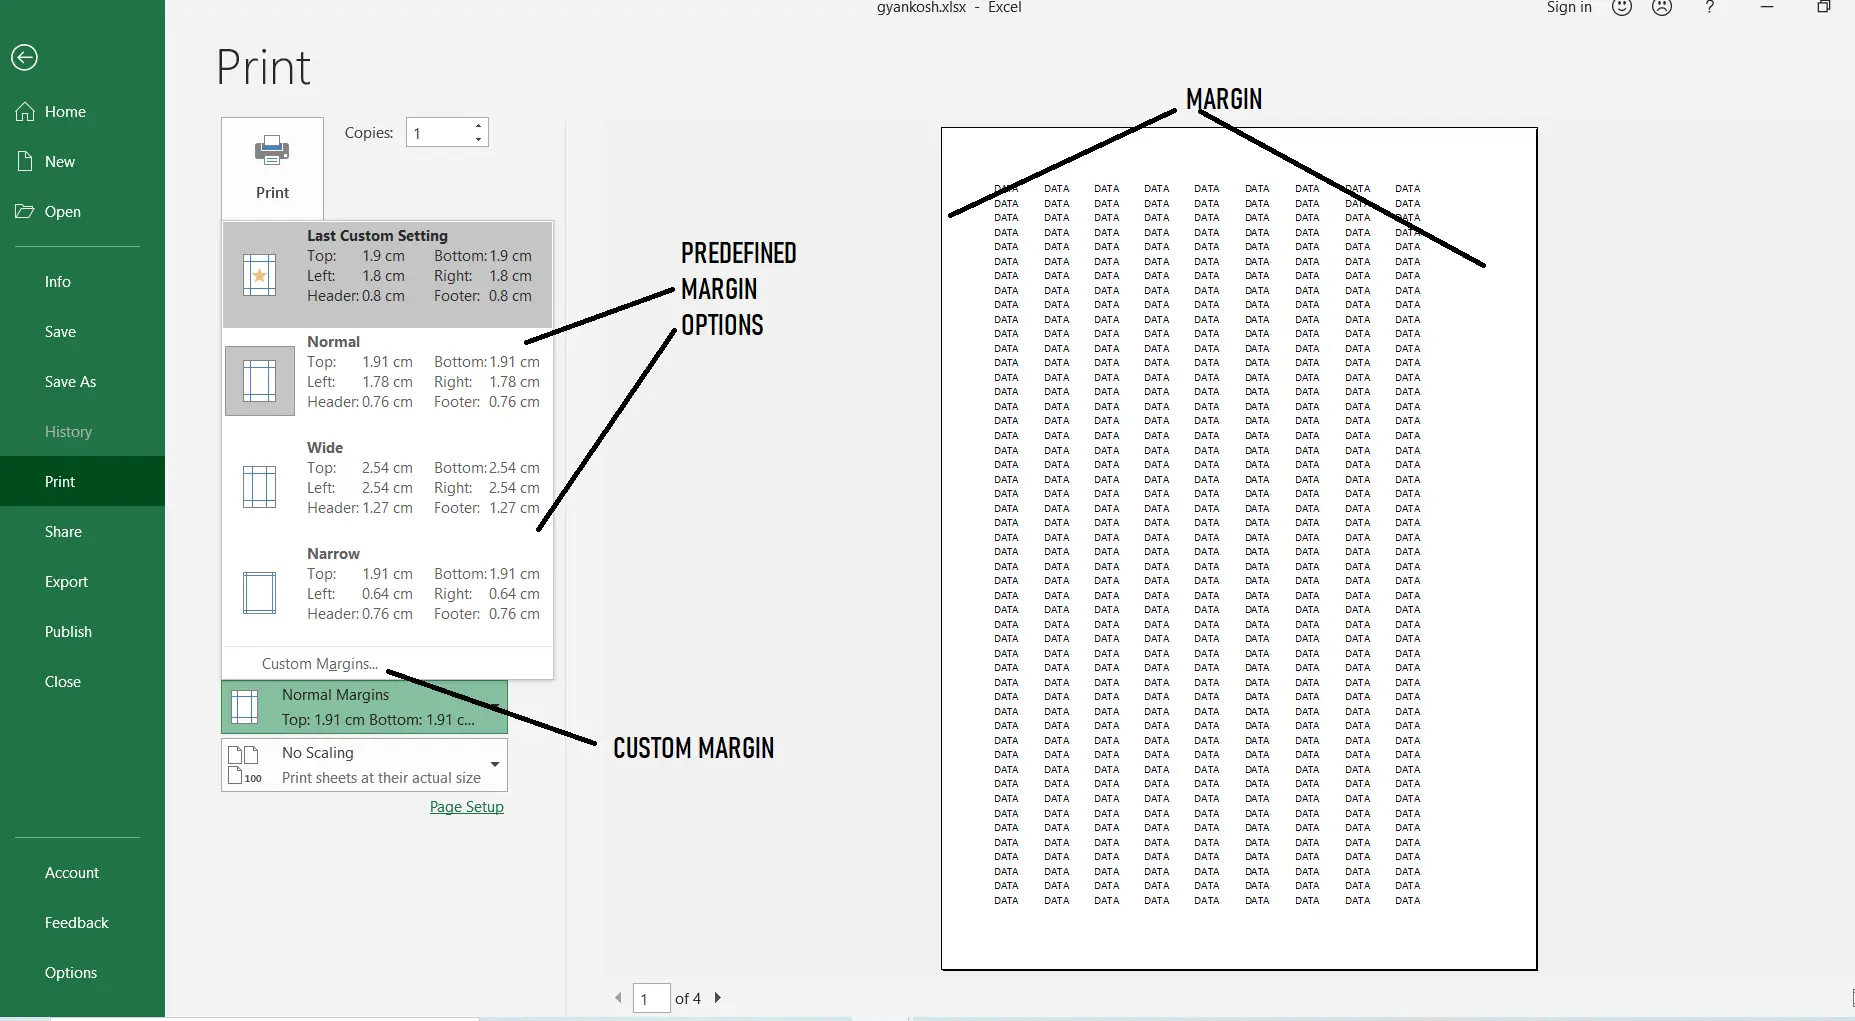
HOW TO SET THE MARGINS IN PAGE TO BE PRINTED
Margins are the spaces between the edge of the paper / page to the text printed.The margins can be set in all the four directions.Excel provides few preset options for fast settings of margins. If we are not satisfied with these settings we can go for CUSTOM MARGIN.STEPS:
- Click FILE MENU.
- Click PRINT.
- Go to MARGIN OPTION as shown in the picture below and choose any preset margins.
- As we choose, the preview will show the effect.
- If not satisfied, click custom margin.
HOW TO SET CUSTOM MARGINS IN PAGE TO BE PRINTED
If we want to set our margins ourselves, we can choose the custom margin option. The option dialog box is shown below.There are the different fields to set the different margins .Just enter the values and see the effect on the sample.After setting the values, click ok.